Walkthroughs
- by Kalah
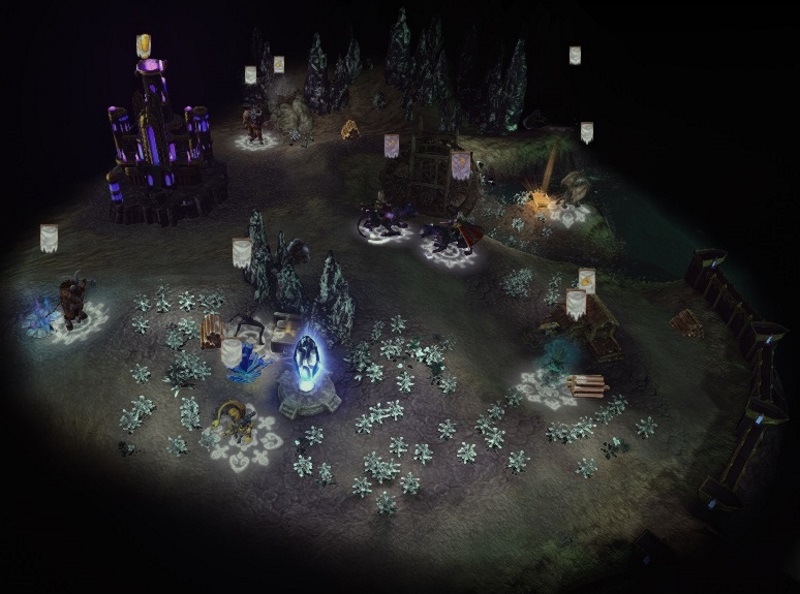
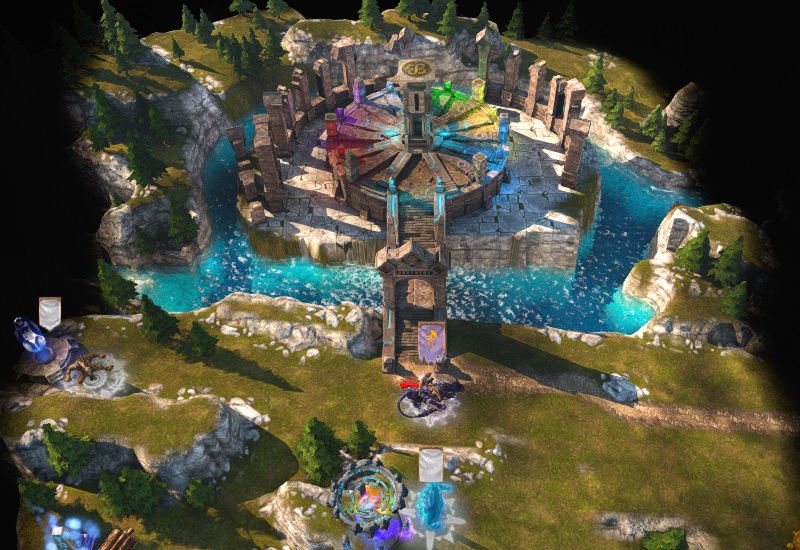
You begin in an area with so much stuff lying around that I suggest you take a minute to look it over, before deciding where to go first. There are free armies who will join you, so perhaps seek them out first? There are also several dwellings and boosters. Then there are people around for you to talk to; start by the town and then you can find Lasir to the northeast and Jorgen to the northwest.
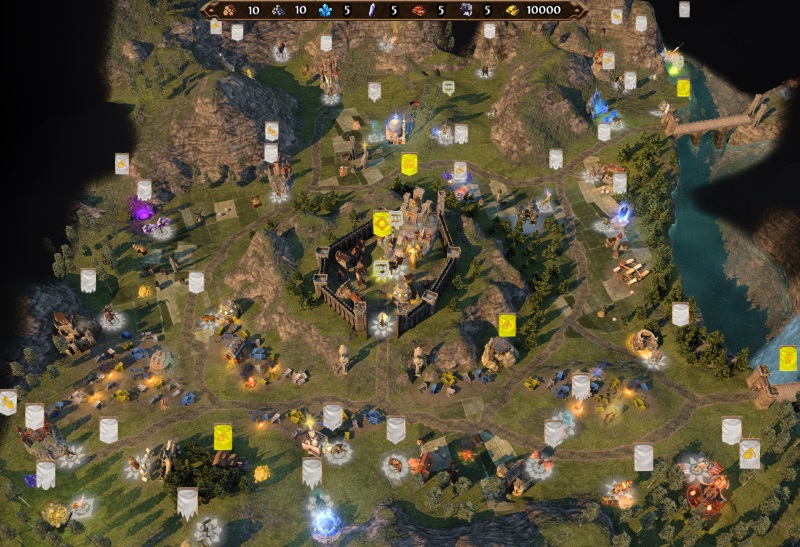
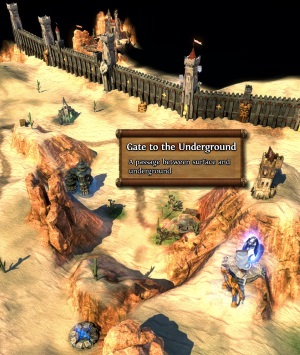
After talking to Jorgen, move underneath the structure you saw in the cutscene and head into the Underground. Don't cross the bridge, though, come back up when the river quest is done. There is also an obelisk to the north of your town. Anastasya is near, and she will join your cause. She should move to the mass grave just north of her position, and click it twice to get free creatures of the death persuation. After this, all you have to do is send her around fighting easy stacks of neutrals, and her army grows (as long as you don't lose too many).
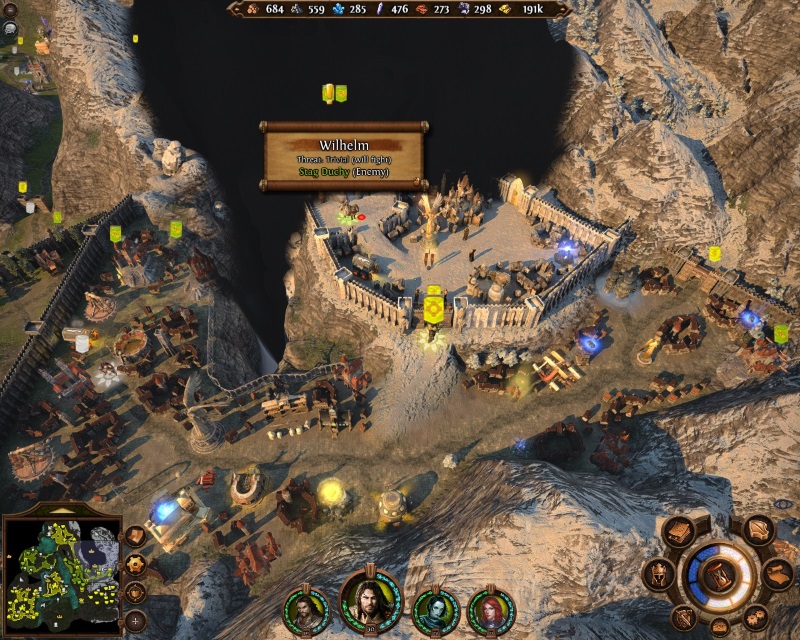
Once you got your bearings and started clearing out the area, it's time to have a look at the quests. The main quest is to take the city of Horncrest and defeat Wilhelm there. A couple of turns into the map, a new hero (Andras) joins you, and his mission is basically to flag the 10 mines in the southeastern part of the map. The challenge here is troop conservation, as his armies do not grow like Anastasya's; nor can you get reinforcements from towns. If you waste troops, you won't be able to kill all the neutrals guarding the mines. It's hard, but Andras has lots of defence and pretty good in-combat warcries that you can use to their full potential. The centaurs in particular kick so much butt. I made a bold call and went for one of the hardest battles first - against the hero Cailean, because of the items he is guarding. Those really help. Another trick is the Altar of Arkath nearby; it opens a seal so that you can find creatures willing to join you. After the 10 mines have been flagged, move through the once-sealed passages to fire the catapults. You can take your time with this. Once he's done with that, have him move to the southern area (go west and then around the mountain), to find a big stack of neutrals who will join him. He can use that to punch through the garrison to the west when all the seals are open. Then he can move in on the enemy territories from the south. (Basically, he's so strong that you can use Andras to fight Wilhelm at this point, possibly even win the map, so if you're in a hurry to finish, I guess you can try just attacking Wilhelm with him).
In the area to the southeast of your first town, there is another mass grave for Anastasya, and several other boosters and things. Use her to clean up there. The Altar of Elrath is also there, just north of the bridge. Visiting that enables you to pick up several free dragons for your army - one stack north of the northern bridge and one down in the southeastern section. It also allows Andras to punch through the garrison I mentioned.
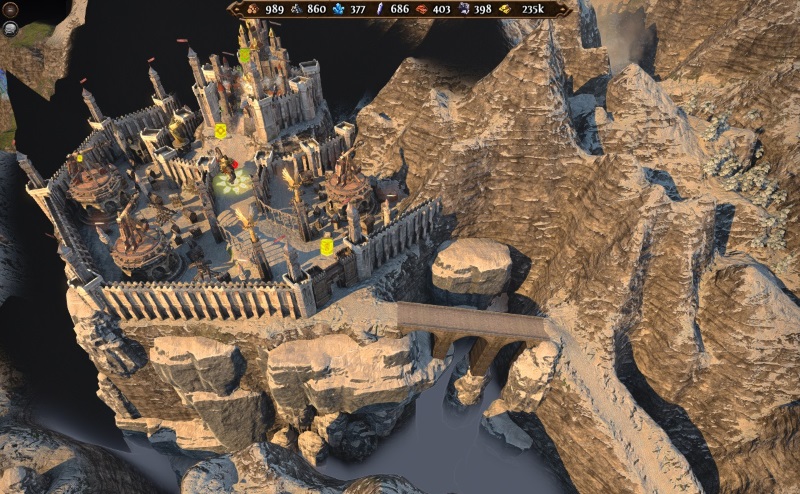
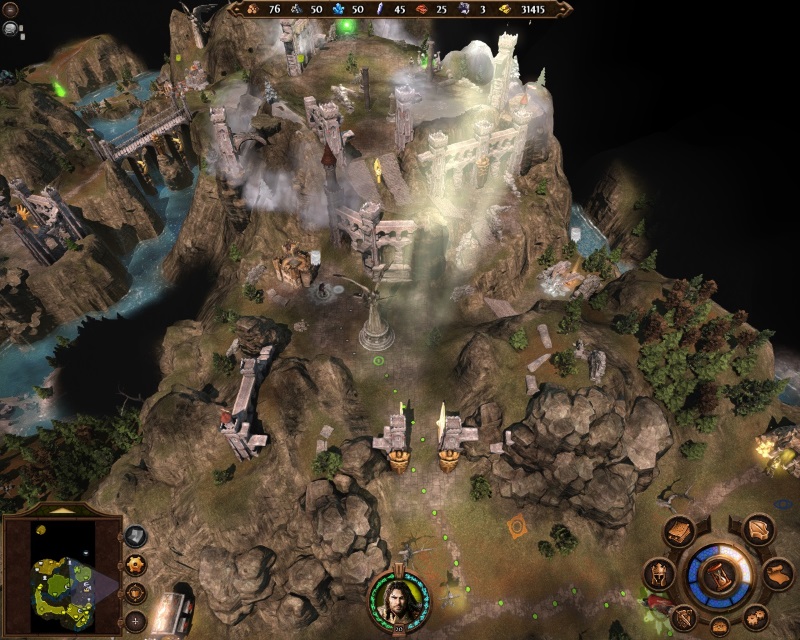
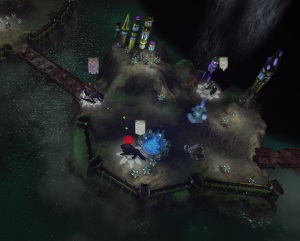
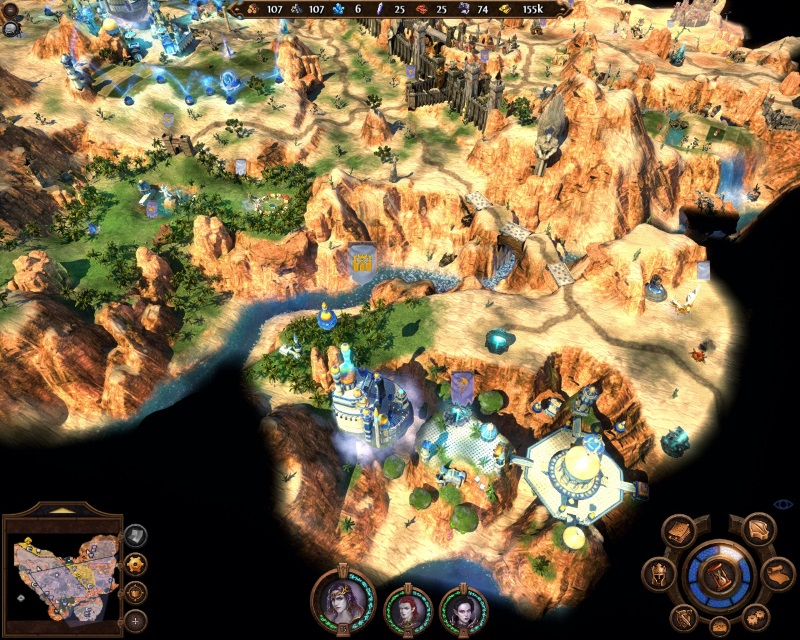
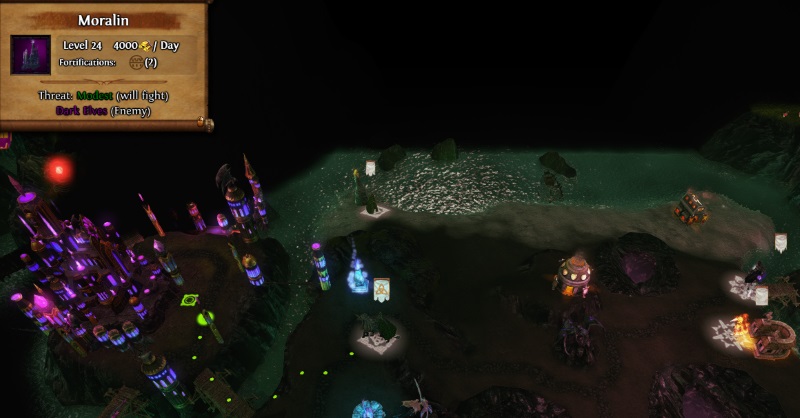
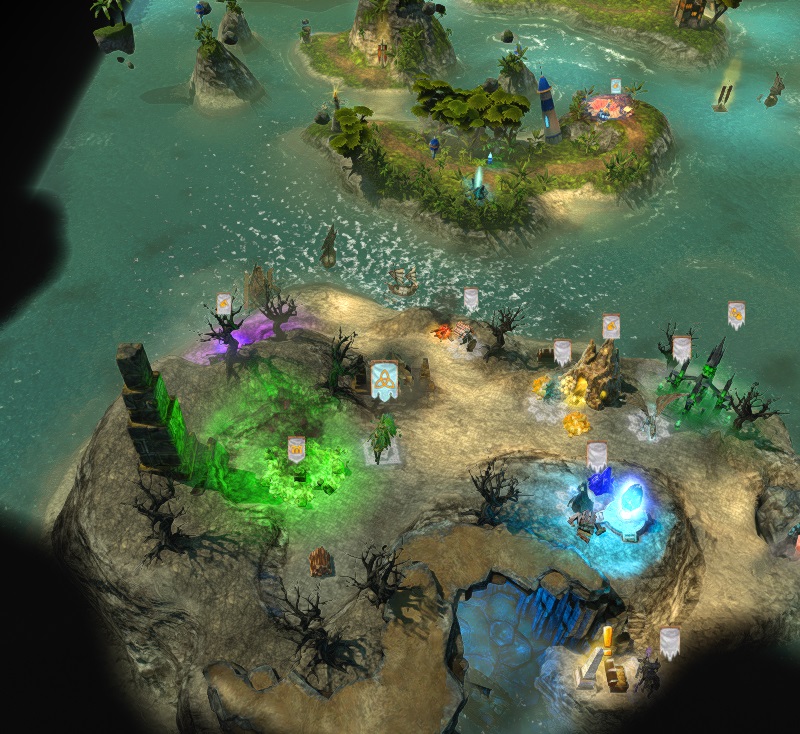
East of your town is another town. Cross the northernmost bridge to find it, and then take it. There is also an obelisk right to the west of it. Once you have two towns, start building them for more creature growth. Do start fortifying too, as heroes will attack your eastern town regularly, popping out of a one-way portal nearby. You can just see it in this image, near the top left corner.
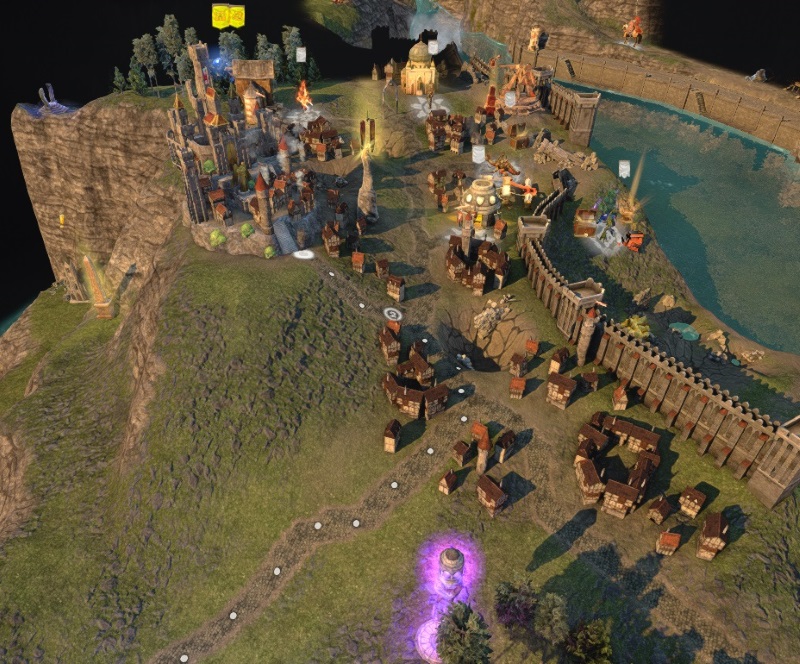
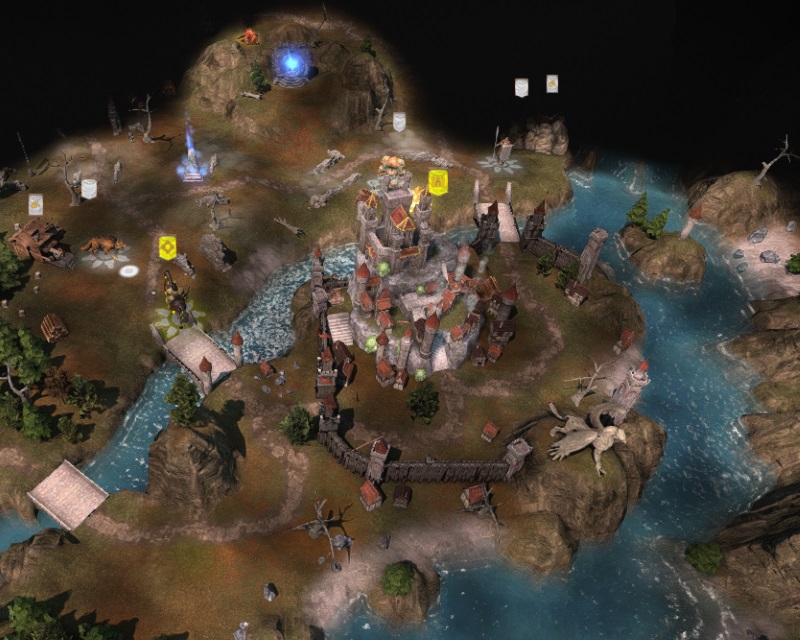
From this town, you can move north across a bridge. When you do, you can see the red pillar controlling the dyke. Move around the mountain and fight your way through neutrals and an enemy fort.
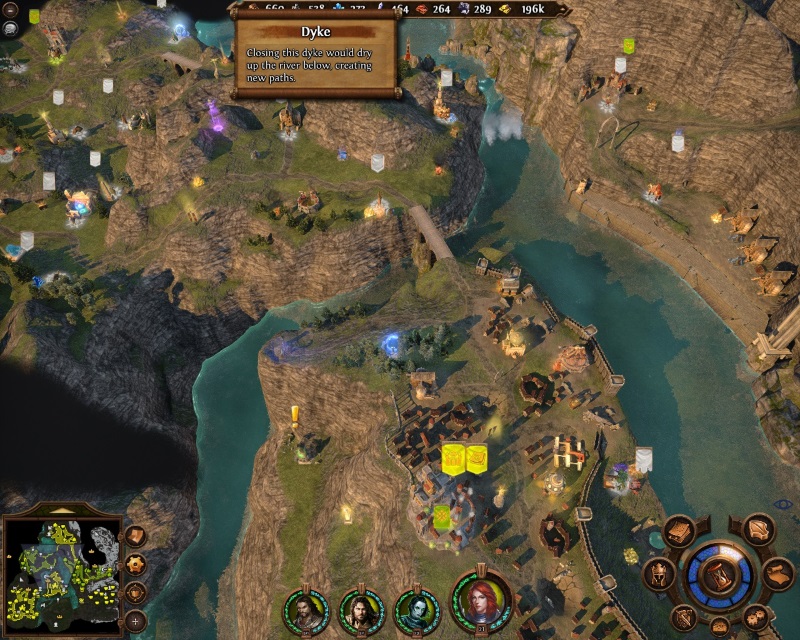
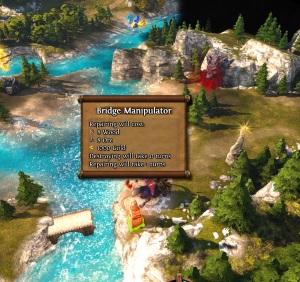
If you keep going north and west, there is another mass grave here for Annie to play with and complete her side quest. Go to the red pillar and manipulate it, lowering the river so you can ford it and get to the other side. This is one way to access the enemy's lands and open up for an attack on his main cities. Another way is that of Andras, and the other two are in the Underground:
When you have fortified both towns and have heroes with armies defending the eastern one, send Ivan into the Underground with a big army. Take on those hydras across the bridge. Then visit the Altar of Malassa.
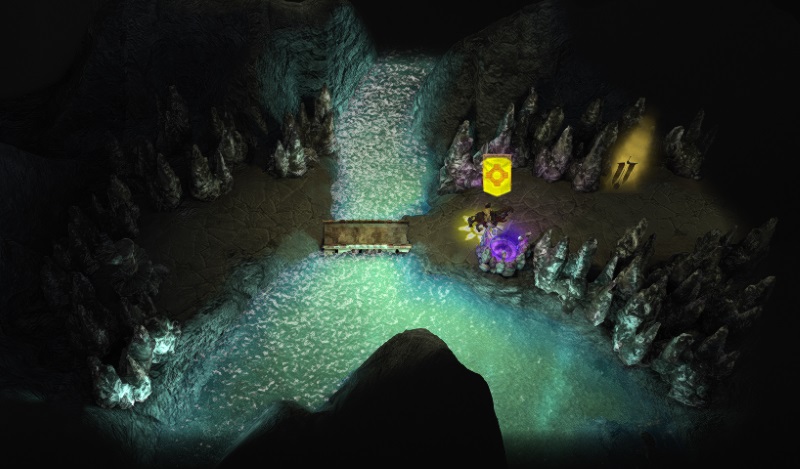
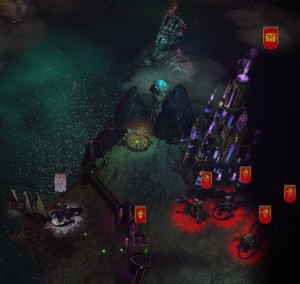
I was lucky here; there was a random effect this week that prevented any creatures from retaliating in battle (“week of cessation”). If you ever get one of those, act fast and go for the biggest battles you can. At this point I was fighting 3.000 skeletons at once down there, so a really big army was needed. I had Ivan lead the way and Anastasya tag along while another hero defended the eastern city. Take the Dragon Utopia and keep moving east. Follow the path until you meet the “blades”. Go through here and move upstairs, and you will come within striking distance of your enemy. Walk along a loooong windy winter path and you end up in the same place you would if you forded the river: at the gates of your enemy's town. Wilhelm sits right outside Horncrest:
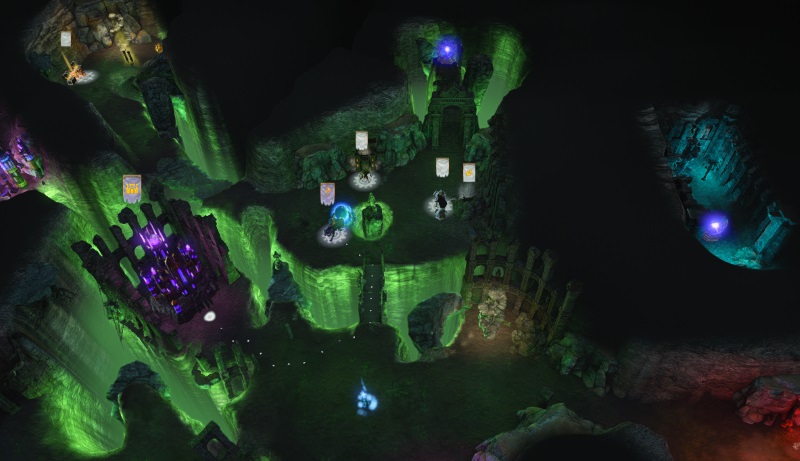
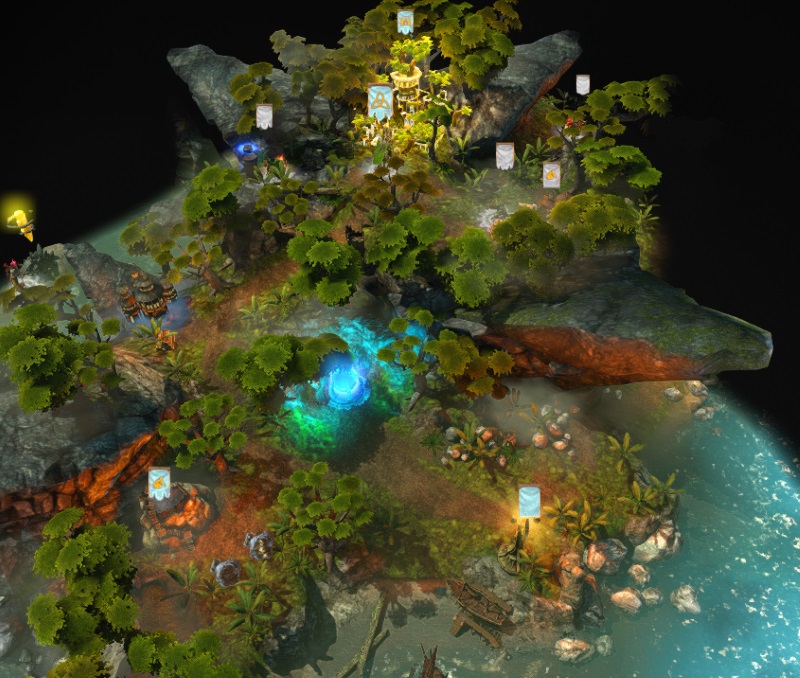
Andras can also access this area since, as you can see from the image above, there are several ways in. You could choose another path (or both) too: instead of going east near the underground utopia building, go west. When you move upstairs, open the seals and move south, getting free creatures and boosters along the way. Moving east, there is a fort you can take, and if you move south from there, you are once again in front of the enemy city of Horncrest. This is where you'll find Wilhelm, so go in and kill him and take the town. You now have three towns, yay. So where is Seamus?
Oh, he's around. There is a small gate in the eastern part of the courtyard outside Horncrest, and from there you can access the path north into the mountains.
Seamus has a decent army and he's level 30 in a fully fortified town, so you can't walse in with just a half-dozen dragons, but at this point, I had 1600 marksmen, 2000 legionnaires, 450 abbots and hundreds and hundreds of other units, so he didn't really stand a chance. Basically, his numbers were in the hundreds and mine were in the thousands. Mr. S had no hope.

Once the battle is over, the map - and the game - ends. Ivan's story is one of a self-made man, who makes his own decisions and writes his own story. The councillors all gave their advice and as Ivan at last figured out: it was not up to any other factions or dragons to decide how the story would end. Just him.
| Comments (2) |
- by Kalah
Welcome to the main campaign, the story of Ivan.
 Here's a little about Ivan: he is a typical leader and strategist - he is skilled in Diplomacy, and you should build that skill further and keep an eye out for creatures who will join you. If you run into some creatures who will join for a price you can't afford, just save up money and come back later. Ivan doesn't have much magic to speak of, but you can get some Light or Prime if you need it. Mostly, though, Ivan is about boosting the strength of his army. Keep that in mind when choosing which items to carry. Build Economy and Leadership. Also, in your town, build the Embassy quickly, to get more creatures joining you. Last thing: remember to appoint Ivan as governor of your town if you're getting governor skills (which you should).
Remember what I said in the Haven walkthrough: the strength of this faction lies in conserving troops, sustaining low losses by having high defense, using healing or resurrection abilities and the like. You can win quite easily if you use those skills correctly.
You start out on level 10, with a slightly built town and some creatures. The mission is to talk to your advisors (as if they haven't spent enough time sitting around that table already); you can start with Anastasya, since she is right next to you. Once you do, a portal is opened north of town. Kente (who can apparently mend bridges simply by having a conversation) is just to the west, so chat with him too. Then clear the area an claim the mines north of your town to get a steady income of wood, ore and gold.
The portal leads to a small area in the Underground, feel free to visit it any time. You get a quest: finding the pieces of an old sword. Another piece lies to the west of your town.
When you have cleared out your area, you should bring some creatures and move through the garrison to the north. Clear the area, flagging mines and visiting boosters. To the north is a gold dragon for you to talk to; he gives you a quest: destroy the evil hydras further north. You need a sizeable army to do that, so you may have to go back home. Also, remember that the Dark Hydra has life drain, so it just keeps on fighting … Do several trips if you need to, there's no rush. I'd take the left stack first, since it's guarding an artifact that gives you +8 defense. Afterwards, talk to the dragons again to complete the quest. There's a chance they'll join you, so check if you can talk to them a third time.
Just to the west is Murazel, ready for a talk. Once you visit her, you get some free creatures and another piece of the sword. North of her is a stack of neutrals you can only reach if you manipulate the bridge; the prize is a purse giving you +250 gold/day, but if you go for it, remember to swap items in the inventory before each fight, since it occupies the same slot as that all-important shield (and you can't recruit more heroes yet to carry the purse for you). Continue moving northwards and near the river you will find your buddy Lasir. Let's go say hi!

Well, that did a lot of good. Darned elves. Well, I guess his tip of a fishing trip may hold something of value anyway. Oh, who's this? Wilhelm? Here? And he says Seamus is willing to admit defeat? Somehow I don't quite believe him …
After you have visited everything in the northern territories, bring a big army, prepare for combat and go through those newly opened doors. Yeah, that marriage deal did sound a little bit too good to be true. Vayaron is the blade Seamus wields here, but if you brought an army worth mentioning, he shouldn't stay in your way for long. Kill him until he dies from it.
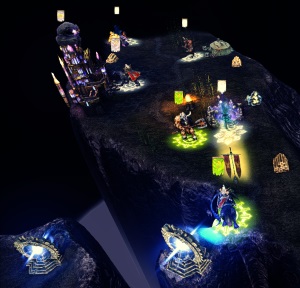
After this whole affair, Anastasya joins your cause as a playable hero. She's a pretty strong hero, so give her a decent Haven army (ditch those necro creatures) and you'll have a real second force at your disposal. Visit the Altar of Sylanna on the hilltop; that can get you into the areas blocked by the green seals. Those Stag duchy heroes roaming around are now no longer allies but enemies. Time to go hunting. Kill all the enemies you come across, take their forts and … you know. Rule your lands. I sent Ivan out with the main army while using Anastasya to keep the home areas secure. With Ivan, I went straight for the jugular: attacking the town of Caer Griobta (it lies to the north of your starting position). Once you have taken it, start building it for more creature growth. Just next to the town is a green seal (which you can open). Go through it and don't listen to Amilcar, keep going. Head across the bridge and flag the dwelling, then take the boat to the small island, where you will find another sword piece. Further north still is a building with a cool illusion around it. Move up to it and Ivan will say that he now understands Tanis' story. Pick up the last sword piece and attack the prison tower. This time, your Dungeon opponents have more of an army to resist you with:

They're fortified, but vulnerable to low morale, so take out their ranged stacks asap. You have fliers, so use them. The dragons that joined me earlier really come in handy here: I gave it “inner fire” and it took out three stacks in one breath. Dragons rule.
When you have won, go back down the hill and talk to Murazel. Then Nolwenn joins your cause too. She's pretty pissed at her dad, guess that'll happen when you try to kill your daughter. I sent her on a trip to gain levels and visit boosters. Ivan needs only go straight into the Underground via the passage right next to Murazel, and once he's down there, the last sword piece is to the south. While Ivan was down there, I moved Anastasya into the Stag lands in the northwest and took the third town. Their forces defeated, that ends the “Stag hunt” quest.
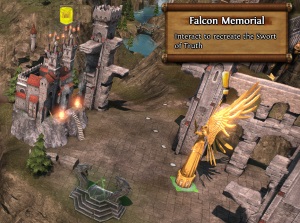
As Ivan cleared the areas in the Underground, I proceeded to take him to the memorial site: Nice sword. Beware not to continue too far further northwest with the wrong hero, that will take you into the Bull duchy and more strong enemies that may attack you.
The quest is to send Nolwenn to see the Bulls. You know, to show she's alive 'n all that. You don't have to move through the garrison, just use the Underground. Move Nolwenn close to the town (leave a slot open in her army if you want the Seraphim to join you), and there's another cutscene.
At this point you actually get to make a choice in the campaign: who to marry. If you let your heart rule, you choose your concillor Tanis, the one you love. If you want to make the strategic and brainy choice, you choose Nolwenn, who will solidify the relationship between the two strongest duchies and consolidate your power. Whichever choice you make, it does not have any serious gameplay effects; you will still win the map. The one you choose will carry over to the next map.
| Comments (6) |
- by Kalah
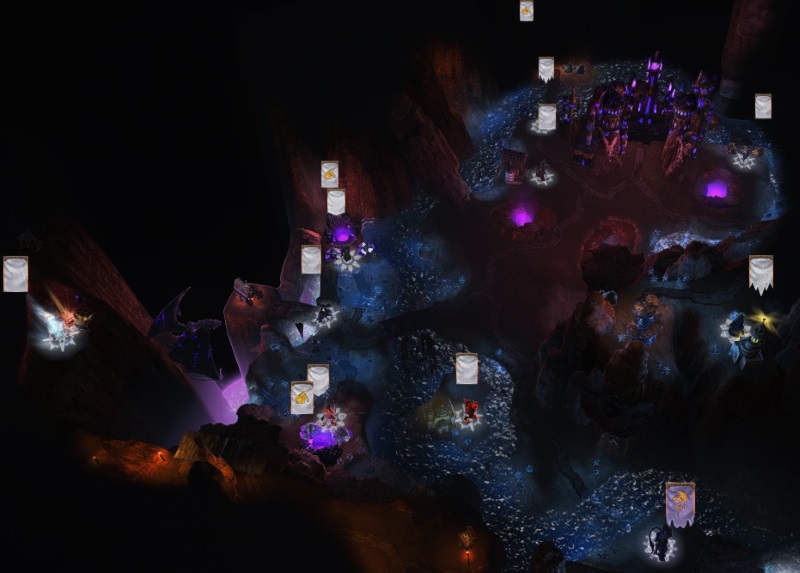
Welcome to the final map of the Dungeon campaign - and what a nice and easy map it is. I say “easy” because of what you will find in the Underground: lots and lots and lots of resources strewn about unguarded. Mines, boosters, also unguarded. Not all of them, of course, but quite a lot don't have creatures in front of them at all. There are still plenty of creatures to fight, but that doesn't take away the sense that this level is all about covering ground.
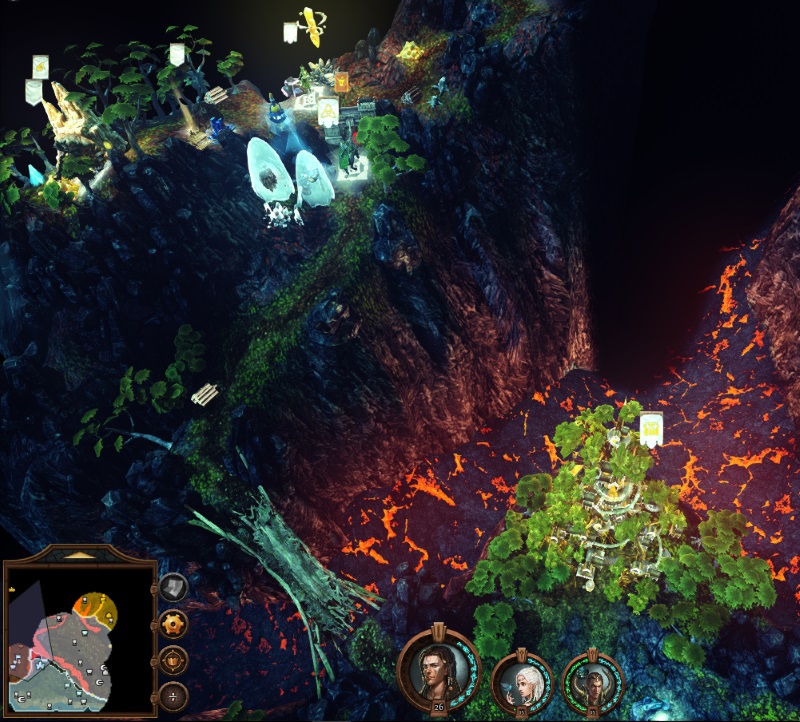
You start off with a single town in lava-covered surroundings, and I recommend getting a couple of extra heroes to do some of the legwork, because there is a lot of ground to cover andlots of stuff to pick up. Giving them the “snatch” ability from the Exploration skill is probably a good idea. Meanwhile, your main heroes can focus on gaining experience.
I don't want to say too much about what you should do, simply because there is no need. You have the whole Underground to yourself and the enemy don't seem keen on coming to visit you down there, so there's plenty of time to do your thing. That “thing” (main quest) is to find a secret entrance, but don't let that get in your way: Build your towns, grow your armies and boost your heroes. Explore the map and open up all the paths in the Underground. There are several portals opening up shortcuts for you, so that when you need to go somewhere you can just find it on the map, click it and the heroes will find the quickest way by using these portals.
A couple of things I will mention, though: Northeast of your town is another town, so you may want to go in that direction quickly. There are also a couple of forts and dwellings around, so grab those when you see them, but on the whole I guess running around the map while fighting the neutrals that aren't too strong for you (come back to fight the strong stacks later) is so easy that you don't need someone holding your hand through it. Just take your time and build.
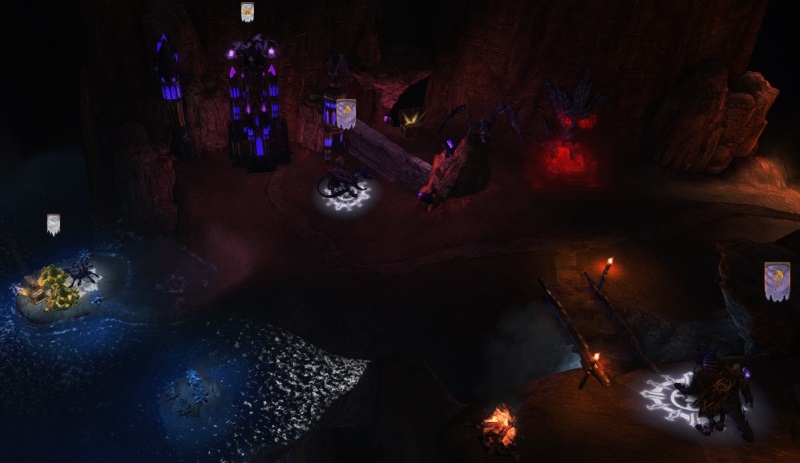
Once you have cleared the Underground completely, it's time to head upstairs. As you may have caught a glimpse of the heroes up there already, make sure you bring a huge army. Once you go up the staircases, you may run into enemy heroes. You have the downstairs to yourself, it seems, but will run into strong opposition once you go upstairs. Hence the needed forces. I would urge you to continue building armies and send them up to support your hero. Just as an example, there's Wilhelm, who has a couple of dozen Landsknechts, Celestials, and several hundred Justicars, just to name some. Don't mess with these guys; they mean business. Thank Asha for the Town Portal, in case you need to escape. Make sure your heroes have that.
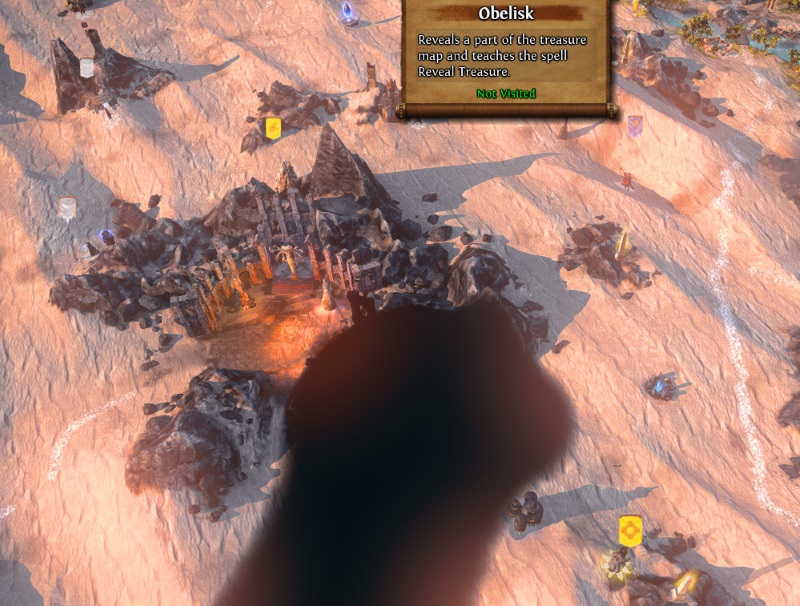
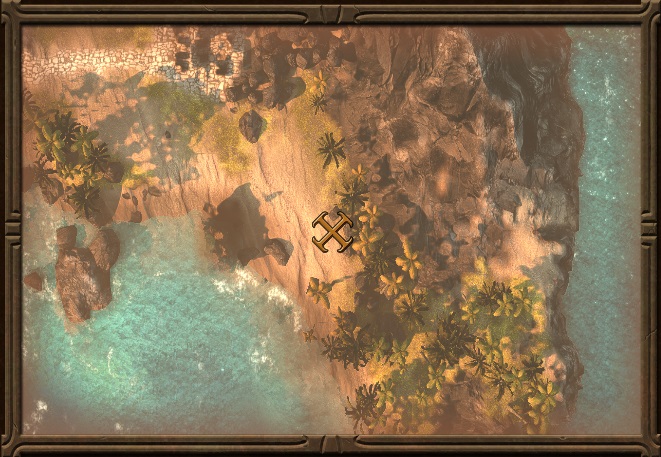
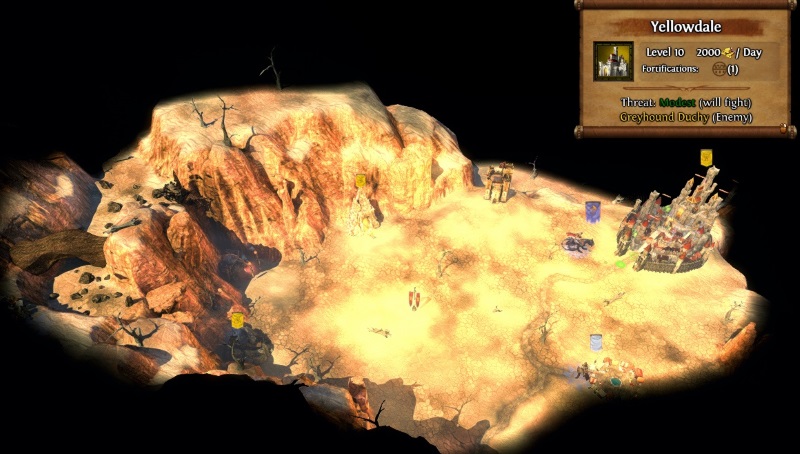
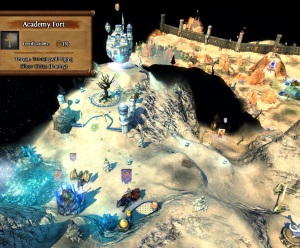
So, what's happening upstairs, aside from the increased resistance? Well, there are the obelisks. There are three, and you have to find them in order to complete the main quest. I'll tell you where they are; they're in the eastern part of the desert, organized neatly in a row in a north-south pattern. Check it out:
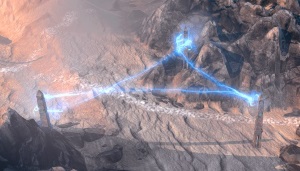 Once you have visited them all, go east through the tesla coil-like things and enter the bay. A small dialogue appears. Continue east. The one-way portal there leads to your second town, so that's nice to know. Another potential shortcut if you need it.
Check the treasure map and you will see that the Tear of Asha is just east of the Shipyard. Dig for it, grab it, and then buy a ship and head out to sea. Immediately to the southeast is an Altar of Shalassa, which you shall of course visit. Also pop by the Lighthouse for some extra sailing speed.
Sailing south, you will soon spot the Seal of Shalassa, and due west of that, a Den of Thieves, which is now on your to-do quest lists. There's another den to the west, and the last one is waaay in the north, so perhaps this would be a good time to portal home and build that Tear in the capital.
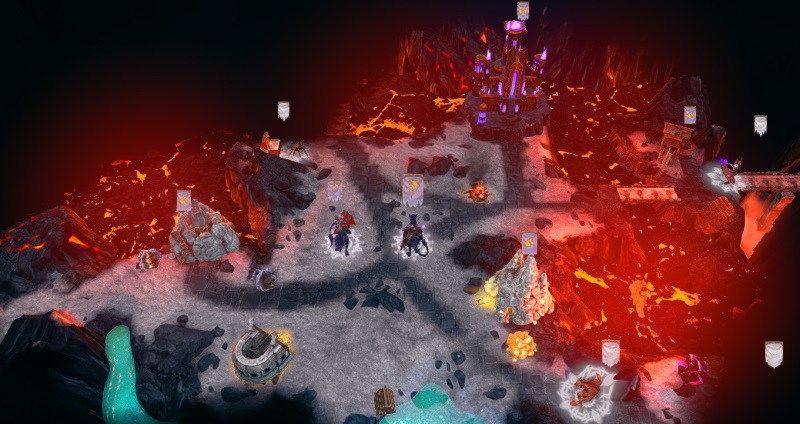
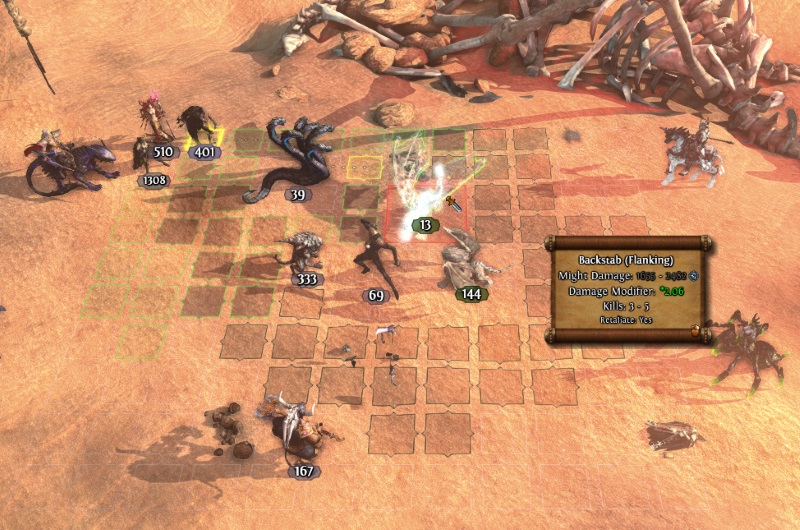
As you keep building your armies, you will eventually be strong enough to take on some of those topside heroes. Then you are a bit more free to roam around and look for those quest locations. When you have visited them all, you will be prompted to attack said enemy heroes ins specific locations, which is again not too difficult if you have already beaten them and still have a sizeable army. This is me going after them:
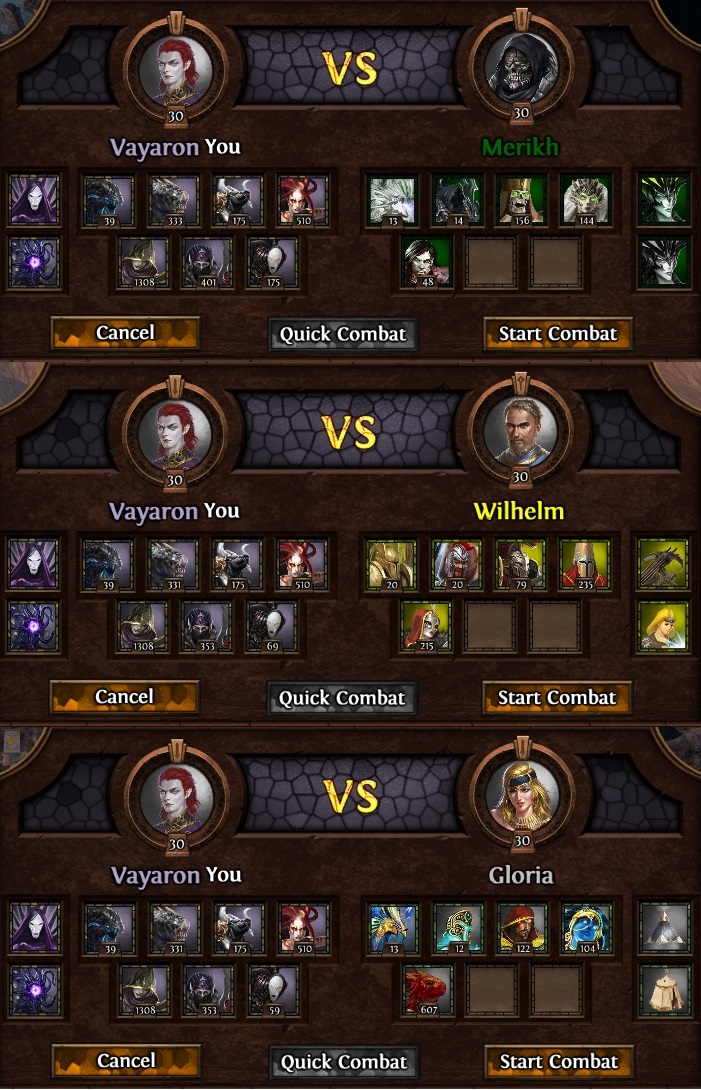
(I have to say: taking out a stack of 235 abbots in a single shot is really satisfying.)
So you're running around the map looking for these heroes, taking them out one by one with your huge army. Easy. Then: treachery! Oh well, Malwen is a buffed hero, but if your army is big enough you should still beat her too. Nice to see a bit of Hydra-on-Hydra action. Roarrr. Anyway, there is only this left: to kill all those heroes lurking about. Check the minimap for their locations if you can't find them.
And that's the end of the Dungeon campaign. Time to sit back and listen to Jorgen's lesson.
| Comments (2) |
- by Kalah
You start out on a small island with a nice and simple outlook: simply take the available town and start building it, and clear the island of resources, visiting boosters and flagging mines. When you have done that, there is a Shipyard on the southern shore. Be careful, though; there are Red heroes on the waters, who will attack you if you get too close, so bring a decent army if you are going sailing. Also, make sure you leave some good defences at home in case the enemy comes knocking (for me, they came at the beginning of week 4). Fortify your town and leave Malwen with a good army (or make sure you have Town Portal ready).
 Once your town is attacked, use spells and ranged attacks to weaken the enemy army as much as possible. Focus on the troggies since they can dig under your walls. If your town is fortified, you should win.
Vayaron needs to cross the bridge into the southeast to reach his second quest. Bring a decent army and make your way across (clearing the area on your way, visiting all buildings, including the Altar of Shalassa). Once on the other side, head north and flag the Gold Mine. Heading south on the eastern bank, you will find more boosters and a gate to the east, which is closed by a Seal of Malassa. Even further south is a Mysterious Crypt and a Dragon Utopia, but you aren't ready for those yet, so this is a good time to go back and collect reinforcements.

 If you take a boat from your starting town and sail straight south, you will reach a Whirlpool which allows you to reach a southern land area, upon which there is a Fort. Bring a big army, as there are several roaming enemies around on the water; they come from a town further east. Take the fort when you can, and rebuild it so you gain control of the buildings in the area. There is a staircase here, but you don't have to go up there yet. There is a Dwelling which you should flag too. Afterwards, clear the area and get back on the ocean.
Head east to fight the Red player's armies and main town. After defeating the first two armies, you should be able to take these guys with little difficulty. Do it quickly, so they won't have time to rebuild and come back and harass you. Once the town and surrounding area is under your control, use Malwen to go up the stairs just to the south of your new town. Make sure you bring a big army.
 Upstairs, you will see a two-way portal and a path to a Yellow fort, protected by a Seal of Shalassa. You should be able to open that since you visited the corresponding altar when you first crossed the bridge to the small island earlier. Take and rebuild the fort, and as soon as you can, visit the Altar of Malasssa just east of it so that Vayaron can travel across the bridges once again and break through to the eastern area of the map downstairs. Beware that once you take the fort upstairs, Yellow player may attack you any second. If you hide in the fort, he may bypass you and go for your southern town and fort. I lost both southern strongholds like that, but it was a pyrrhic victory for Yellow as the amount of troops dwindled after attacking my fortified places. It was a nuisance more than anything else, having to wait for her to finish attacking everywhere. Soon after, my main armies intercepted the hero and took care of her, reconquering the lost town and fort shortly after. Then I sent Malwen to conquer the upstairs. She should take a right, go through the garrison, continue north and capture the town there, and then clear the area around it. There may be some remaining Yellow heroes, but no big challenge. Sending for backup via caravans is a good idea, though.
(By the way, here's a neat trick for easing the use of caravans at this stage in the game. You will notice that in order for you to send caravans from your home town, you need ships in the north. This will cause an accumulation of ships on the southeastern shore, while there are none to the north where you need them. What you can do is move a hero over land across the bridges to the eastern shore and go as far south as possible, then use Town Portal. Since it takes you to the closest town, you should be teleported to the south. Then you can travel north by boat. Rinse and repeat until you have lots of boats by a shore your caravans can get to.)
Anyway, back to our main quests. While Malwen wreaks havoc upstairs, now is a good time to send Vayaron to visit the invisible (yeah, right) library to the east. Since Malwen visited the altar up there, the seal can be broken. Visit the place and after the cutscene, clear the area. Make sure you visit the Altar of Ylath nearby. After that, I recommend using Vayaron for the afore-mentioned caravan trick for a while, while Malwen clears the area upstairs.

When the upstairs town is taken and the area around it secure, go north through the garrison and keep going north (don't turn right to finish the banshee quest yet). To the north is another area (oooh, shiny!) with lots of goodies, including an Altar of Elrath. Visit it and then head back south to the fork in the road south of your town; the left path leads up to a seal which you can now open. Going through it leads to another area with a passage back into the underground. You are now on the centre island, with an Elite dwelling on it, which is nice, but also the Altar of Sylanna. Clear the whole island, including capturing the town to the southwest, before moving on.
When Malwen has a big army and nothing else to do, visit the banshee north of the upstairs town. This means a battle against a lot of ghosts, so be prepared. With that done, there's the next mission (assuming you have killed off the roaming heroes already), and that's a prison break. Look at the upstairs map, southwestern section; that's where you need to go. Head to the southwestern island in the underground and find the stairs located there. Head up and there you are. Having visited the Altar of Ylath earlier, the last seal in your way can now be opened and you can visit the prison. It's just a fort, really, so attack it (no problem) and rebuild it. Once you do that, there's another cutscene.
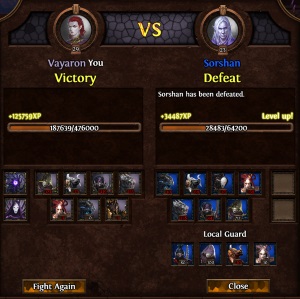 Last mission: attack Sorshan. The cutscene shows you where to go; a small path east of your upstairs town has a Seal of Sylanna, which you should be able to open if you cleared the middle island.
Before you go up the path, this will be one huge fight, so remember to visit boosters and gather creatures in a single army with your strongest hero. Summon caravans, check your items, call upon your oldest lore. The battle should be hard, but winnable.
If you're struggling, just reload, go back to the point before you broke the yellow seal and gather more creatures. I beat Sorshan in his town, with more creatures than he had, naturally, and with better stats. I used Firewall on his shooters, Fortune on my own creatures and then just sent my troggies and dragons in past the walls while my other creatures hammered away at anything that dared come out. The Regeneration spell is also nice here. But don't worry about conserving troops: once you finish this fight, the map ends.
| Comments (5) |
- by Kalah
This map starts off with a fairly simple main quest: conquer two forts, one to the north and one to the south. As you will soon discover, though, it's not that simple. My suggested strategy here is to take your time and take control of the whole map.
You start with a single town, and not a lot of resources, so get to building the core units. Around you are a bunch of difficult stacks; start off with the easy ones and try to conserve troops (not something Dungeon are known for, I know). Use your hero in battle as much as you can. Go south first and get the item down there, then continue clearing the area while building your town. Take the Ore Pit northwest of your town as soon as your army is strong enough. I'd also keep my secondary hero close to the town to pick up the weekly resources.
East of your town is a Gold Mine and a Blind Maiden so you might want to head there as soon as you can, but the mine is heavily guarded. The path west of that mine leads to the surface but that's not the place to go just yet. North of the gold mine there is a Dungeon Fort which you should take, and to the west of that is an item that boosts your might. East of the fort there is another passage to the surface. Don't use that either yet. Clear out the underground first. It will take time, but you just have to keep building your town, gathering resources and buying creatures. Eventually, you're strong enough to take on all the neutral stacks.
After clearing the underground, I went up using the stairs east of the fort. That takes you to Yellow player's territory. There is a hero and town with pretty good defences there, so be ready. If you're lucky, you can catch the hero outside the town. If not, well … it'll be harder. Anyway, once you take the town, you will gain control of another Gold Mine and Ore Pit, so resources are really starting to mound up. Once you get that town built, you can really get some troops behind your cause.
Get reinforcements by caravan and then proceed south from your new town (of course, make sure you build it). Pretty soon, you will see a Haven fort. If you already beat the main enemy army, this should be easy. Weirdly, this is not your quest target (those are to the west), but take it anyway; you need to keep building your strength. To the west of this fort is an area with several garrisons and a heavily fortified town. Stay away from that town (don't worry, nobody comes out to attack you) and clear the area instead, picking up resources and items, as well as making sure both of your main heroes are boosted to the maximum level. You can take the garrisons; this will make it easier to travel.
Also, this is a good time to send one of your heroes up the stairs just south of (and above) your starting town, the one west of the gold mine down there. Once you have gone up those stairs, you will find two Sawmills and some resources.. North of you is a garrison, and through that you can see an area blocked by wizardly magic. Go around it by heading east, then north, then west. Take that Academy town. Its creatures aren't much good to you at this point, but the spells and extra gold can't hurt. Start building it, though; you'll need the troops later.
Now head north and northwest. You'll find some useful trinkets and resources on the way. Quite soon you'll find a wall. A long, huge “Great wall of China” type wall, ensuring that you can't reach the target fort. Oh well, head back south, follow the road to the south east of your Academy town and presto! You'll find one more town. Take it and you have two. Now it makes sense to have Academy creatures building up. Build the towns, fortify and build up armies of creatures. I'll tell you why later.
 Okay, so you have taken the eastern Haven town, the two Academy towns and you're almost completely dominating the map … where the frak is the road to the forts? Here's a clue: look to the east of the southern Academy town. There is an underground passage, take it when you're ready. When you're in the underground, head west and you'll see that you have arrived in a familiar place; those areas in the underground that were unaccessible earlier. There is even a Bloodforge there, but it's heavily guarded and you don't really need it at this point; you can just trade for the resources if you need any.
Keep going west, find the staircase and go up (before you do, though, there is a fort just north of those stairs, you could take that just for the fun of it). Go west and there's the Academy fort, see? Yay! Take it, it should be a snap at this point. There are also a couple of Crystal Caverns nearby, which you should flag. The fort can be rebuilt and use for summoning reinforcements via caravan before you continue.
 How to find the northern (Haven) fort? I know this is hard to find, so look at your northern Academy town. Just northwest of it there is a Blackfang Watchtower which stands on a hill. At the bottom of that hill, on the western side, is a well-hidden entrance. There it is. Now you know where to go. Once you've gone down those stairs, explore the area and head north (flag mines and kill creatures if you want to), and once back on the surface, the fort is to the west. It's an easy fight.
Wait a minute. Did I really have you take the time to control the whole map just for that? When you could have snuck through the enemies' lines and taken those forts easily? Yes. But why? Well, you see, taking those forts was only the first part of your quest. Now begins the second part: to visit the trading posts scattered around the map. Firstly, those are well guarded. Secondly, the enemy heroes could pop up and make your life difficult. But not without their towns (giggle). You can do it the quicker way, but then you really have to be quick about it. My way, you can take your time. Besides, who doesn't like to dominate the maps?
Using my method, I now have three huge armies at my disposal; one Dungeon, one Academy and one Haven. Three armies with which to travel around to the well-guarded trading posts. Let's go, shall we? Just follow the clues on the minimap to see where the trading posts are. Once those are visited, the final quest is given.
Now you must destroy that crusader building near the great wall. Use Malwen to do it. Beware that two enemy heroes will come in from the south. Do not attack them! Do, and the map fails. The point is to let them fight each other; they are the response to the rumours you have spread. Coming to investigate, they will find each other and naturally assume the other to be the enemy.
That's pretty much the end of map 2. See you on the other side.
- by Kalah
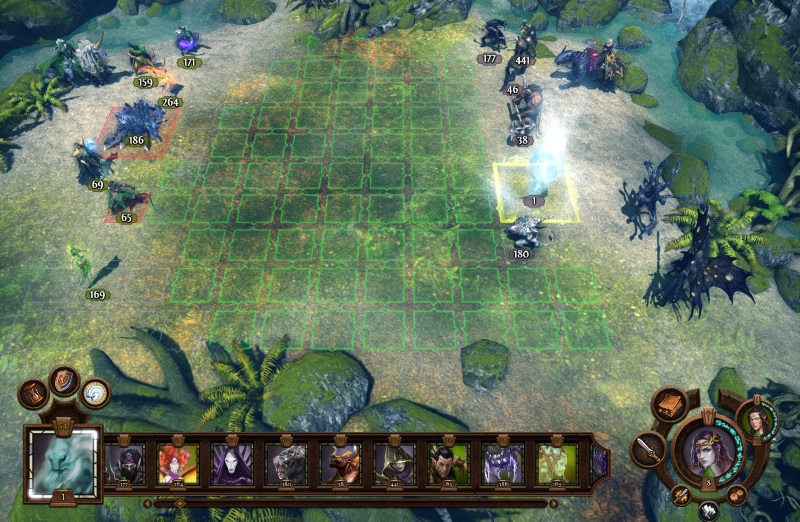
Welcome to the Dungeon campaign. This faction is about stealth, speed and making your opponent feel bad. Giving your opponents weaknesses like bad morale and loss of strength is a good thing, especially when you yourself are quite fragile. A good strategy against most creatures is to boost your shooters with morale (burning determination) while giving general defensive and attacking bonuses to the minotaurs. Here's a lowdown on the creatures:
The Trackers shoot without range penalty and also ignore the target's defence, making them immensely powerful against strong creatures provided you have the numbers on your side. Give them morale boosts to get multiple actions and you're sure to win. The Assassins are all right; a weak unit but cheap to buy. The also have poisoned weapons, so spreading them out in several stacks to give negative effects to the enemy is usually a good plan. Don't plan on keeping them for long, though; they're more fragile than butterflies. The Troglodytes are decent, a bit expensive, perhaps, but they do have the digging ability, enabling them to pass obstacles. From the elite section, the Minotaurs are noteworthy. They are the tank of the faction, incredibly hardy and with a first-strike ability on their retaliation. Give them defence boosts and watch them survive forever. The Soulless are slightly less useful, but they do have some teamwork abilities, boosting nearby friends and weakening nearby enemies. It is very useful against the right enemies but useless otherwise. The Medusa is known to us all; it is not as powerful as you might have hoped, but is still useful when it comes to crippling your opponent. They're not easily blocked, which is nice; they can move and shoot in the same turn. The Hydras are tough, deals lots of damage in several directions and has the life drain ability, making it almost overpowered. A bit pricy, though, thankfully. Saving the best for last: the Black Dragons are strong, fast and has a devastating attack, in addition to being immune to magic. When fighting wizard factions, look no further.
The first map is about spinning a web of lies and deceit. In best Roman tradition, your side wants to divide and conquer by getting your opponents to fight each other. To do this, you are given a main quest consisting of several parts: 1) defeating a Sylvan army and blaming it on the orcs, 2) destroying some Ancient Treants and blaming it on the wizards, and 3) attacking Imperial merchants while planting evidence that the elves were behind it. Also, you need to contact the leader of the Blackfang thieves guild to strike an alliance – he's east of your starting position.
The layout of this map is such that there are several garrisons on the surface, and they are too strong for you to attack. Your town is in the underground, though, and there are several staircases down there, enabling you to access the areas anyway. The problem is: if you take the wrong staircase too early, you run the risk of alerting the enemy to your presence, and they may follow you back down. You don't want that. I will be taking this in a specific order, but I'm sure you can choose to explore in a different one. In this map, your main problem will not be a lack of creatures, but gold to pay for them. Save money where you can, and pick gold over experience (there will be plenty of exp. from battles anyway). Your heroes are Vayaron (might) and Malwen (magic). Right away, it seems clear that Malwen should be your main hero since she can be maxed in both dark magic, offence and the special Dungeon skill, while Vayaron is stuck with exploration and warfare. Still, they're separated for now (she in the underground near your town, he up top), so you don't have to choose just yet. The heroes will carry over to the next map, but there is plenty of experience for everyone here. Below, I will deal with the heroes individually:
Vayaron should go west first and get the boosters nearby, then head east. There are several Elemental Conflux buildings nearby; those can really boost your numbers, big time, but first you need resources to buy them. When you reach a Stable, you can also see a passage into the underground. Guess where that leads? Well, downstairs. The garrison is too well guarded, so you can't go south, and the bridge to the east is out (but you can just see Ajit over there). The two bridges to the north are also temporarily unavailable to you, so it's time to head into the underground. Once there, snoop around; fight neutrals and visit boosters.
Malwen can go east to fight the minotaurs (those things are tough, so try quickcombat) and flag the Underground Pit, and then grab the Ore Pit to the north, before going back and heading west. Southwest of the town is a stack of creatures that will join you, and when you're done down there head north to find more joiners. Further north is a Meteor Crater (in the underground, really?) and several strong stacks of neutrals, so focus your attention on flagging the dwelling there and then head back to town for reinforcements.
 Just south of your town is another dwelling, and a Bloodforge, giving you a rare resource. After clearing that area, head east to pick up some free minotaurs and fight the sun deer for a nice item. Keep going east and you'll soon reach a staircase that takes you up into the sun, and if you head north now, you will find Ajit. Talk to him and then visit the Altar just behind him. You can also visit some of the buildings and boosters if you can defeat the guard stacks, otherwise you can return later. The Sawmill in that eastern area is important. Rebuild the bridge (if you have the resources), by interacting with the red pillar – it's a nice shortcut. When you're done, head back to town.
Now both your heroes should be in the underground, working together to explore. Here's a tip: don't go too far north yet, as it can antagonize yellow player, and she's strong. The two-way portal is fine to use (you'll find some free creatures), but don't go up any of the northern stairs unless you're ready for trouble.
When you are ready for a big fight, head through the two-way portal and up the northern stairs. Notice the Training Grounds nearby, good for upgrading creatures. To the west, you see a garrison. Don't attack it, you'll be wiped out. Instead, continue west until you meet Edric, the «imperial merchants» in the Seeds of War quest. Attack. His guardians are strong, but you should focus on taking out the legionnaires and the shooters; take the guardians when they are getting close. Winning this battle completes 1/3 of the main quest. Grab what resources and boosters you can and move on westwards. The enemy hero Agathin is north of the well-guarded garrison; you can beat him with a large army, but he won't come out. He has backup, though, so keep your distance if you have a small army. Clean out the area and head west, then south, to clear that path southwards. You can reach this area from the underground as well, by heading west and then south from your town. You will no doubt notice several armies of treants around, but you can't attack them since they're behind a green seal (the altar to which Agathin is guarding). Head on the one eastern path that is open to you, and you will soon see that you have arrived on the south bank of the river, without having to pass that garrison. Clear out the area and note that you can't enter that Academy town. Your mission is to plunder the mines. Do it. They are behind the blue seal and you should be able to pass it since you visited the altar next to Ajit earlier.
When you have nothing more to do, there should be lots of creatures waiting for you in your town, so go there for reinforcements, and then head to the staircase northwest of your town. This is how to get to Agathin without going through the garrison, but once you surface, a yellow hero will come to the rescue so you either have to be fast and beat Agathin and teleport home again before she can catch you, or you'll have a big fight on your hands. Not impossible, though, especially since she had a mixture of Sylvan and Necropolis troops.
Next on the program: fight Agathin, visit the shrine and then go back south (not through the garrison, mind you, use teleport) to those treants in the west. They are easily beaten but will cause massive casualties to your shooters, so cast Weakness on them and try to stop their ranged attacks. Recruiting some air elementals from the Elemental Conflux buildings in the south may be a good idea, since they have great movement range. When you have gotten rid of all the treans as well as plundering those wizard mines, the map ends.
| Comments (1) |
- by Kalah
The first priority here is to get to the Elemental Forge in 12 weeks. You start on a beach, and you can start by fighting some neutrals, then move up the northwestern path. Keep moving up and you'll find a lightly guarded Sylvan town. Neat, huh? Grab it and build it.
East of the town is an Observatory, which shows you a substantial part of the south. Near the Observatory there's also a Sawmill. Take it. Clear the area; upgrade your creatures, get the items that are lying around etc. The Ore Pit on the beach can also be taken promptly.
Let's wrap up that time-limited quest. Head north from your town, over a bridge and up a winding path. Keep heading due north and go for the Rally Flag. Then you get a cutscene and the quest is finished, no more time limit.
 Instead, roaming heroes again. Remember from map #2? They're baaack! Yaay ...My my main army was attacked near the town very quickly, so if you have him up with the Rally Flag, use Town Portal to get home asap. At least one of the fights is against a high-level mage and classified as a «severe» threat, but I found it quite easy with 46 blade dancers buffed with «inner fire», and the usual few dozen druid elders, along with assorted other troops.
To the east of your Sylvan town, you have an Ore Pit, a Gold Mine, a Dragon Utopia and a champion dwelling; just have a look at the paths to see where to go first. The two-way portal there is like a lift, taking you between the floors. You need area control to take the mine, but the Dragon Utopia has lots of goodies.
The quest to do now is go across the bridge west of your town, go up the hill and free some prisoners that the wizard is controlling. Up the hill, and take the garrison.
A natural target after that is the Academy fort since it gives you control of the Gold Mine there, so take a right turn after the garrison. Standard procedure: take and rebuild. Moving further north along the path, you will come to a stack of Simurghs guarding some other neutrals. When you defeat those birds, you complete the prisoner quest. Those neutrals are Stronghold units, but as there are quite a few of them they may be good for one of your secondary heroes. The Academy town is an obvious target, and when you have taken that, clear the area and consolidate it under your control. Your main army can go back to your town; once I had taken the Academy town, two different heroes attack my fully fortified Sylvan town with my strongest hero in it; they seem pretty desperate and will keep coming.
 Meanwhile, there's a two-way portal just east of your new town, which leades to another town on the other side of the map, but don't go there yet. First, take the fort and the Meteor Crater southeast of your new town. North of Isaar is a fort and some boosters, and if you keep going, you will come to the same Academy town that you can reach through the two-way portal. When you're ready to invade, take that northeastern area.
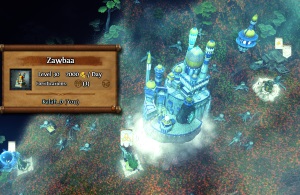
The Academy town Zawbaa is up in the northeast corner, and should be taken easily. You are now very near the final objective, and just southwest of the town, you'll run into the mage in the conflux.
She's very tough, so I suggest holding off on her and instead go after the red player in the eastern part of the map, completing the «Defilers» quest. Head due south from Zawbaa and you'll soon find the Stronghold town. Take that (and the Bloodforge next to it), and no more orcs coming for you.
After this, return to your home town and build up a huge army capable of taking down that pesky wizard. When ready, attack.
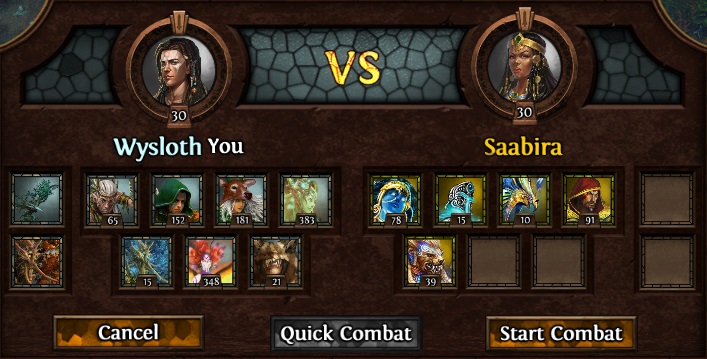
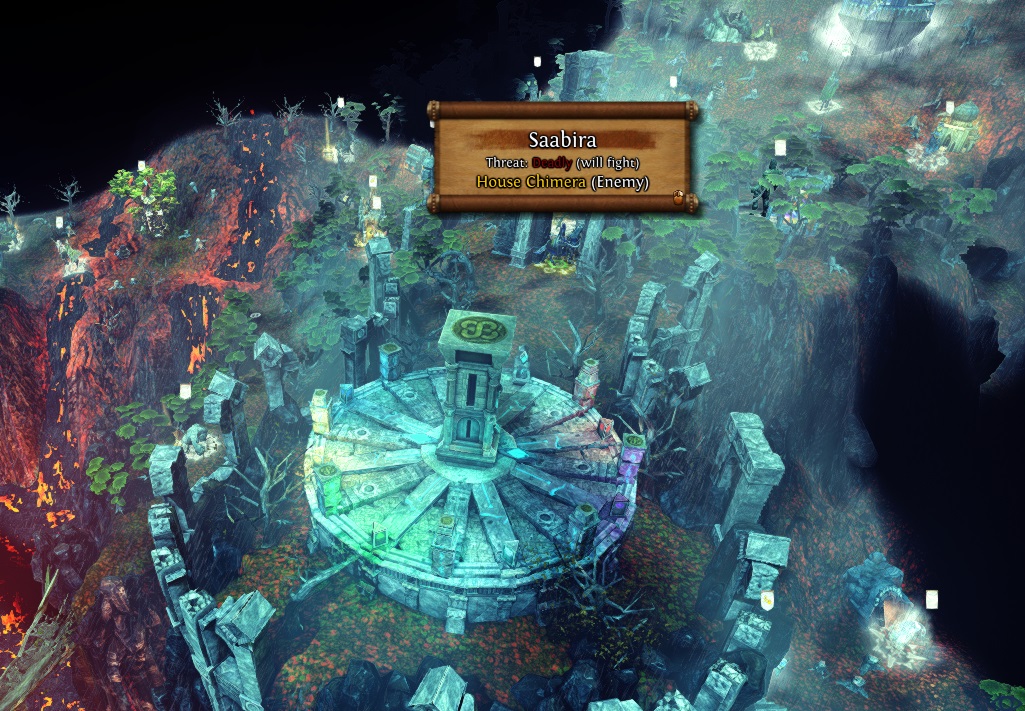
When fighting Saabira, do not let those carpet guys shoot. Boost your shooters as you usually do. The fight should be doable.
To end the campaign, choose. Go with Danan for a ritual and romance? Or go with your father and do what's expected of you? If you want to leave, simply walk Wysloth down to the beach where you started and board the ship there. If you want to stay with the Elven beauty, enter the big stone structure. Regardless of your choice, the campaign ends.
- by Kalah
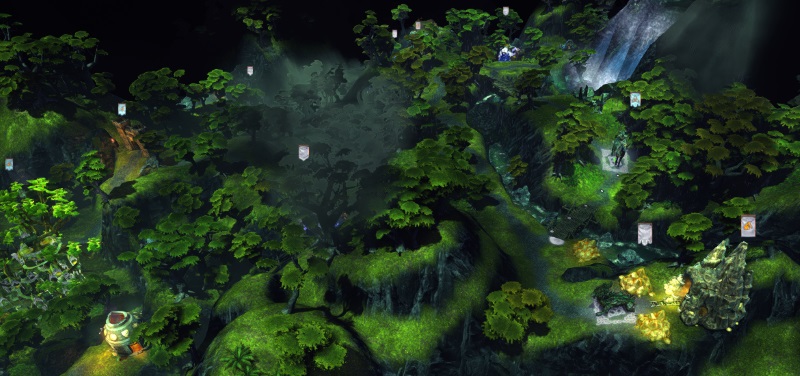
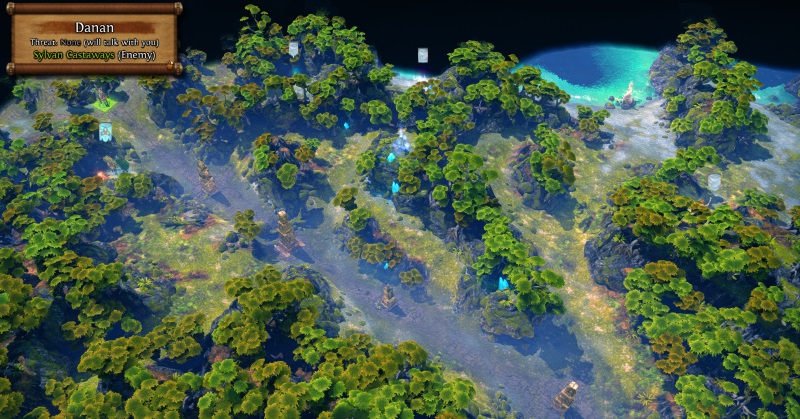
You start out with two main objectives: 1) Search the island for the solution to why your friends are behaving so weirdly, and 2) do not harm them! That means you cannot do battle with either Danan or Sylrael. Also, the only army you have left is a few trusty sea elf pirates.
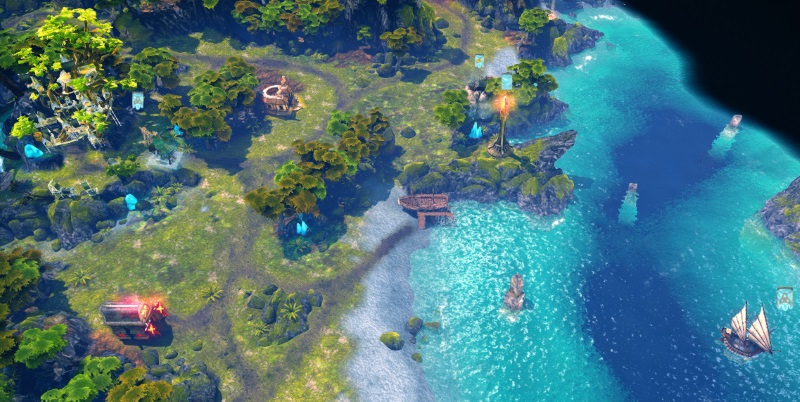
Things aren't too bleak, though. There's a town directly to your east, which you should take, after you first pick up the free creatures nearby. Most of the armies around are too strong for the moment, so just engage the ones you can. The Ore Pit north of town should be easy enough. There is also a Rally Flag west of that Ore Pit, which can give you a vital boost in the battles to come.
South of town is a stack of swordmasters who will join you if you complete a quest for them. As they would be a big boost to your strength this early, you should solve this quest first. The heirloom they seek is on an island to the southeast. Go southeast and fight your way to the Observatory. Now you know where to go: you need a ship from the shipyard and then head out to sea.
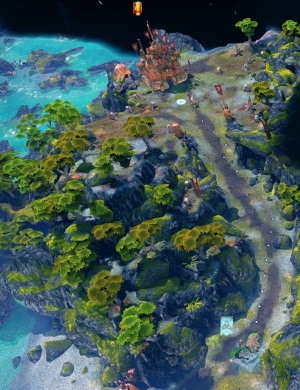
It could take a while before you're strong enough to defeat those druids guarding the shipyard. Yeah, gold is an issue here; make sure you visit the Tax Collector every week – that helps. Even so, let's do another quest first: fight your way through the garrison and move east.
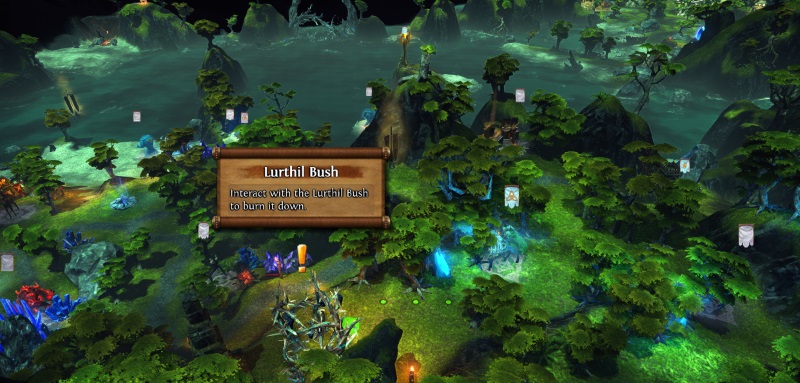
There's a bush (lol) that's had some kind of narcotic effect (lol again) on the elves; go burn it down. Danan will be angry when you burn down the weed (ooh, can't stop laughing), but don't let that stop you. Go south from the bush to find a much-needed Gold Mine. With that, you can clear out the surrounding area – including flagging the vital Sawmill and Crystal Cavern to the north – while making your way back to town. Then head for the shipyard.
At this point, you should also hire a secondary hero if you have not done so already. That hero should also head out to sea and follow Wysloth. Ahhh, out on the ocean blue.
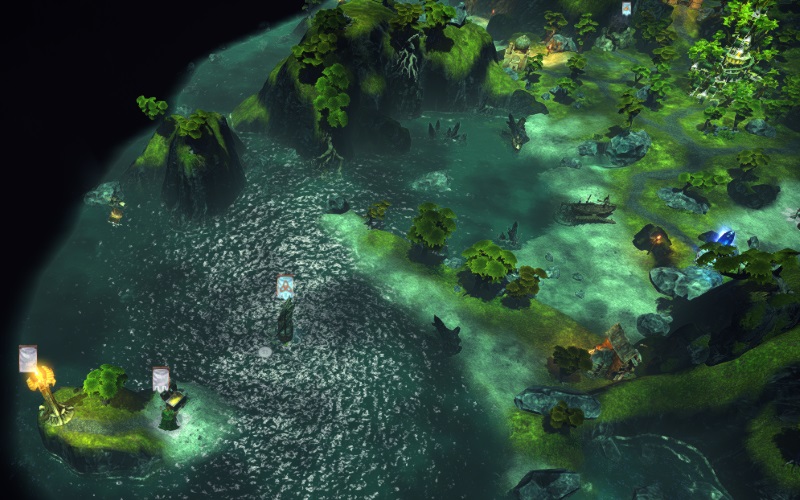
Head southwest first, and flag the Lighthouse for more oceanic speed. There's also a nice item due south of it. Now go east. Head for the pirate base. You may come across a pirate ship on the way too. Engage.
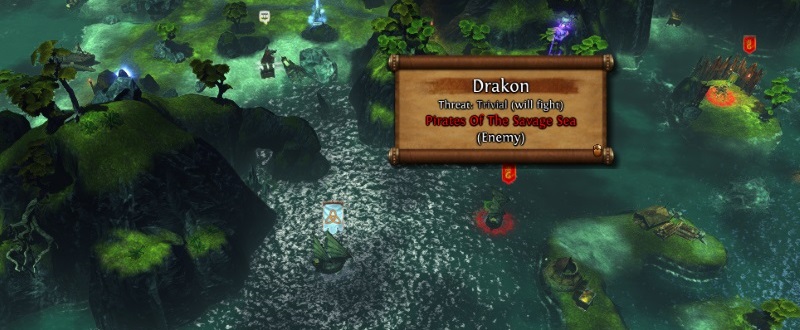
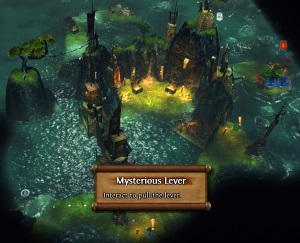
When you have killed them, go for the small island with pirates on it; the centaurs are fairly easy, but the basilisks are tougher. Still, shouldn't be too much of a problem if you brought a few dozen master hunters and druids with you. When you have defeated the stack of creatures on the small island, interact with the lever there. See where to go next?
 Head south and fight the last pirate army. When that is done, you get a nice item that boosts your ranged creatures.
You may have noticed that the gate to the cove closes every turn, so using a single hero to pull all those levers will not work. See the point of having two heroes?
Have your secondary hero pull the northern lever while keeping Wysloth ready near the others. He can then pull the two southern ones and head into the bay (when you pull all three in the space of a single turn, the gate stays open).
 Note the message when you pick up the treasure.
So what now? Head west with Wysloth and land on the southern bank. You have more weed to burn.
Fight your way west (ignore the underground for now) through the garrison and you will soon see it. It's guarded by a big stack of sun deer, though, so at this point I found it wise to teleport home (or you can take the boat back, but it takes longer) and talk to the swordmasters again, as well as picking up reinforcements from the town.
Build a new boat and head back to the southern bush. Clear the whole area; take the Dungeon fort and rebuild it, and flag the Crystal Cavern and the Meteor Crater (that starsilver is great, finally you can upgrade your blade dancers and buy sun deer). When you're done up top, head into the underground.
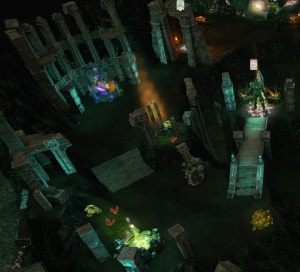
In the underground, move north and take the fort. Then west to find a purple hero. Kill. To the east there is an Underground Pit to flag and a couple of booster to stop by. West of these is the Altar of Arkath. Visit it. When you have, you can cross the bridge northeast of the stairway, and open the seal. Clear that area too and claim the Bloodforge, until you reach a seal of Malassa (which you can't pass yet). Head back upstairs.
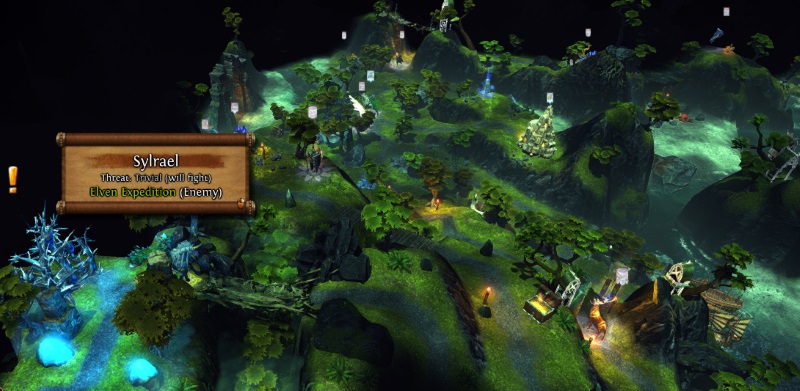
From this southern area, head west and go ashore. Start looking for bush to burn, but do not head southwest. Do you read me? Do not engage Sylrael in the southwest.
Instead, go northwest, and look at the minimap to find your way to the bush in the middle western section of the map, flagging the Gold Mine, Ore Pit and Crystal Cavern as you go. Just above said cavern is the bush in question – unguarded by fragile elves. Once you burn it, the Dungeon hero Ashbeth confronts you and tells you what you already suspect: that these bushes are narcotic. She then disappears again, but as you have seen in the cutscenes, burning the bushes opens up new paths in the underground.
First, though: you're under attack! The one-way portal exits now start spewing out Dungeon heroes. There's one near where you are, and did you notice the one northeast of your town? Hopefully, you have a hero with an army near that town, otherwise I'd teleport back home asap. I found the fights fairly easy with just a couple of weeks' worth of creatures. At this point I had Wysloth with my main army in the western area, and Danan started coming for me. If that happens, run away. Go back south and towards Sylrael. As I said: do not engage. Instead, go around him, take the garrison and burn the bush (it probably doesn't matter which you burn first). When all bushes are burned, your two companions return to your control, as does the northwestern town. It's pretty unbuilt, which is something you should see to right away. There are also some mines around, but the only important one is the Meteor Crater in the western part of the map.
You new mission is now to hunt down that Dungeon hero in the underground, so head back south with your main army and prepare to get violent. The other heroes can stay near your town(s), making sure they aren't suddenly ambushed. The roaming purple heroes aren't a big problem (some of them even wander around without armies) as long as you have heroes with armies guarding your territory.
 Now, the underground is a bit of a maze. First, you have to go to the southwest corner, and visit the yellow altar.
Then go due north to unlock the corresponding seal. Continue north and take the green two-way portal, which transports you to the northeastern part of the map.
A huge battle awaits (for me, 18 black dragons, 180 medusae etc.). When those are defeated, visit the Altar of Malassa, and hop through the one-way portal right next to it. From there, you should know the way to the purple seal. Move through that and you will soon be confronted again by the high-pitched voice of Ashbeth. Never mind the mother-daughter catfight; just head for the Dungeon town (there are a couple of permanent boosters in the area you should visit, even if your level cap is reached).
The final purple army is of decent size, but smaller than others you have encountered so far. The hero has lower stats than you do, so this should be no big problem. Treants providing defence for your shooters should be good, and as I have said in earlier maps, those sun deer are great for morale boosts. Take out the ranged creatures first, then use your swordmasters or other tanks to mop up the rest. Once you take this town, you can take out the roaming heroes without fear of their coming back.
Take Wysloth back upstairs, out to sea and through the straits that now open in the centre of the map. A pair of Whirlpools await you.
If you take the western one, you have to fight a bunch of hydras, while the eastern one leads to a fight against ancient behemoths. I hope you brought a big army.
I went for the hydras, although it doesn't really matter strength-wise, those ancient behemoths have that «jump across the whole battlefield» ability. I took out the hydras in just a few shots, seeing as I had over 100 druids and 200 master hunters at the time.
Map completed.
| Comments (2) |
- by Kalah
In this map, there is going to be some sailing, so you should probably level up Wysloth in navigation. Also, this is the kind of frustrating map where enemies roam around and steal your towns and forts if you're not careful. You may have to go back and forth a bit. If you manage to get their strongest armies in combat against your strongest army, the job gets a bit easier. Having the town portal building is useful; you can jump back to town when there's an enemy approaching. You should hire some extra heroes to do some of the exploring and resource gathering, as well as patrolling the map with a real, physical presence. You should try to get them all decent armies too, so that you can move around and physically control your area. I eventually had 5 heroes, all with small-medium sized armies. Wysloth had the main army, and I gave Danan a pretty large one too and managed to get her lots of experience by fighting neutrals.The main thing is not to get defeated, and keep expanding your territory slowly.
The main quest is to find a way out of this archipelago, and in short, there are two ways of doing it. Sneaking through all those orc patrols, or fighting through them. The sneaking approach involves seraching for and finding all the obelisks; that will give you the clue to where to go. The fighting approach involves taking all the orc towns. Honestly, the orcs seem to be everywhere (due to several Whirlpool shortcuts), so I found it far more straight-forward to just fight for control of the whole map.
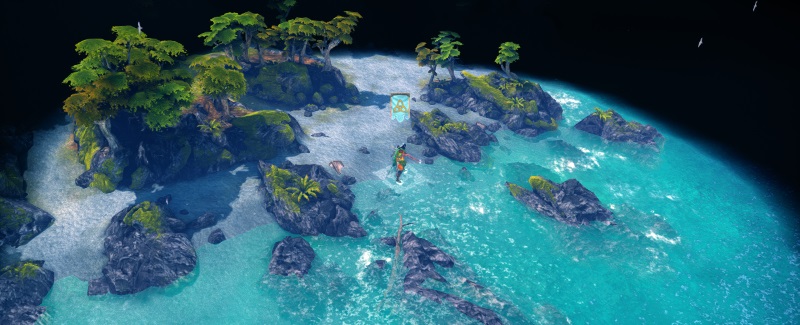
 The map starts with a bang: as part of the story, you and your (now very small) army are boarded at sea. You should win quite easily, even if you lose a few troops. Next, you're on an island, surrounded by some neutral creatures; attack the guardians first, and visit the Armoursmith for a permanent defensive bonus before going for the other neutrals. Visit the obelisk north of you to set off a quest, and then take (and rebuild) the fort east of you. Just to the southwest is a Training Grounds building, where you can upgrade your hunters. To the west is a Gold Mine and a core dwelling, just what you need.
When you have cleared the island and got a bit of an army up and running, head back out to sea. Take Wysloth north to the Lighthouse and flag it, along with the other stuff you find there. Make sure you head north after flagging the Ore Pit; the island is bigger than it looks at first glance. Most importantly, there's a town. Get it and have Danan come over as soon as you can (there's a shipyard by the fort; use it to build her a ship). South of your starting island is a stack of sea elf pirates who will join you for free. Get them; they're part of your story. I used Danan to pick them up on her way to the town.
Visiting the Whirlpool between your two islands, you get a bit of story development. Keep exploring and be on the lookout for those obelisks.
North of your town is a small island with some nice resources, including a ring that gives you the «summon elementals» spell in combat – great for avoiding casualties. There's also an Elemental Conflux building, which is good, but requires resources.
South of your starting island are some other islands, one has another fort and Gold Mine on it. You should try to control this area as soon as possible, but beware that taking a fort will cause the enemy to come for you. Here is where having multiple heroes really helps. On the southern island is also an obelisk.
 Once you have control of the western part of the map, go to the centre. In the middle of the map there is a Sylvan town (Faillan); the other towns are Stronghold, so you should prioritize taking the middle one first. To get there, first sail east from your town, to find an obelisk.
Just south of that is a Crystal Cavern, which is really useful. Clear out that island and then sail southeast towards the Sylvan town. Once you have that, start building it so that your creature growth doubles. This can be built to capitol, so you also get lots more money. After this, go south, rebuild the bridge and flag the champion dwelling. Due north of your new town (on a neighbouring island) is a Bloodforge, which provides an important resource. Grab it, and you can explore that island too.

North of this island is a Stronghold town. It's time to kick some roaming enemy butts. Taking that town (Mwanya) gives you control of all the surrounding mines and also should put a dent in the enemy's recruiting capabilities. East of Mwanya is another town (Mchanga) that you can also take. Why give the enemy time to rebuild and regroup? Now that you have them on the run, go for it. With a total of four towns under your control, gold wil flow in and you can build several large armies, strong enough to fight your enemies on several fronts. There's a fort south of Mchanga – take that too.

Southwest of your capitol is another obelisk. Further southeast is another Stronghold town, called Mweusi. It's the last one, and if you take it, the «blockade» quest ends and you will be deemed to control the whole area. There is another fort and an obelisk to the east, though.
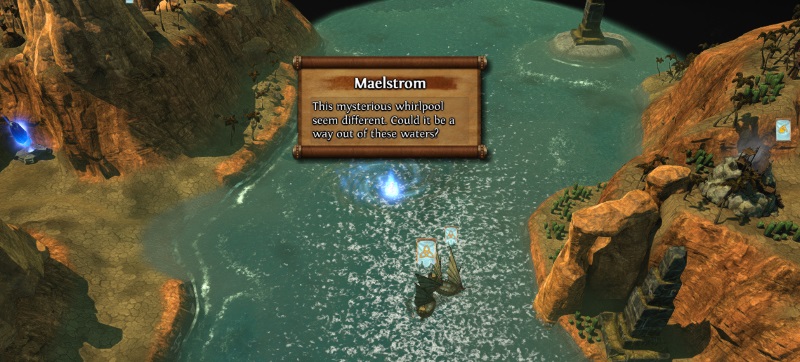
Once you have taken all the towns or found all the obelisks (or both), you are told to go to a special Whirlpool. It's between the two northern Stronghold towns. Heading into it ends the map.
| Comments (1) |
- by Kalah
Welcome to the Sylvan campaign. This faction is all about teamwork, focusing on speed, luck and morale. Since positioning and unit cooperation is a big deal in this faction, it seems to me that the Quick Combat option makes you lose a lot more units that playing manually.
Let me give you a quick run-down on the creatures: pixies are fragile, but quick and will get no retaliation once upgraded. They're actually great units since you get so many of them cheaply. Dryads are interesting, as they're not very powerful, but work as a support unit, giving defensive and healing bonuses. Position these right and you have a very good team player. Hunters are very powerful shooters since they get double attacks once they're upgraded, and since they don't cost too much either, they're probably the best ranged core creature in the game. On to the elite: druids are very good, but their cost and growth rate make them less important in the army than the hunters are; blade dancers are very quick damage dealers who can hit all neighbouring units. They aren't very resilient, but the can't be flanked. The moon doe aren't too special, but once you upgrade them to sun deer, they have an incredible +20 morale and luck boost on the neighbouring creatures. Having played the faction for a while, one thing you notice is that this creature keeps getting extra turns. The faction does have a dragon in their army, and its particular ability is regeneration. These things just never die, unless you kill them fast. The treants have ranged attacks and are very strong units that can also provide cover for allies. One good setup is having a sun deer and dryads stand next to the hunters and treants, so they get boosted by their presence.
So, map 1.
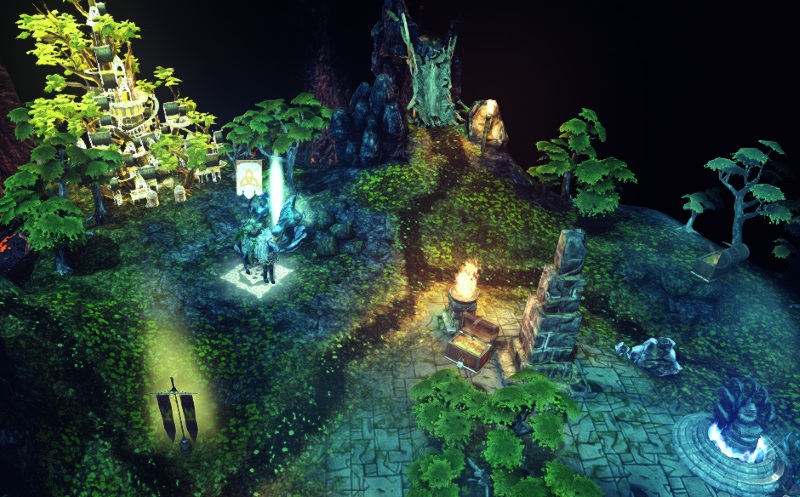
So, map 1. You start off in serene, exotic surroundings, with your starting hero Wysloth. Wysloth's main skills are Defence, Leadership and Nature's revenge, and those are all good to level him up in; the first two are general skills that work well with any living armies. Nature's revenge is about «marking» enemies and gaining bonuses when attacking those, and it may seem like a silly skill (and the novice level skills are), but if you get it to the top level, we're talking critical hits on every hit for those marked creatures. He also has access to air and earth magic, I suggest getting him air magic since it's a buff for the hunters he will eventually have in his armies. He needs mana, so make sure you get some skills increasing that. You should also get some Offence.
At the start, you're on foot. Not much to see or do but move north to get yourself a ride in the form of a unicorn. Head west to find some starting battles and free creatures to get some experience. There are also a couple of nice items around, so fight your way to them. As you follow the moving stags, you come across some big stones and more free creatures. Keep moving west until you find Danan. She's lonely, so go talk to her. (Note that Dragon Nexus, it's needed later when you run out of mana). She wants you to follow her home. Do. When you reach her town to the north, you will get some development in the story and also gain access to a town, and Danan will join you.
Start building your town. Get a magic guild up so you can get some spells eventually. Make sure you get hunters asap. Keep exploring the island, picking up resources and fighting creatures. There are mines all around. Get them all; you need resources. What for? Well, there's a quest: build a special ship. No rush, though – keep exploring and gaining levels.
Look around the map, take the easiest fights first and keep going back to town for reinforcements and go back out for the harder ones. There is no hurry, so use this opportunity to learn about your creatures' abilities and what kind of spells go well with your army. Obviously, «stoneskin» and «storm arrows» are good in general.
When you have cleared out the island and grabbed enough creatures, head to the shipyard east of your town and head out on the ocean blue.
 Due east is the maelstrom (your quest target), but you can explore some first. There are small treasures around, and if you try to go northwest, you will see the cyclops that the elves talked about, blocking your escape so you can't go that way. Go back. When you're ready, head through the Whirlpool and go to the eastern shore. Head up the path and attack. It's a fairly easy fight, just 5 cyclopes and a local guard.
After you have taken the fort, head back to the ship and sail it out to sea. The map ends when you head through the Whirlpool out there.
| Comments (2) |
Page 1 of 23