Walkthroughs
- by Kalah
 Yes, map five. Surprised? There are indeed five of them in this campaign, unlike the others. So, you're back in Nar-Heresh with Zenda and Charna.
There are three missions and they are fairly straight-forward:
- Eight places of power (they look like dark obelisks) need visiting,
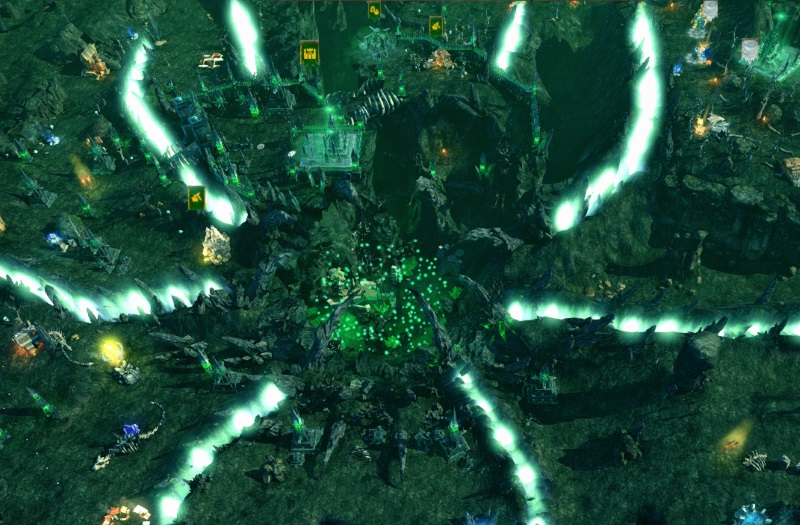
- you need to kill a total of 4000 creatures (enemies or your own, it doesn't matter) to feed the Well of Souls just south of your town,
- and Charna should find and arrest Ludmilla for her lack of faith and loyalty. (How dares she not agree with your plan of killing absolutely everything?)
You should focus on visiting the eight places; the reward includes over a hundred vampires. Killing things is just something that happens on the way, and every time you kill a stack of creatures, it will count towards your quoate of 4000. Weirdly, creatures that are already dead, like skeletons, also count to the total.
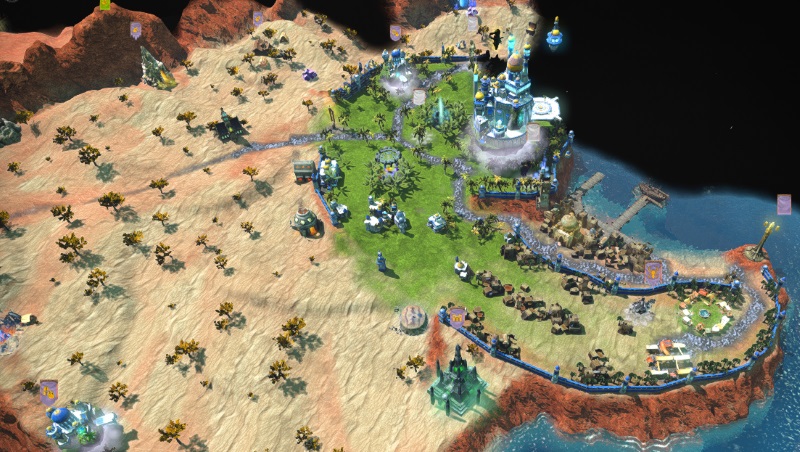
Start building your town (even though you may already have built this town fully in map #1 but whatthehey) and sending your heroes out to explare and flag mines. Set Charna as governor of the town to get extra bonuses. Focus on getting mage guilds and dwellings up and running.
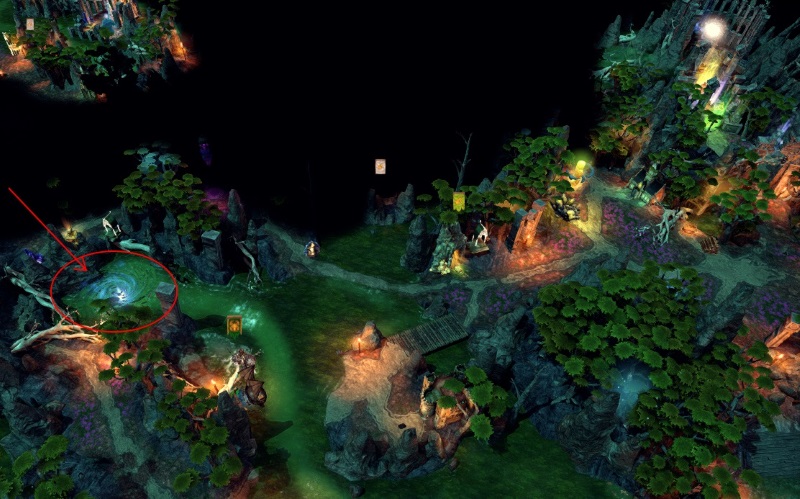
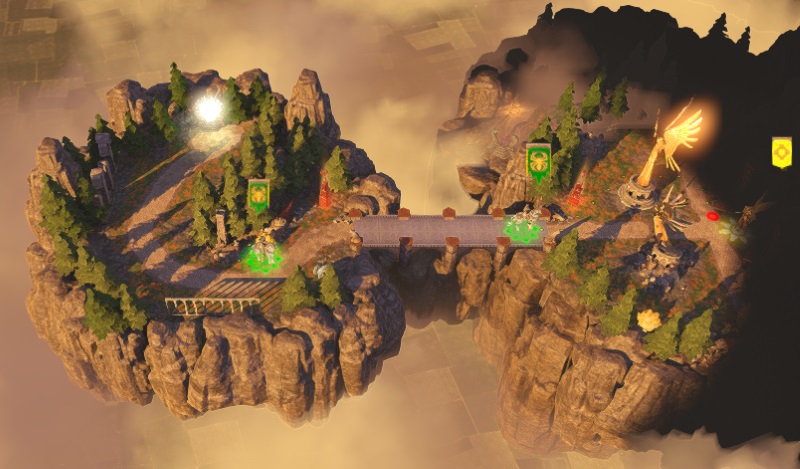
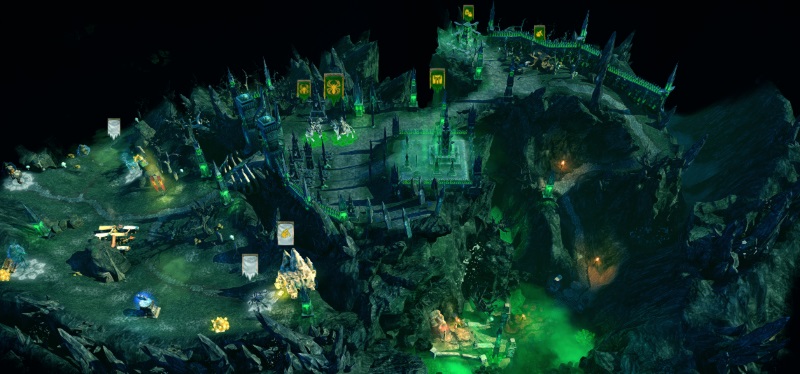
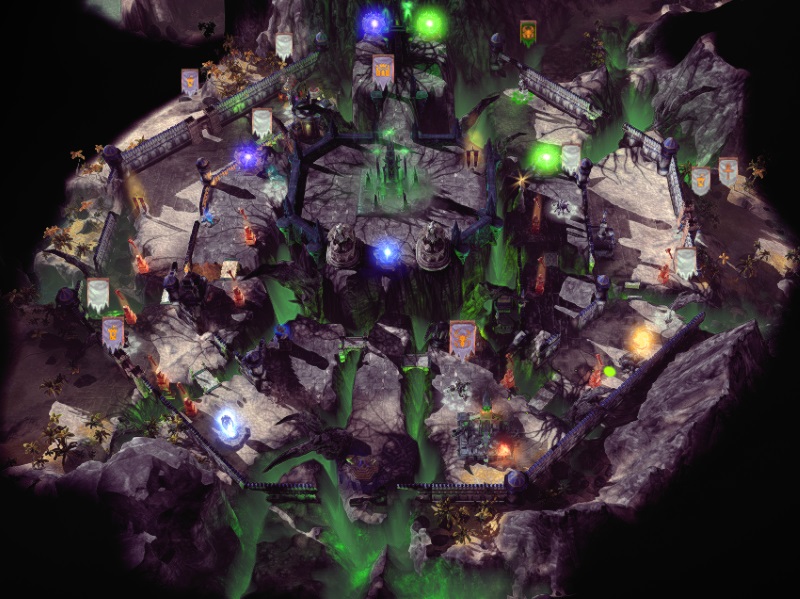
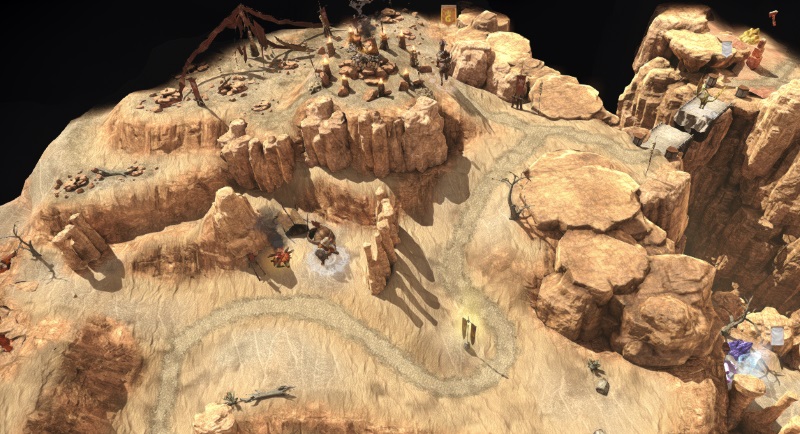
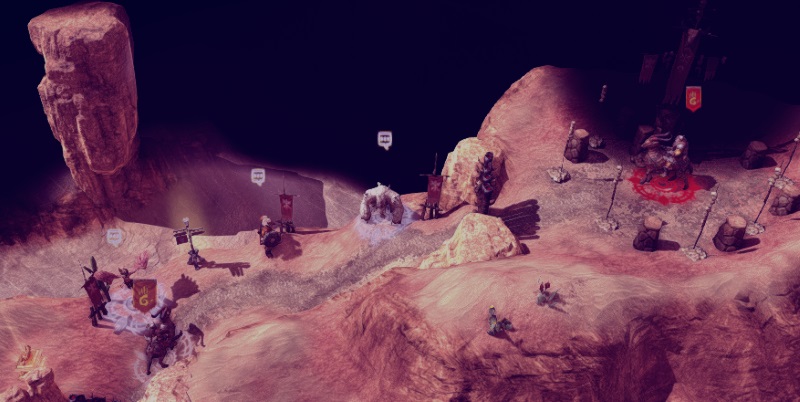
There's an artefact to the east, increasing your necromancy skill. Necromancy is important – with all those fights waiting for you, you can get lots and lots of skeletons. The Gold Mine to the west is, of course, also quite important. After claiming that, you should head north and find the first quest object (marked with an exclamation mark) as well as clearing out the area. If you're wondering where to find these dark obelisks, look at the minimap or simply follow the ravines out from the Well of Souls; notice how these light up when you activate an obelisk.

West of your town is a fort and an Ore Pit. Keep moving through the southern bend, then east until you reach an Observatory, then keep going and head south. There is a great structure down there; a Cartographer, which reveals the whole map for you. Once you do that, you can see Ludmilla to the east with a Necropolis town. That's your first objective now; the yellow player can wait.
White player has two Academy towns; one to the west and one to the east. Once you move east and take that town, you can soon move north to take Ludmilla. If you're running out of troops, call in reinforcements with the «instant reinforcements» spell – especially useful when you're standing next to a mana booster. Also, keep an eye on the yellow heroes in case they invade your territory from the north; be ready to jump home if needed. Anway, take the southeastern town, flag the mines around it and then move north to «talk» to Ludmilla. Have Charna do the meeting. Take Ludmilla's town, then move to the nort of it to visit another obelisk.
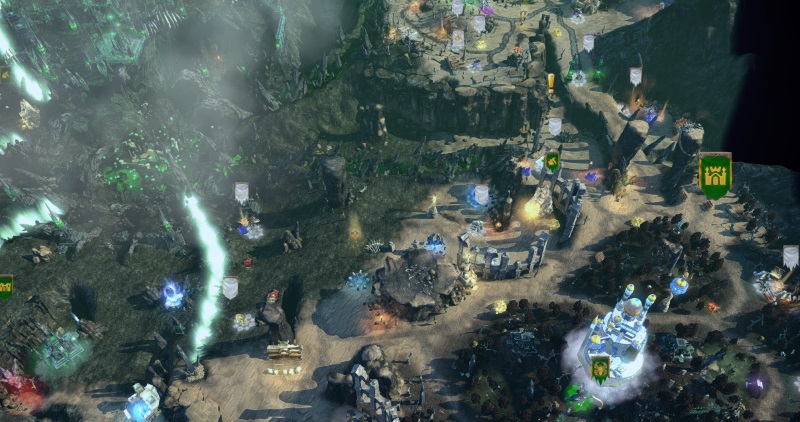
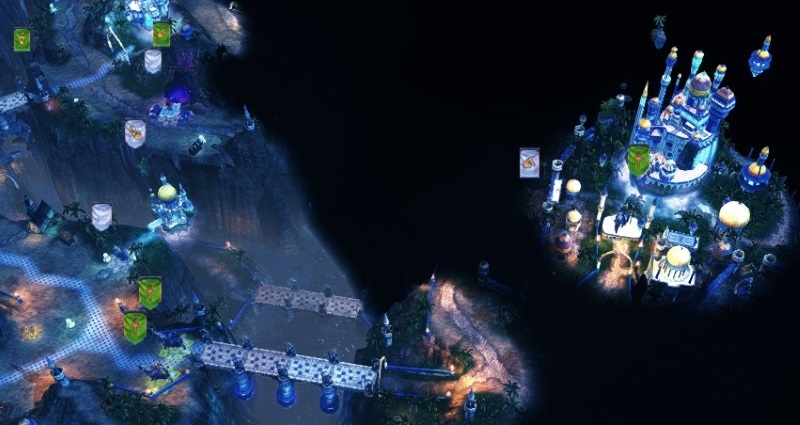
When you feel ready, move north from your starting town and take the Haven town of Desquite, giving you control of the area and more resources to play with. You don't really need it, but why not. Take the fort to the east of it as well, then move south to find another obelisk. Keep visiting them until you have them all. Once you do, everything lights up and you should return to base.
You can keep fighting neutrals (with necromancy, your army will probably grow from it) and flagging mines too, but if you have killed the 4000 creatures you need, you can also go straight for the quests and focus on getting all the obelisks. Once you have visited them all, you should return to the Well of Souls with the Deadwood Staff. Once there, the map is completed.
And that is the end of the Necropolis campaign.
| Add comment |
- by Kalah
 This time, you start with Ludmilla and Charna who have been sent on a quest to retrieve the Deadwood Staff from some angels who have hidden it in their reliquary. It's not a head-on assult, this, that would be pretty suicidal. So... sneaky it is. Shall we go?
The way I see it, there are two ways of solving this map. What you're supposed to do is gain access to a portal, which is in the centre of the map. To get to it, first you have to visit several altars to unlock the seals. Once you're through, you are taken to another level and the mission is to sneak your way in with your heroes. I'm pretty sure you can do all of this (find the altars, unlock the seals, enter the portal, sneak into the angelic reliquary and run back out as fast as you can) the sneaky way, by running and dodging the roaming Sylvan heroes. You do have some difficult fights near the end, though. I, however, used a different approach: take the Sylvan towns, beat their heroes into submission and take control of the whole map... and then go through the portal. This walkthrough will therefore speak of that approach, but you're welcome to try the other.
 Anyway, let's get started. Start sailing and split up; one hero goes to the north and one to the east. Fight neutrals when you can (and pick up those who will join you), but try losing as few as possible. If you win, you might get some back through necromancy, but even then it's important to conserve your troops as reinforcements aren't readily forthcoming. Pick up resources too. Flotsam is not easily spotted, so keep an eye out. As you follow the coast to the north, an elf will spot you. Don't worry, no danger yet. As you keep moving east (you have to), you'll find a dwelling. Flag it. Keep exploring. As the path turns north again (meaning you can go no further east), you will come across the series of magical gates that need unlocking.
Quite close is the yellow player (the elf), and he will attack you if you get too close, so stay on the water when he's near. He's not far away, so instead of going ashore near these gates, continue westward on the water until you reach a whirlpool. Head on into it.
When you arrive on the other side, move west and presto! you find a town (Eldam). The downside? It's Sylvan. Oh, well, beggars can't be choosers and it does mean money; besides, you can level up your heroes in Diplomacy if morale becomes a problem for your Sylvan critters.
Shortly after you take the town (or before, if they spotted you), one of the yellow heroes will come for you. Run, Forrest, run. To the north of the town is the Altar of Sylanna, which opens up the green seal. Just east of that (and north of the Lighthouse) is another whirlpool which leads back to the locked gates. After I jumped in there, the Elven hero seemed to lose track of me, but I'd still keep a waking eye about. There is every chance that you could be ambushed. The way to deal with this threat is is build that town fast, and also to build a town portal in it so your heroes can escape by use of the recall spell if they should find themselves without a boat. There is another Sylvan town (Sinlad) in the centre of the map, but it's heavily guarded. No hero there, though, so I could pass without incident, and just west of it there is a sanctuary building. I popped in there when I saw the aggressive Jenova approaching.
The northern part of the map is interesting. In addition to a series of boosters, you will also find a second town (Damfail) which is guarded, but lightly, so you can take it. Ghosts are great for storming through city walls. There are also a few stacks of free creatures strewn about, so make sure you hold the cursor over all the creatures you see in case they'll wish to tag along.
When enemies attack your newly built towns (the northern one in particular seemed to attract them), there will be several challenging fights. You need as much fortification as you can muster; towers that shoot at the enemy; any creatures you can make available; any boosters outside the city that you can visit before the assault. A typical thing I noticed, though: if you enter the town, the enemy heroes are less likely to attack; they don't seem to want to assault a fully fortified town with the hero inside it. As the enemy approaches, you can also lure them to turn around and go for the other town instead, by having your hero leave that town. Suddenly they will see that a town behind them is without a hero, and turn away from the one that has one.
So let's say you manage, through quick building, fortifying and running away if needed, to keep hold of your two recently acquired towns. Then you should soon be able (as your army of Sylvan creatures grows) to take the centre town (Sinlad). When that is done, you can keep building and move towards the southeastern one. In the middle of all this, you're probably wondering «where the frak is that next altar!?» It's off the beaten track; far far east, here:
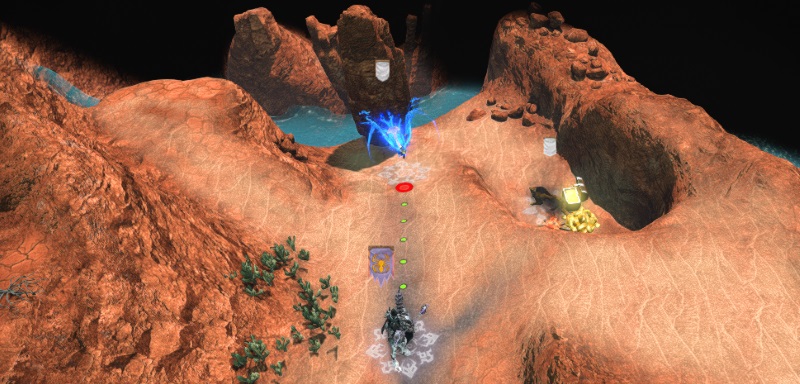
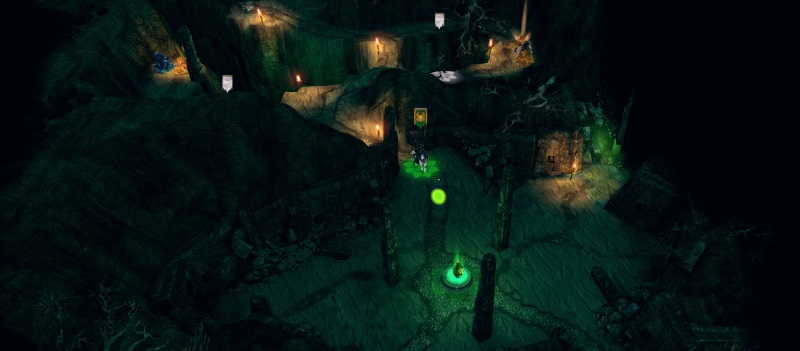
Just south of that altar is an elite dwelling and just southwest of that, an unbuilt town. Take. Keep going south. Keep going until you see snow. Head up the hill and find the last altar near the southeastern corner. Check it out:
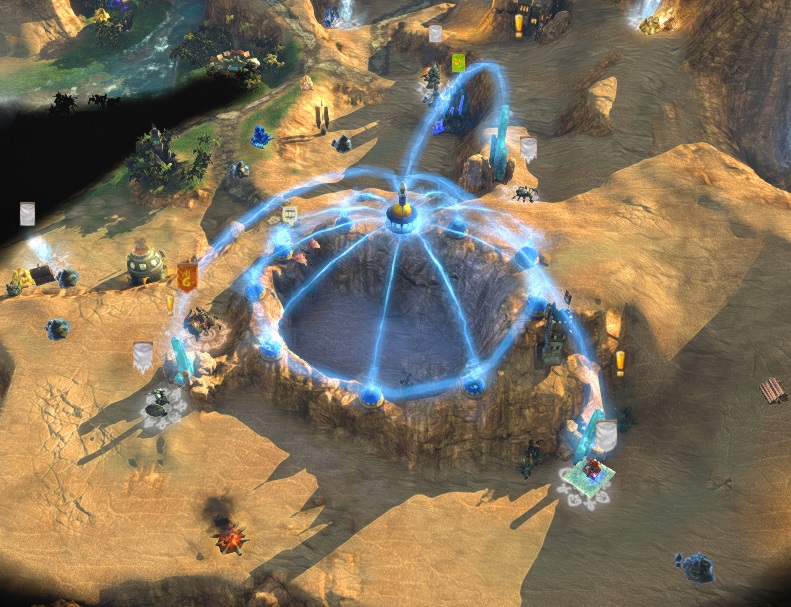
When you have visited them all, head to the gate system in the centre of the map. Bring both heroes and loooots of forces. You will find yourself in angelic, lofty surroundings.
Looks lovely. Shall we knock on the door? Oh, there's an army guarding the gate. Chaaaarge! Easy. Still can't get in, though. Walk around to one of the sides of the castle. Hop through the spirit gate. Mop the floor with any armies you might find standing around, just for fun and experience points. That is, if you have the troops for it.
When you're ready to enter the building to find the Deadwood Staff, activate the Solar Sigil in front of the gate. You may notice that if you walk one hero up to the sigil, and then try to walk that same hero up to the gate, the gate shuts again. Well, you have two heroes, don't you? Send Ludmilla up to the gate and have the other activate the sigil. It has to be Ludmilla who enters the vault and steals the staff, so give her your strong army and walk up to the gate. Charna can activate the Sigil. When Ludmilla enters the vault, alarms sound. All gates are shut. Angels are coming fast. How to get out? Have Ludmilla walk around to the big wooden gates and activate the banner next to them. That staff sure packs a punch. Go through both doors, fight the neutral army next to the sigil for the front gate, activate said sigil and the front gate is open to you. Run to the portal that brought you to this level; if you're fast enough, you may not have to fight anything at all.
Once you escape, the map is completed.
| Comments (2) | Add comment |
- by Kalah
You start as Adar-Malik, on a mission to recover Vein's skull from those pesky wizards. The target is in the northwestern corner of the map, and you're in the opposite end, but since you aren't likely to succeed by simply walking in anyway, let's start by building your town and exploring your territory.
General tips: You should build town portal in your town. Then, when Adar-Malik needs reinforcements, you can just magic your way home to get them. Also, since you're really poor in the early stage of this map, try to build some wealth generators such as the town hall and resource silo. Spells are also important. I find the «fire wall» spell particularly useful, so level up your skills to boost that. Get the mage guilds up and running. You can defeat lots of neutrals here just by hammering away with fire spells. You can also call in reinforcements (without using a caravan) with the «instant reinforcements» adventure spell, that's really useful; you can get that spell at the shrine just east of the stables. As for other skills, I would focus on necromancy as it strenghens you while it weakens your opponents. I would also focus primarily on core creatures and not bother building elite dwellings until after you have control of mines. Last bit of general advice: go for gold early on, not experience.
As you begin exploring, you will soon notice that you're on an arid rock with no mines and limited resources, and a Simurgh standing in the way of further exploration. There's no other way: you have to fight this thing. I'd use your hero's spells for all they're worth.
When the bird has been defeated, head onwards and now you have a choice as to whether you go south across a bridge, into yellow player's extended territory, or continue west. If you go south, there is a fort way back to the east (almost exactly due south of your town), but if you go for this, lots of enemy heroes will come for you and take it back. I counted a full dozen heroes chasing. Going west, however, I did not experience this. So instead of taking the southern territory immediately, I recommend going west and fighting neutrals. Yellow player has a Haven town called Ziyad directly west of your starting town. This should be high on your list of priorities, but the enemy is strong so you may need to head back to your town to gather creatures. If you do manage to take it, beware: once you take a town, those spells you use to call reinforcements or withdraw back to your starting town will no longer work; the spells are applied to your nearest town. You can also move north; there is an Observatory which gives you a view of some of the area. I did eventually encounter a strong hero, so I retreated with the town portal spell to get creatures from the town. After getting some creatures, I went back out there and this time I crossed the bridge into the southern area. Fight the dragon, move on south and clear out this lush oasis. Moving eastwards, you will eventually find a fort, which you should take and rebuild to gain control of the mines in the area. Go and flag them. Once you own these, you control a Sawmill, a Gold Mine and an Ore Pit – all the three staple resources. You can now really start consolidating your position; use resources to buy as many creatures as possible.
 If you have not yet taken the town of Ziyad, chances are the enemy will come for you. They really don't like that you control that fort and they want it back. Here are some good tips if you can't simply beat all of them: you can hide in the fort, you can summon instant reinforcements or you can run away with town portal if you want to. I managed to beat three big armies before having to run away from the fourth and concede the fort. Then I would just come back and reclaim it later. A more lasting solution, though, is to take the town to the west, as that seems to put a dent in their recruiting capabilities.
The dozens of heroes roaming all around is one of the real problems with this map. They will retake the forts if you leave them unguarded, and the same applies to towns. What to do? Well, you can hire heroes yourself. Some may be "stolen" from the enemy; if they're recruited by you, they won't be available to anyone else. Cool, right? The other thing is that sooner or later the enemies will start to run out of troops, whereas you will gain more and more through your necromancy skill. That's a skill you should really focus on. Eventually, you will have several heroes with armies guarding your towns, and the enemy heroes will start to run around with small or no armies at all, unable to take anything back.
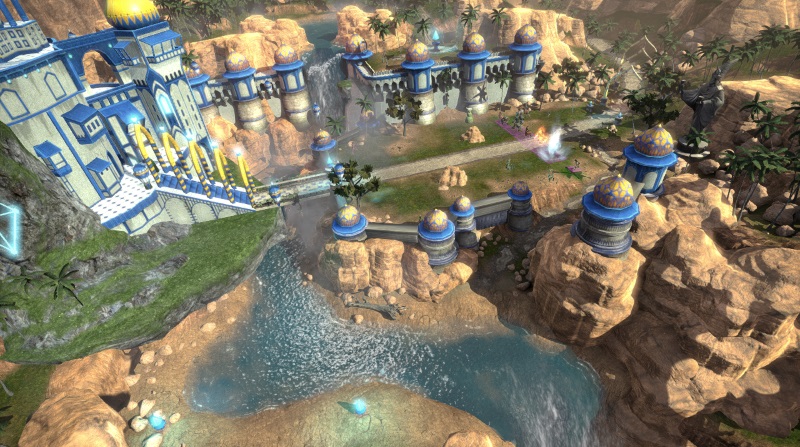
North of your first town (go west first, then north, then east), you will find another fort (Muhiit Qsar). I found it protected by small armies only, and there are several mines around, so you should go for it to gain control of the area. Just north of the fort is an Academy town (Al-Amal). Take it! It's actually a really nice port town, and you can send out some ships! You can also start using Academy armies (disciples and rakshasas really kick butt), or you can take those recruits to your Necro town and turn them into undead units.
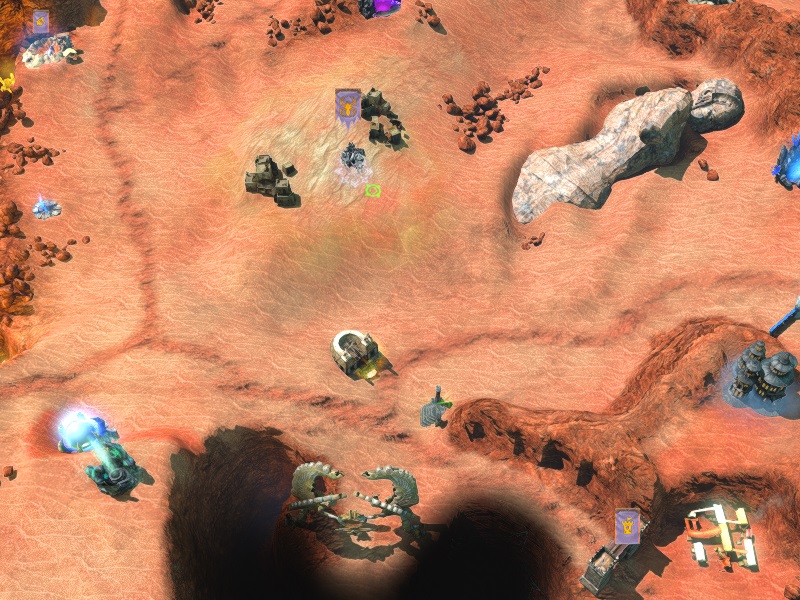
Southwest of this new town (down by the water's edge) there is an obelisk. Stop by, but make sure the town isn't taken by the roaming enemy heroes; there are a lot of them. While down by the water, head south and visit the Altar of Arkath too, so the seal is possible to open later. The seal is to the northwest of Al-Amal and leads to a Dragon Utopia.
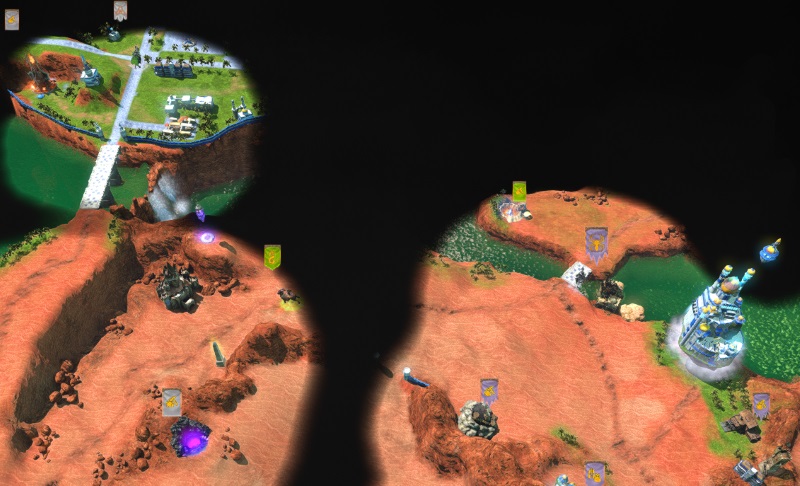
Once you are strong enough to take and hold enemy towns, you should be able to hold all three eastern towns, thus controlling the eastern part of the map. You should soon be ready to move westward, but first, let's explore the possibilities on the water: When you manage to procure a ship, head north along the eastern edge of the map to find an obelisk. Further northeast there is a whirlpool, taking you to one of the inland lakes. Don't go too far north, though, that's enemy territory, and if you lose a hero there, they'll take your boat and have a shortcut down to your lands. If you bring a proper army, you may have more luck and the thing is: there's a fort up there, and the Altar of Ylath just northwest of that. The corresponding seal is to the south of your Haven town and beyond it lie some nice artefacts and some Shantiri ruins, and an obelisk.
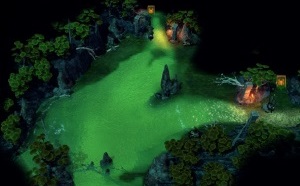
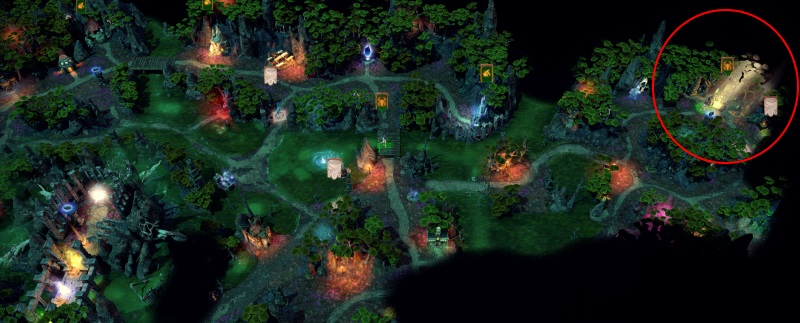
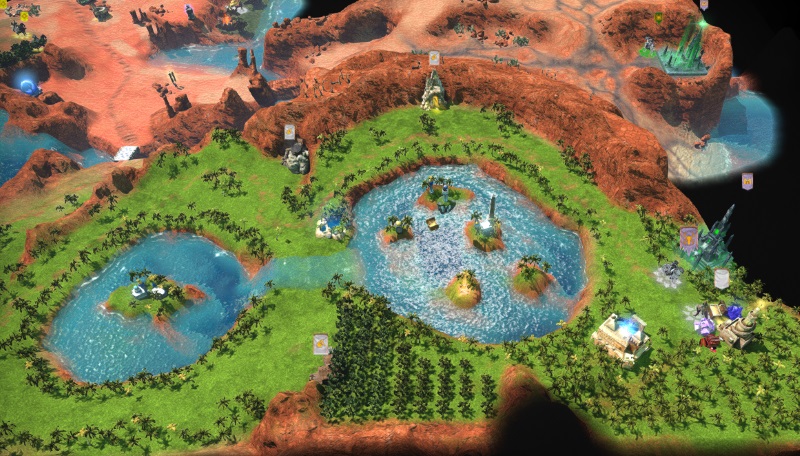
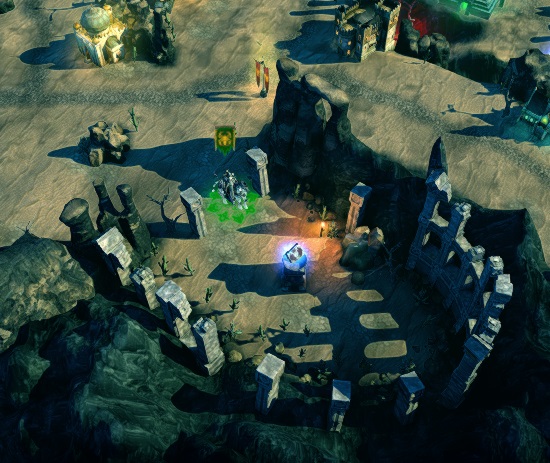
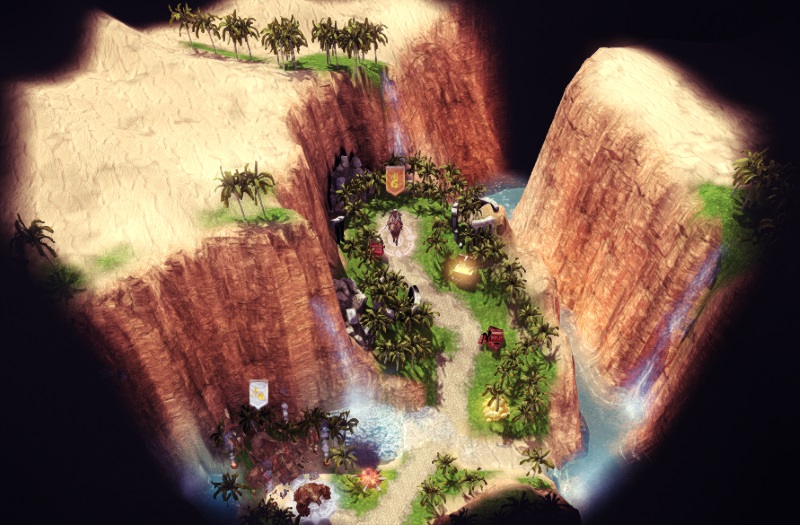
Anyway, now that you control the east, let's go west. West of your Academy town (you have to go around the mountains) is a Gold Mine. That's one thing you really need: more gold, so go for it. There's a magic shrine nearby too. After that, keep heading west past the Haunted Ruins until you reach a garrison. You know what to do with it. Past the garrison are a pair of sphinx-like statues (taken straight outta «The neverending story»), and a cutscene gives you a hint that you can't go south until they're dealt with. Westwards it is, then. First, though, let me do you a big favour. Since you're here. Take a look at the picture below. See where my hero is standing, just north of those sphinxes and the stables? That's where you can find the Tear of Asha. Sod the obelisks and tell me I'm awesome.
Now move west. What have we here? Another town? Mine now. It's called Thaqib and it's another Academy town. You can really get some Academy armies up and running now. If you go north from Thaqib, you will approach your final destination; I wanted to explore the whole map first. Go south from Thaqib if you want to find an obelisk, and then go northeast from the town to find another one.
Heading east from Thaqib and then north as you reach the Blackfang Hideout, there's yet another town (Nudhar). It's problematic keeping hold of all these towns, that's why you should hire more heroes to guard them against enemy heroes with small armies. As they lose more towns, the enemies should have their recruiting capabilities hindered too. Many heroes will wander around with small armies (or none at all). With a total of three Academy towns at your disposal, gold and creatures are now available in vast numbers while the enemy is severely weakened.
At this point I started walking around with my main hero and an army of 1000+ skeletons, nothing else. The necromancy skill makes sure the army doesn't get depleted. My other heroes had Haven or Academy units, or elementals picked up from the confluxes.
To the east of Nudhar is a Bloodforge. Move north from the town to find a level-up shrine. Nice for your main hero. Go east from there to find another obelisk. Keep heading east and then north to find a fort. This is the same area you can access from the sea but should not take without a big army. At this point, however, it is easily controlled, and with that, you own everything except the final city.
There's still the matter of passing those guardian statues to the area in the south, however. Guess what, though: you're not supposed to. Insetad, attack the final city, Al-Jamasht.
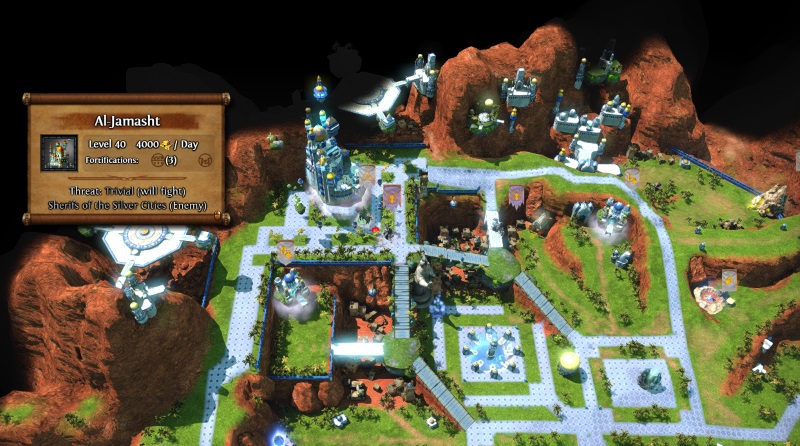
Well, crap. Things are going to hell in a handbasket, aren't they. Don't worry, even though you are now the hunted traitor and your once-adored hierophant seems to have lost it completely, this is a story to be told, remember? This is what's supposed to happen. To make a point.
After the cutscene, run south. The stacks of grim reapers will not chase you. Go through the pass guarded by the statues. Keep heading south and you will complete the map.
| Comments (9) | Add comment |
- by Kalah
This is a classic Heroes map where you must simply clear the whole map and defeat all enemies. With a couple of side quests thrown in. With Anastasya busy watching from beyond, you play as Zenda at the town of Nar-Heresh.
You have no resources, creatures or spells to speak of, so start moving north to flag mines and make your way east and then south towards the underground. Enter it and move east. You will see a big spider carrying a vial of venom, that's what you're after. However, every time you get close, the spider will run away with it. The text on the dark obelisks is a clue. There are three of them spread around the room,; interact with all of them and the spider will stop running. Grab the vial and the spiders who will join your army. That's the first quest completed. Clear the underground of loot and head back upstairs.
Now you get another hero – Ludmila. There are several quests:
- building a capitol in the town,
- flagging 17 mines and
- recruiting 6 stacks of refugees scattered around the map.
Let's go. Move west and start flagging mines, fighting neutrals and picking up resources. There is also a fort you should take and rebuild. When you follow the road onward, you will encounter Adar-Malik, who will join you. A new quest follows: to get rid of the rivals in the valley. It's a fairly straight-forward task so far: gaining control of the map and fighting the competition. A tip: make sure you let your secondary heroes do some of the fighting; once one hero has reached the level cap, it's useful to let the others fight neutrals to gain experience. Whenever you find a stack that is marked as the refugees, let them join your army.
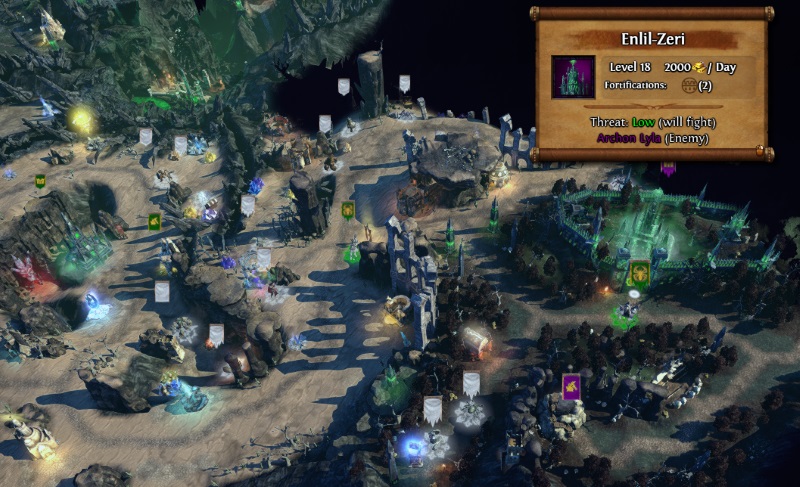
Just east of the spot where you run into Adar-Malik there is a fort. Take it. The enemy heroes might come running to fight you, so be prepared. The purple town (Enlil-Zeri) is to the east; I went for that one first. You can clear the area to the west first (there's a fort, but no town), but I went straight for the town. Once you own that, you get the resources under its control, such as ore and crystals.
From the town: refugee stack to the south, obelisk to the northeast. To the north is the red player's territory. Walk between the two stone pillars to get there. If you wait long enough, he will probably come to you. If not, move north and take the red town. Shouldn't be too hard with a decent army. Further north is a stack of refugees – you need those, remember. There is also another obelisk – the second of three.
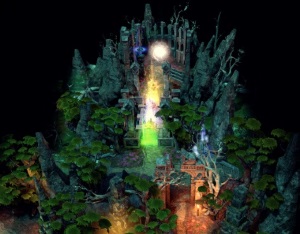
When you have killed both your rivals (something I found ridiculously easy), that particular quest is completed. Still, there's more stuff to do. Remember that fork in the road when you came from the north and you went east instead of west? No? Well, your minimap should tell you something by now: there is more stuff to the southwest. Head in that direction. The road splits as you move past an Ore Pit; further west is a fort which you should take. Then keep clearing the area and pretty soon, you'll find the third obelisk. The Tear of Asha should be here:
The map is completed when you have eliminated both rivals and found all the refugees. Shouldn't be too hard, just clear the whole map and sooner or later you will have done it.
| Comments (2) | Add comment |
- by Kalah
Welcome to the Necropolis campaign. This faction is special. There are no morale effects, so you cannot boost your own creatures that way, but nor will they be affected negatively. You cannot heal your creatures either, such light spells are just too far away from everything these creatures stand for. There are some spells you can use to buff your creatures, of course, but mostly, this faction's strategy involves weakening the opposition.
As far as creatures go, here's a quick overview: skeletons are absolutely useless at low numbers... but thanks to the necromancy skill you can get lots of them. Ghosts are all right, I guess; their greatest usefulness lies in their ability to fly through obstacles, while the spiders are fast and carry venom. Liches are great shooters, but they're fragile; lamasu have a good crippling effect to their attack but it's not the best of units; vampires are extremely powerful once you get some decent numbers of them, but they require special resources to get hold of and they're very expensive. As for the champion creatures, the grim reapers are great against other champion creatures due to their instant-kill attack, while bone dragons are more for show.
Let's get started. You start out thinking how lucky you are; you have a fully built town, loads of creatures in your army and controlling a level 30 hero. That's just the start, however. This story is about the fall of Al-Betyl, so your job is not to win the upcoming battles, but to delay the enemy as much as possible, so that Anastasya and the other fleeing members of the Spider Cult can escape.
Start off by popping inside the town and buy war machines, creatures etc. Then move north (not through the one-way portal) and interact with the Defence Tower so Anastasya can escape. Below I will deal with the heroes separately, while you must of course make sure they both act each turn.
Anastasya should move to the east, then north and then follow the western path until she meets Adar-Malik. Talk to him and head into the tunnels. Move east across the bridge. Then you can choose which path to follow: the northern path is shorter but has a more difficult fight; the lower path only takes you past some easy-to-fight cabirs, but the route is slightly longer. Since time is of the essence, I chose the top route. The battle wasn't that difficult anyway. Near the harbour are some people you can talk to before getting on the boat.
Vein should go through the green two-way portal once he has released Anastasya. Picking up creatures and boosters as you go, destroy bridges behind you. The main army will arrive through the northwestern garrison. The other armes are insignificant and can be fought. Move clockwise until you reach the blue two-way portal, then take it and get back inside the town. You will have noticed that several heroes are beginning to attack the garrisons and rebuild your bridges. Stay ahead of them and get yourself inside the city walls so that the main enemy army can't get to you before Anastasya has reached her excape route in the underground. Since you know that the main army comes through the northwestern gate, you can use this to plan which bridges to destroy. The most important thing is to avoid being caught by the main army before Anastasya have talked to the people at the harbour.
Once Anastasya is on the boat, it's time for the last stand in the city; the battle begins immediately. You will lose this fight no matter what you do, but you can have some fun if you want to. Map completed.
| Add comment |
- by Kalah
Time is of the essence in this map, so keep tabs on the Quest log. You also have to do several things simultaneously. You find yourself in a lovely shantiri scenery with your three heroes, who have to work as a team in order to complete the main quest. The teamwork involves Kibwe helping Reem in the underground, and then Imani must help them both get back to the surface. The main quest, however, is to assault the main Academy town within 4 weeks. To do that, first the trio must split up and create a distraction; two targets must be taken (once one is taken, the other must be taken within two days) in a coordinated effort. This walkthrough will deal with the three heroes separately and their complete missions, rather than going back and forth between them. In this map, troop preservation is very important, especially for Kibwe and Reem.
First things first. Troops. Can't do anything without that, so use Imani to capture the town just southeast of your starting position. After that, head east to pick up free creatures and go across the bridge to capture the Gold Mine, Sawmill and Ore Pit nearby. Be careful; there are patrols coming, and they have titans. After taking the mines, go north and find the Altar of Ylath. It allows Kibwe to break a seal. After this, I sent Imani back to town to pick up reinforcements, and then back east to take the Tribal Outpost fort. Once that is taken (and rebuilt), you can send reinforcements very quickly. Move south and plunder the Crystal Cavern. You need to plunder 5 mines in total to complete the side-quest, but it's not necessary. Do not move east and challenge the army guarding the bridge; it is unbeatable.
Keep moving Imani south. Fight the titans and touch the monolith there, watch the magic happen underground, where Reem is – she should now be able to board the ship there.
Reem starts out with a really nice artefact just north of her position, but before engaging the neutral guards, head south and pick up the free stack of creatures. Then move her south and capture the Gold Mine there. After clearing her area and moving across the bridge, Reem arrives at a garrison she can't attack. What to do? Well, just north of the garrison there is an underground passage. Head down and make your way quickly through the cavern, to find yourself on the other side of the garrison when coming back up. Go back towards the garrison to find free creatures, then head east to the two-way portal. Now you're back in the underground, with more free creatures and loot. You have to wait for Kibwe to visit the purple altar to go any further. When moving onwards, you arrive at a ship which becomes available when Imani touches the monolith above.

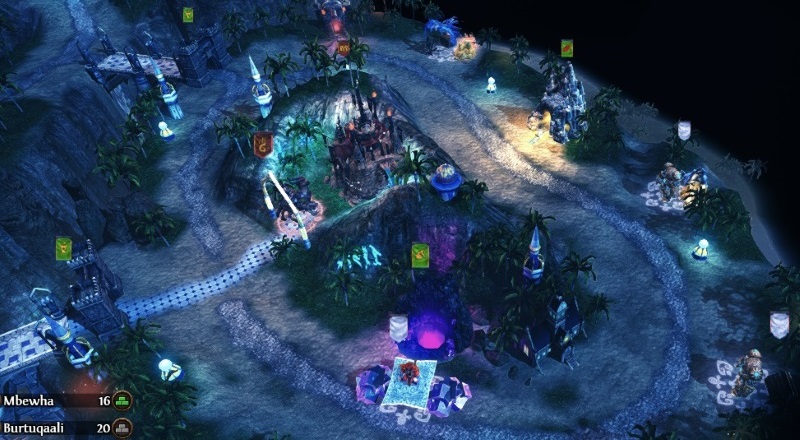
Get on board, head for the whirlpool and find yourself magically back on the surface. Head east and you find the town that you should be able to take if you have conserved your troops. Once Reem takes the town (Burtuqaali), her job is done. She can wander around and grab resources.
Kibwe, meanwhile, should capture the Ore Pit before taking the underground passage. After clearing the underground, he should take the northern stairway. Moving north, he finds free creatures and more potential fights, but you don't have to do them all. Remember: don't waste troops. Move on through the seal Imani has helped you with. Head into the two-way portal and find yourself back in the underground. Grab the free creatures to the south and visit the Altar of Malassa. When that is done, he can move through the seal and find the stairway leading back up top. When going up, it will be on the other side of the unbeatable garrison. He is right next to the House of Invention fort, but remember: don't attack that until you're ready to attack the southern town too. Instead, plunder the mines or something. When Reem is ready to attack her town down south, attack the fort with the innovative name, rebuild it and the distraction job is done.
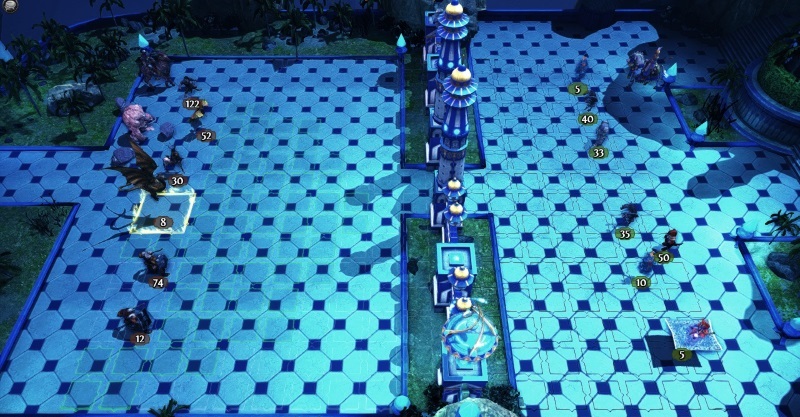
Once all of the above moves have been made, the two armies guarding the white bridge will leave, with the intention of retaking the recently lost town and fort. Don't let Reem and Kibwe fight those armies; you will lose and then the map is also lost. Running away the way they came is a good option. Keeping the town or fort is not a priority.
Now, have Imani cross the white bridge and go straight for the jugular: attacking Yasir in the town of Al-Jabr. First you fight Asad again and kick him to the curb. Then go for the final target. Yasir is pretty powerful – a level 30 mage – but as he only has a token army, you should win. And that's the end of the Stronghold campaign.
| Add comment |
- by Kalah
You start off with a fort (Kuwananjaa) and a couple of dwellings. As the newly uhm... «elected» tribe leader, Imani takes the tribe into the desert. Not much water there, so the mission is to find a way out before thirst and hunger overcome your people; you will lose 6 creatures each day, so get a move on. Since Imani needs to rest, you control the heroes Reem and Kibwe. Use Kibwe as your main hero (Reem can pick up gold in the desert), give him all your creatures and move northwest asap. Move until you find a broken bridge. Move around it and find the oasis. Once you're there, the daily death toll ends.
Pick up the free behemoths (behemoths, you'd be crazy to say no), but do not go further east yet. Instead, start clearing the western area of neutrals while trying to lose as few troops as possible. You could even return to base for reinforcements. Northwest of the oasis is an obelisk.

After you have cleared the site, go east. You will spot the Haven hero Melisande, who is on a crusader's mission to convert all heathens to dragon-ism. Convert or die, that's the deal. Once you spot her, she will make her way to you pretty fast, so get ready; visit both the Blind Maiden and the Rally Flag. Pass the flag and attack the Vigilant Sun fort. Rebuild it and wait for Melisande (she has the enemies' main army). When she attacks, fight for your life.
I managed to beat her since I had the defender's advantage, and in one of my most thrilling battles it ended up being a single behemoth left on my side against her last three stacks. I just managed it. After this, I sent caravans with units from the dwellings, and even though my one-behemoth army was attacked by the aggressive Melisande again before the caravan arrived, she did not have enough strength left to beat me. Tips for buffing the behemoths: regeneration, stoneskin and lightning burst.
With the new fort, you gain a foothold inside enemy lands. The main goal now is to take the Haven town of Castleroc, which is located in the northwest. Make your way slowly towards it while picking up as many resources as you can, and run back to the fort for new creatures shipped in by caravan. Roaming heroes may also have to be fought, which is why it may take a while. Eventually, you'll arrive at the town and take it. The enemy won't be able to launch a proper counter-offensive if you beat their main army already, nor will they have much of a defence in town.

Once you have it, you'll get access to a new Stronghold town (while losing access to the Haven town), and you will also gain control of the mines in the area. You can start building the town and consolidate your position. Visit the underground (stairway next to your town) to find some treasures. Keep sending caravans with reinforcements and clear the map of neutrals.
Moving north, you will encounter a wizard scouting army – a small contingent which should pose no serious threat to you. However, more are coming. Roaming Academy heroes will pop up and become stronger as time goes by. Keep building and fortifying your town, and keep shipping in caravans with troops. Just south of your Bloodforge there is an obelisk guarded by bone dragons. In the eastern part of the map, you will find some useful boosters and an Elemental Conflux. Soon enough, Asad himself will arrive with a sizeable army, but once you beat him, you get some development in the story and Imani becomes available.
There isn't much left, though; just hunt down the remaining Academy heroes and that's the end of the map.
| Comments (3) | Add comment |
- by Kalah
After the calamities of «the great orc raid» in the previous map, Imani split off from Jengo's orc army as she believes he is a bad leader. You start out in the wilderness with two heroes (Imani and Reem, the centaur) and a town (Kesho), but no money or resources. And I mean none. Zero. The main quest is to kill Jengo, so you should start gathering resources and building the town.
First, move south and talk to the orcs. They will join you after you have performed the funeral rites, so start gathering the resources to do so. Do not spend those resources building the town yet! With the hero Reem, you can walk south and talk to the harpies, but they will also join only after the funeral rites. Keep gathering resources until you have enough, then head back up to the mound and do your thing. Once that's done, speak to the neutrals, who will now join you.
Pick up resources, items and clear the area. Go south and capture the Ore Pit. Then visit the obelisk just south of you. If you visit the Observatory to the east, you can see a Sawmill and a Gold Mine. You can capture the mine, but the Sawmill requires control of a fort just to the east, so you have to take that before you take the Sawmill. After taking (and rebuilding) the fort, take the Sawmill. You may see some red heroes to the east so you can go and fight them too, but there are a couple of them that are quite dangerous, so be careful. Also, they might start rebuilding the bridges, so be ready for it when they come across. (If they try to come across before you're ready, you can destroy the bridge they just rebuilt). Town portal is nice, and also, if you kill the wyverns by the two-way portal, it will open a passage for you so you can use it to get back home quickly.
To the north is a small wooden bridge leading to an artefact and a two-way portal, but there is a mound of rocks blocking the path, so move east instead. Try visiting the oasis to get a new quest: finding the real one. Just keep trying to follow those strange-looking oasisesesssss ... (yes, I know it's «oases» but can't a guy have a little fun?) and soon you will come to a real one.
Flag the behemoth dwelling and clear the area. Then take the two-way portal to the south and look where you are! Further east is a fort. Take it and you gain control of an Ore Pit and two Gold Mines. Mmmmm... goooold... Just south of the fort is a town (Kuaminifu, go east and around to the south to access it) you can capture. East of that is a Blood Forge, giving you some shadowsteel. Sweep the area to the south and claim the champion dwelling before you visit the obelisk (second out of three).

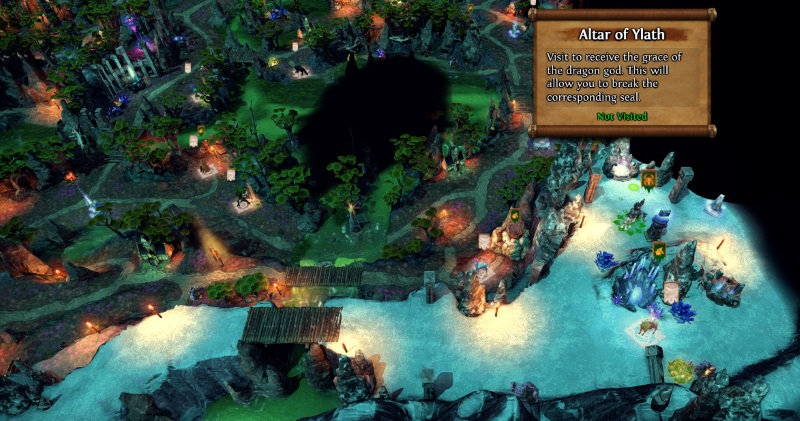
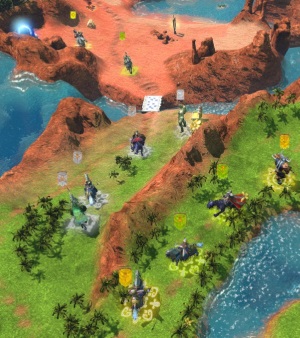
When you have cleared the southern area, look to the passage north – just between the Ore Pit and the Gold Mine. Just east of the Gold Mine there you can find the third obelisk, and the grail just nearby:

When you're ready for the final showdown, move through the passage and go west from there, and you will find the town Kulazimisha, your main objective. Bring a huge army and attack orc style: chaaaarge! This is what I brought to the table and poor Jengo didn't have a chance:
Job done. Or is it? No, now it's time for ritual combat. You find yourself on a hilltop, and you need some creatures, so talk to the ones waiting there to get them to join you. You can choose one of the three stacks. Choose wisely. I picked the ancient behemoths. Then I proceeded to make mincemeat of the enemy. Map completed. Well done.
| Add comment |
- by Kalah
Welcome to the Stronghold campaign. This faction is about strength; attack strength and bloodlust rather than magic - although you do have some access to that as well. As a general strategy, you can build strong hero attacks and focus on boosting your creatures with lots of attack and defence.
A bit about the creatures: The brutes are your rush units. They have good attack stats, but aren't too good at defending. The gnolls are not very good but you can get a lot of them, so they can be put in the back ranks and shoot. If you can buff their attack in combat, having a high number of them suddenly becomes a good weapon. The harpies are fairly quick and they can use their strike and return ability, which is great when fighting creatures that have already retaliated. They're fragile, though, so take care of them. The centaurs are excellent shooters and they are difficult to block since they move when you attack them in melee. These are the creatures you will rely on the most in the campaigns, along with the wyverns (fragile, but fast and venomous); the rest are basilisks (great units, but expensive), cyclopes (very strong units with a powerful melee attack) and behemoths (sturdy, strong with great staying-power).
You start as Imani, who has 4 weeks to rally troops in the shape of gnolls, centaurs, harpies and rakshasas in a rebellion against their former wizard masters. Unlike map 3 of the Academy campaign, the deadline is very clear this time. Also, you are early on given a message that it may be a good idea to pick your battles and focus on the important ones – the small size of your army suggests the same. Gold and artefacts are important, but otherwise you should keep away from the difficult battles. Make sure you stop by boosters whenever possible. Also, don't plunder mines – it takes too long. So start moving north and pick up resources as you go. I recommend levelling up Imani in defence, as this will help you sustain fewer losses.
You will almost immediately meet some caged gnolls, and Imani seems to have a way with words (despite being an orc), so they will join you. Further on, get off the road and visit the Blacfang Hideout. Academy heroes will start patrolling the roads soon. Avoid them if you can (if you can't the armies are still manageable).
Further south, you find some harpies in a magical cage. Those wizard slavers are starting to piss me off. Do as the harpy suggests and destroy the pillars around the cage. I would take the easiest battle first – the skeletons. Imani doesn't have much in the way of spells, but she has a decent hero attack, so use that for all it's worth. Let the enemy come to you and remember that taking out a stack gives you a morale boost. After the first battle, kill the spiders to the north and the cage will fall, giving you more troops. Moving west, I was encountered by a patrolling hero on the bridge, but it was a fairly easy fight. Ooooh bridge fight!
After crossing the bridge, you spot a pyramid. That's a catapult in wizard speek. Looks like it's powerful enough to destroy a dam just north of here so that you don't have to faight your way through all those pesky spiders. Move past the catapult and talk to Reem – she has the same idea. Taking on those genies was pretty hard, but I took out the apprentices first with hero attacks and then focused on the genies. Then I could use that pyramid to free the centaurs. After doing that, talk to them and they will join you.

You may have noticed that lack of troops is beginning to be a real problem in this map. That final map is going to be impossible at this rate... Where can you find new ones? Well, there's an Elemental Conflux just below the catapult/pyramid. Those can be hired for money and resources.
Only rakshasas left now. Move west across the other bridge and proceed towards the statue of Qasim. If you still have units of different kinds in your army – notably centaurs and harpies – it will fall. Then walk across it. Talk to Asad nearby the fort and fail to get him on your side, then fight his army of Rakshasas. These are fierce creatures; fast and strong, and with no retaliation. Still, if you have recruited some of those elementals, it should be doable. After the battle is won, the map is completed with the usual «lesson» for Ivan. What is it? Well ... that's for you to figure out.
| Comments (1) | Add comment |
- by Kalah
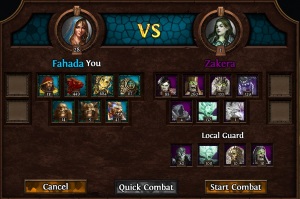
In this map, it's important to conserve troops until you have your own town. In the early game, direct damage spells are great. You're start out once again with Fahada, still rather reluctantly hunting orcs, in the upper northeast corner of the map. After the first battle, your authority/opinions are challenged by Aali. Can't have that, can we. Engage. Aali takes some creatures from your army to fight you with, but you can wipe the floor with them with a couple of lightning bolts.

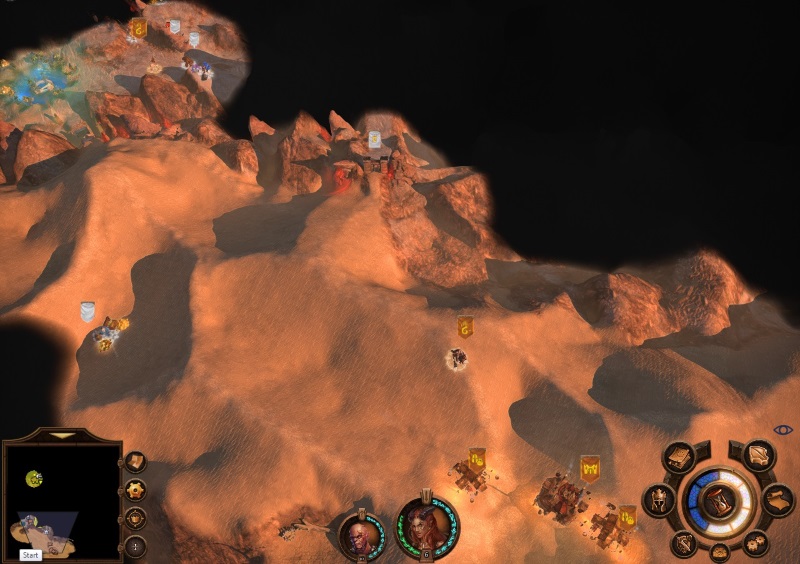
Your first quest now is to follow up this initial confrontation and defeat Aali once and for all: she is to the far south on the map. As you keep moving south, talk to Jengo. He tells of a blue gem (heard that before?) with great power and encourages you to find it. Not much of interest to the west yet, so keep heading south past the two-way-portal and the Academy dwelling. You will come to a garrison, and further south of that is a fort. That's a hard battle, but managable when using spells to take out as many enemies as possible. To the southwest is a town called Ihmarra. Grab it. Owning that (and the fort) will allow you to control the mines in the area and build strength. Aali is waiting (not attacking your town) just north of the town, so you can wait until you are strong enough to go at her again (she will move eventually, so don't take too long). The first priority should be the Gold Mine to the east, then Sawmills and Ore Mines. Don't take too long, though; there are other towns on this map and your enemies are growing in strength too. Killing Aali gives you lots of good artefacts and completes the «Turncoat» quest, giving you another one.
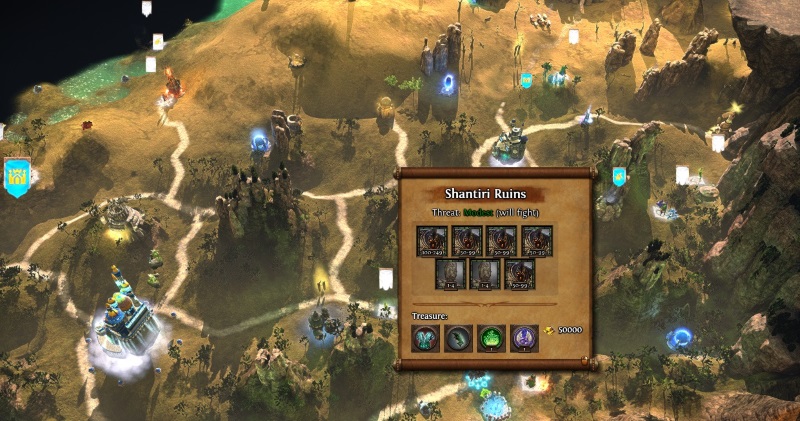
After getting rid of Aali, it's time to consolidate your position. Now that you have your town, you have all the time in the world. Grab all the resources and flag all mines in the area. When you've done that, hit the Shantiri Ruins. From here onwards, my fights actually got a lot easier since I got about 20 cyclopses to join me due to my diplomacy skill – that's a nice skill to have, I have to admit. If you don't get any free creatures, just keep getting reinforcements from the town.
Now, when you're completely done in your area, move east into the southeastern corner with the nice ruins and visit the altar you need to open the bridge to the west. This is also where you will find that blue stone everybody wants. Especially you, it turns out, seeing as the stone contains your former lover's soul. Once you have it, move west from your town and pick off the Dragon Utopia on the way. Enter the portal guarded by dragons, and be ready to fight colossi as well. Also visit the second altar. The portal takes you to an area in the north. Grab all the loot, then head back. With both altars visited, both bridges (the southern and northern one) can now be crossed. North or south, it doesn't really matter which bridge you cross, since they both lead to an enemy territory. I chose the southern one - so that's what this walkthrough will talk about: When you want to go further, move across the bridge west of your town.
Once you go across, your main enemy, Qasim, is said to have heard of your arrival and dispatched some minions. Melisande is the big one, and she is far to the north, but like I said, I'll clean out the southern area first. Melisande will no doubt grow in strength, but so will you.
Head west (the roaming orc allies started tagging along at this point, but don't expect much help other than for scouting; they're really annoying, though), and you can clear this area as well if you like. I took on 34 shantri titans but left the other neutral stacks alone since I was feeling invincible anyway. Keep moving west until you encounter a fort. Take it and move on, to engage the purple enemy. On the way towards the Necro town, stop by the bridge tower. You need to activate those to summon the bridge leading to the central island.
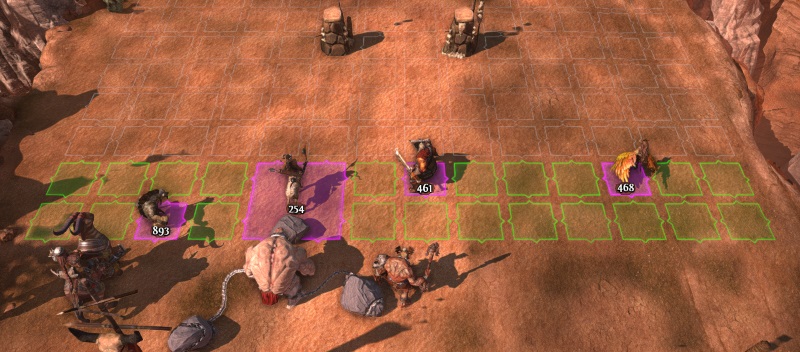
 When taking on the town, the enemy made a mistake. The defending army was big enough, but the lead hero was out with a small contingent, meaning I faced only a level 1 hero in the town. The liches and vampires still need handling, though; I summoned elementals next to the liches so they couldn't shoot. Thanks to the hero's low damage, it took several turns for the defenders to get rid of my elementals – then I just summoned some more. As for the rest of the battle, well, this is the time for those cyclopses to shine. If you don't have any of those, use the cannon fodder to take the brunt of the damage.
Once the town is taken, you can finally hire extra heroes and get to know your surroundings, even call in reinforcements from Ihmarra. When you're done in the southwest, move north. At this point, I had reached my level cap and had more resources than I could ever need, so I'm not sure you even need to keep flagging mines. Move north, take the fort and the second bridge tower right next to the waterfall. Then move north across the bridge nearby. I encountered two yellow heroes there, but they were no match for me. Then I encountered Melisande with the main army. This should be one big fight.

At this point, I moved my shooters to the flanks to avoid the straight-on charge by the fast haven units. Also, give them the arrow storm boost. Summoning elementals next to the enemy shooters should be a priority too. But I suspect avoiding losses completely is not going to happen here: these Haven troops are getting really big morale boosts, so the goal is to keep their shooters out of the game for as long as possible, while taking care of the ones that attacked mine. When the wolves and cuirassiers are out of the way, my ranged units will make mincemeat of the enemy.

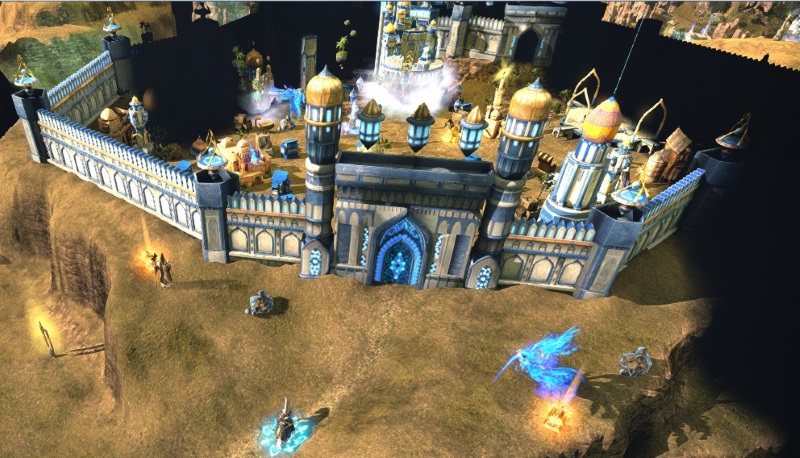
After winning this one, the yellow town of Lightmarch is easily taken, it's just north of you. You can also sweep that area for artefacts, creatures and mines if you want to. When you're ready for the final fight of the campaign, head across the new green bridge to the huge Academy complex in the middle of the map. Qasim is level 30 and he's got a decent army entrenched in a town, so do be prepared to take losses. Still, if you play it right, it should not be impossible at all. And that's the end of the Academy campaign. Well done!
| Comments (1) | Add comment |
Page 2 of 23