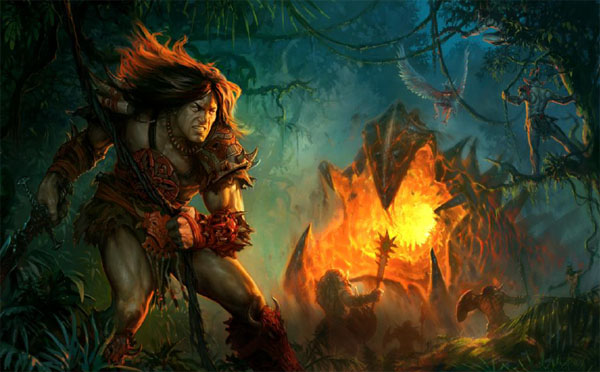
Welcome to the Stronghold campaign! In the not-very-distant past this was the "Might faction", then the Orcs who can't cast magics. Thanks to Heroes6's theme, the Stronghold faction is just as magical as any other factions... or is it? Just look at Sandor's overgrown muscle! (By the way, I used to wonder how come Sandor is the owner of the "Staff of Sandro"... didn't look at the spelling too carefully.)
PLANNING
 While every other faction have two magic schools that they can't learn (for example, Necropolis cannot learn Light and Fire), Stronghold is able to cast magics from all but one schools. Unfortunately, Stronghold's magic shortage happens to be the most powerful Prime school (featuring Heroes6's Ace and King of magics: Time Stasis and Meditation). Having one extra magic school is offset by the fact that a Stronghold hero will have some trouble keeping up with mana. Besides, five out of seven Stronghold creatures use Might Power in their attack, so a Magic hero will struggle with limited damage with limited mana.
On the other hand, a Stronghold magic hero's special ability is a little more versatile than a Stronghold might hero. The idols can serve as a temporary distraction, while the Tear II ability gives a 1-turn Mass Reinforcement that goes well with other mass bluffs.
Since previous walkthroughs have covered all four possible heroes build, let's follow the game's default class - Might. How about the Tear path (Chieftan) as it makes a good story and grants an interesting ultimate ability that essentially nullifies all magic attacks for a short time? It will certainly come in handy.
Here is a list of abilities that I recommend. This campaign is very easy in general, so there is no need to spend too many ability points on mass buffs/debuffs.
Daily unit conservation: Reinforcement II, Tactics I, Mass Life Drain, Mass Regenerate, Heal (probably won't need Mass Heal).
Mass Buff/Debuff: Mass Heroism (no mana requirement), Mass Weakness
Passive abilities
- Logistics, Path Finding. To speed up the expansion.
- Archery I, II, Counterstrike I, II, III, Giant Slayer, Rampage, Cleave. Increase damages dealt.
- Parry, Resilience, Toughness I, Defense I. Reduce damages taken.
 Irina... if we were not related... Wait a second, didn't Goink join me later in the story?
CEATURES
 Mauler/Crusher (tier-1). Yet another might-based, mediocre-initiative tier-1 melee. But this one is very different - why? The upgraded version attacks AGAIN after the target's counterattack - not only drains the damage right back (Arache or Mass Life Drain), but also delivers another heavy blow!
Goblin (Hunter) (tier-2). Ranged unit that comes in huge numbers. Somehow their boomerang, which is supposed to be full-ranged in all other games I have played, loses power over medium or longer distance. A Unicorn Horn Bow or Emerald Yumi Bow would make them stars of your roster! Before having such a bow weapon, their trap ability is also very handy. You can even split them up to setup multiple traps.
Harpy/Fury (tier-3). These flying creatures have a great range to perform their strike-and-return, but their damage is not really impressive. Only the upgraded version's attack is not retaliated - then they will be extremely useful. Bad news: there are no upgraded units of any sort to recruit in the first two campaign missions.
 Dreamwalker/Dreamreaver (tier-4). A rare Magic user in the Stronghold roster. They have a very nice, quickly-renewed special ability that slows and damanges a single stack (basic version) or all stacks (upgraded version). The damage is applied whenever the target moves. Combining this with Goblin's traps, the enemy's melee might never reach you.
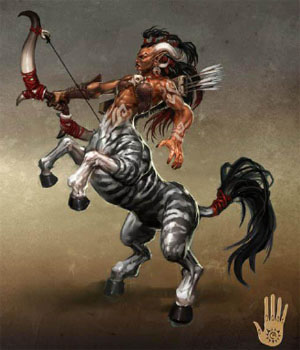
Centaur (Marauder) (tier-5). The cornerstone of the Stronghold army. High initiative, good ranged power, and shoots at the first enemy stack that crosses the middle of the battlefield. Before you get the tier-6 Jaguar Warriors, the AI will always target Centaurs. Getting Reinforcement II as quickly as possible makes unit conservation a lot easier.
Jaguar/Panther Warrior (tier-6). High initiative, good movement, and a charging special attack that draws no retaliation. The upgraded version damages all surrounding opponent (similar to Kappa Shoya's Crashing Leap, but the affected area is bigger). The AI will always target them when they are in your army. Reinforcement II is the answer.
(Enraged) Cyclops (tier-7). By now you must have fought them and know that they won't die until their action comes up. For some reason, this trait is not fully compatible with Life Drain, so you will have some hard time keeping them properly healed. The upgraded version is a ranged unit that shoots cool (but weak and half-ranged) magic-based laser beams. Both versions deal a powerful special melee attack. Their building is so expensive that you probably won't have many of them.
BUILDINGS
Stronghold seriously lacks Wood, although the town buildings are apparently made of furs and bones. There are a few useful buildings that stand out from the rest that I not necessary recommend.
 Advanced Market. Didn't know the Orcs have mastered Commerce! By now you should have learned what to look for: a Great Bow (Unicorn or Emerald Yumi), the Ring of Haste, the Boots of Wayfarer, the +8 Morale/Luck accessories, the Pendent of Mastery, etc. The Puppet Master Magic Comb may look funny on Sandro, but it will be equally ass-kicking. Even better, when a new saved game is loaded, there will be new items in the shop.
Hall of Raiders. Same as the adventure map structure, this building gives 250 gold per battle for an initial investment of 2500 gold and 5 resources each. Assuming the best market exchange rate, your still need to have 40 battles to break even. Usually the hardest fight in a mission happens before the 40th battle. It is better to put the resources into something that makes a difference early.
Warpath Lodge. Same as the adventure map structure, this building awards 3 land movement after each combat, but has diminishing returns for additional buildings. Unlike the description says, your hero does NOT have to visit the town during the same week to receive the benefit. While you may recall how far your main hero can travel with it, you need to invest 5000 gold, 5 wood, 5 ore, and 10 crystals. Fortunately, in all missions of this campaign you will be richer than you need to, so you can always be able to afford two of them. Particularly useful on mission 3 and 4.
ARTIFACTS
Four Dynasty Weapons are given in the Stronghold campaign - 1 in mission one, 3 in mission 2. You can also collect a total of two complete artifact sets in this campaign - the Prophet Set, the Regent Set, and most parts of the Warlord Set. However, since you have access to the advanced market, it is always better to replace some low-quality set artifact with the best possible choice of the part.
 Stronghold Campaign Mission 1
Level cap: 11
Difficulty Index: 3/6
Last updated: December 25, 2011 (v1.2)
Dynasty Traits: Other than the usual Core Creature +3 for mission 1, by now you might have achieved the Platinum Rank in your Dynasty, so you can try something fancy. One of the three Platinum Rank traits you can buy is "Fanatic", which rewards friendly heroes with 150 points of racial ability at the beginning of each combat. This is a great trait to have! However, in my game I was never able to get Sandor's rage to level 3 or 4 even at the very end of the campaign. Is it caused by the Fanatic trait, which (by a bug) carries into later missions for free?
 Very good mission name! And good for us, it runs a lot faster than the movie "No Country for Old Man". From the campaign map, you might recognize this as the same area where Sanctuary mission 4 took place (according to story: will take place). Indeed, you will find a lot of consistent landmarks!
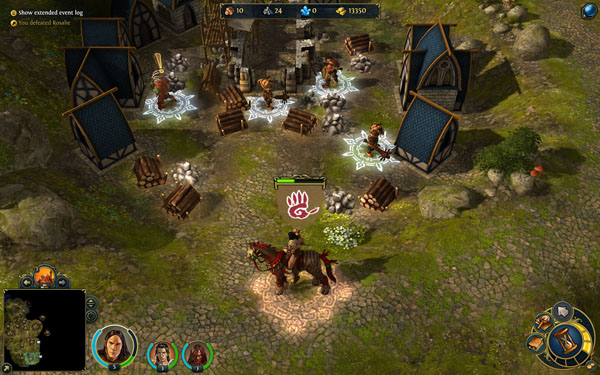
Sandor starts in the northwest corner of the map (start). Now if you do NOT have a lv 4+ Arache, you can take Life Drain as your level 1 ability, followed by Reinforcement and Regenerate., and Reinformcent II, Mass Life Drain, and Mass Regenerate after level 5. Otherwise, you should go a long way with Arache with Reinforcement II. Fight everything that you can beat without loss, collect friendly Maulers, and follow the road all the way down to take Town A.
Sandor's only opponent is the Red Haven AI, which owns all other towns on the map. Fortunately, this map is very carefully scripted in a way that you always face something you can manage. First, travel down to (1) and free a number of Goblins and gather some free Blood/Tear points. There is a very productive creature east of Town A that you definitely want to have.
Collect the resources in the area until the Red AI launches its first, weak invasion. Defeat this hero, and easily steal Town B from the AI. On your way to Town B, you can free a group of Harpy and a group of Centaur at (2) after a not-too-difficult fight.
From Town B, travel northwest to defeat a stack guarding the stairs at (3). There are a few resource and creature buildings and some friendly creatures to flag and collect in the small underground area at (3'), but no enemy at all. You can use a secondary hero for the job.
Starting from the day you take Town B, there should be another invasion from the Red AI in a week or two. You might have to fight this hero around Town B, so don't wonder too far off or you might lose the town to the AI. However, you might have enough time to send Sandor get down to (4) to flag a creature building, and to fight the next invasion around (4).
 Whenever you defeat an invasion, Sandor is usually free to do his quest for about a week. The next point you can visit is an interesting Haven town in construction at (5), guarded by a dormant hero. You can further recruit a number of friendly stacks, as well as unlock the Dreamwalker building.
There are more Orc slaves to be freed at (6). Now you should have freed all four groups of slaves required by the game, and the gate (GA1) northeast of Town B should open. But don't wonder off yet. Let's first make sure Town B is safe while Sandor is away.
You can do that by taking over Town C from the Red AI. It will be a slightly more difficult fight than those you have had so far, since the AI should be building a more advance Town wall (with the arrow towers). But since you have been collecting so many friendly creatures, there shouldn't be any problem. You can take some time to clear the area around Town B and C - the next gate (GA2) will remain closed for a while. By the way, you can see a familiar huge yellow-leaf tree northeast of Town C. This is actually the exact same tree seen in Sanctuary mission 4. Town C was labeled as "Town F" back there (although chronologically that mission happens later).
When you run out of things to do, gather everything you have and venture north of the first gate (GA1). Beat everything, visit the stats boosts (s). Follow the path east to challenge the hero before Fort D and take the Fort to advance the quest.
 Defeating this hero rewards you the first Dynasty Weapon of the campaign, Sword of the Wolf (Might). At level 3 it prevents enemies to escape from battles (sadly, an active ability). Its free Mass Haste comes very late at level 4, and the ultimate level 5 ability gives insignificant power boost when you most need it (at the beginning of the battle). Not a very useful weapon.
Now the second gate (GA2) should open. By now you should be rich enough to afford some top quality artifacts, so build up the Advanced Markets and shop! The top priority should be the Emerald Yumi Bow to really boost your Goblins' power. When you are ready, pass the gate, and challenge Town E. By the time you arrive, the AI should have cleaned everything except for a friendly stack of Goblins at (7). Be grateful to the AI's generosity!
Just one more obstacle remains - march everything you have and crush the garrison in Town F! This is the final AI town and you should earn the check mark of another quest, some Might Power and Blood points. To finish this mission, simply defeat the guards of the shipyard at (8), board the free ship, and sail south a bit.
Note: Town F will become the infamous Town H in Sanctuary mission 4, garrisoned by the greatest army of Heroes6!