Only two articles left before our journey through the Heroes V campaigns is over.
Map 4 - The March
Size - Big
Level Cap - 28
Carry Over: Raelag & Shadya
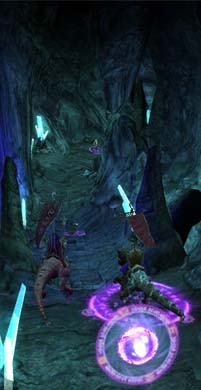
Warlocks get their ultimate satisfaction from destroying the opponent's entire army with only destructive spells. This mission serves precisely this purpose. Forget about your puny army; you don't need them, and you are not given anything significant later in the map. On the other hand, if for some reason you didn't develop either Destruction or Summoning magic, you will probably be eaten alive here on heroic!
There will be no town in this mission, and you only have one enemy to defeat. For the rest of the mission, you can explore around and defeat zounds after zounds of neutrals, but you have to get out before the two-month time limit. A little trick to conserve your troops against ranged / caster neutrals is to separate them into little stacks of 1. This way, each time the neutrals shoot, you only lose ONE unit.
Starting Bonus: Doesn't matter. The 8 minotaurs are slightly more durable, but the 14 assassins give you six more "hit points".
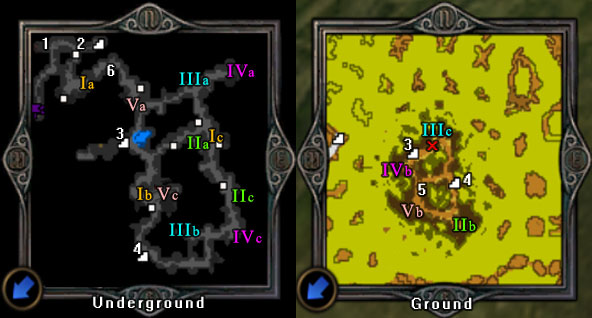
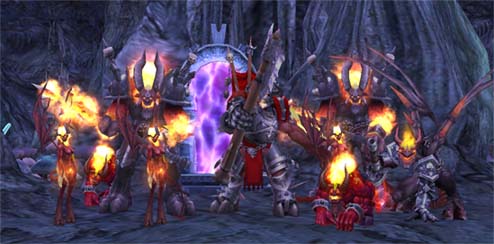
From your starting point, follow the tunnel north, and rescue a few endangered dungeon species along the way. There is a red keymaster tent at (1). When you pay a visit to it, a cut scene tells you that the key has already been stolen by an Inferno hero, Grawl, who got here just before you. (This Grawl does not use "Grawl's face", though.) Therefore, you can't pass the red gate at (2) unless you defeat Grawl and take the key from him.
Turn south, and at the end of the tunnel you will bump into a portal (Ia). There are a total of 15 portals in this dungeon, and this very portal is your only exit to The Maze that lies ahead! Let me explain a little how these 15 portals work:
The portals are organized into groups of threes (triplets). Portal Ia may carry you to Ib or Ic. Ib carries you to either Ia or Ic. And Ic brings you to - guess what - Ia or Ib! At the beginning, when Raelag enters Ia, he always comes out at Ib. After that the transfer pattern is possibly random, but if you try a few more times in and out, eventually you will visit all three portals in the set.
There are five groups of three linked portals. I've marked them all with different coloured Roman numbers I, II, III, IV and V.
You can only travel WITHIN a certain Roman number. Entering a portal of the IV triplet can never bring you to a portal of the V triplet. Therefore, after you defeat the Inferno hero, you can exit this dungeon only by entering either Ib or Ic.
Back to Raelag. When Raelag enters Ia, he comes out at Ib, with a stable located conveniently nearby. A cut scene plays and Grawl has escaped in front your eyes. He is now waiting on the ground level, marked by a red X. The fastest way to get him is to use the stairways 3 or 4. Stairway 3 is to your north, and you will come out on the corresponding stairway (3) on the ground level. You will be very close to Grawl.
Alternatively, you can take stairway 4, which is on your south. The good thing about stairway 4 is that you can visit an artifact merchant just beside the ground level exit 4. One great artifact for Raelag is the Emerald Slippers (5000G), which offers +50% damage to earth spells -- both Meteor Shower and Implosion!
The best way to fight Grawl - as I am sure you know by now - is to pound his troops non-stop with your most powerful spells. This fight is not difficult at all if you follow "the Warlock's way" - meteor shower for multiple stacks, implosion for individual stacks.
After defeating Grawl, you may travel inside this maze freely. Since now you know how the portals work, you can actually plan out an effective route to sweep the underground clean in one go. You can split troops between Raelag and Shadya, and have each explore half of the map. There is a trading post, a Hill Fort and a Witch Hut at 5. The only stat bonus on this map is located at 6.
When you are ready, use either portal Ib or Ic to return to Ia. You might need to try more than once (just turn around and enter the portal again) to get back to Ia. Then, go north to 2 to unlock the red gate, and use the stairway behind it. As long as you have one character reaching this stairway, you win the mission! Congratulations!