To Honor Our Fathers
M4: Mother Earth's Wisdom
- Map Size: Normal
- Level Cap: 26
- Difficulty Index: 1/5
- Last Updated: November 9, 2007, Patch v3.0
Again we are back as Kujin, but this time her job is a lot simpler. This is a typical solo scenario where your lone hero eventually travels to every corner of the map through a unrealistically winding pass that eventually utilize the entire map, and witness every scripted event along the way. It seems that a lot of Mission 4s are designed this way (Markal, Raelag, Findan, Fredya, Wulfstan, and now Kujin), too!
Good news first - all Stronghold stacks will join you for free, and they come in great numbers! There is no time pressure except that neutral creatures grow every week - but so is your Stronghold reinforcement. Even if you are terrible at troop conservation, you will still have enough troops to beat a very easy mission boss.
Therefore, the bad news is this mission has no challenge at all.
Generally speaking, you want to fight as much enemies as possible to level up Kujin to the cap before the final battle. In my game, I fought everything reasonable (skipped almost all of the shooters/casters), and was able to cap Kujin just before the boss battle. The resources on the ground are not useful at all - there is no quest using them. However, you do need some cash at the end to upgrade units and to buy artifacts, so pick up the gold bars if it is not too much trouble. Cash out the smaller chests as well. In my game I actually picked up a lot of resources, and I had a 30K leftover in the bank when the mission ends. So you can probably skip ~30K worth of resources on the ground to speed things up.

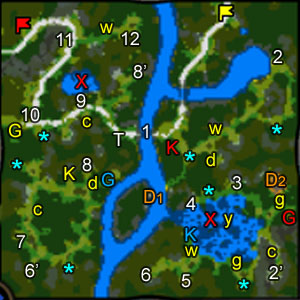
The starting bonuses are about the same. I picked the 10 Centaur bonus to add to Kujin's little starting stack of 15. Follow the obvious road south and pick the easier battles. Defeat a tiny stack of Devils to enter the first quarter of the map. You can see a broken bridge at (1), which would have led you straight to the exit! Now you have to take the longer path. This mission is divided into four quarters, and each one has its own objective and sometimes an optional quest. When you meet the main objective, find a Seer Hut to teleport Kujin to the next quarter.
First Quarter (NE)
On higher difficulty it is likely that your starting army is too weak do take on anything major. Do yourself a favor and go straight to the Stronghold creatures (all reinforcement are marked with lower-cased yellow letters): Earth Daughters (d) and Warriors (w) just to the east. After picking them up you should be powerful enough to beat everything in this quarter. But still, for troop conservation you don't want to fight the shooters and casters unless they guard something you really want.
Make sure to visit the Red Keymaster tent (red K). Just south of the tent is a hidden path in the forest, leading you to a Dragon artifact (helm) at (D1). When you are ready, go to the Seer Hut at (2) to jump to the next quarter, at (2').
Second Quarter (SE)
Go straight north to pick up a large group of Centaurs (c). Note that your reinforcement stacks also grow every week, so if you arrive at a stack on Day 7 of a given week, end the turn and pick them up on the next turn/week. I picked up 11 more Centaurs here just by wasting a tiny fraction of Kujin's daily movement. Keep going north and you will notice a Red Gate (G) to the east. Unlock it and VOALA - the most powerful might artifact on lower middle earth -- the Lion's Crown (morale + 2, luck + 2)! BOOOO! This is too easy compared to the 360+ Titans in the last mission.
To the north of the Lion's Crown await lots of Goblins (g) to join you. Further north you will notice an Imp (yeah, 1 Imp) guarding a Dragon artifact (D2). It can't be this easy, right? Actually when you get close, your exit will be sealed by a stack Succubus, but you can still get the artifact! With enough Rage Points, you won't lose a lot of Centaurs (probably single digit).
Let's sweep the lake in a counter-clockwise fashion. Go west and visit a mana x 2 spring at (3). Further west you can see a Seer Hut at (4). This Seer tells you to kill at least one assassin in exchange of the Tarot card artifact, which is mandatory to pass the second quarter. You have no other choice than accepting the quest and hunt down the assassins - they are conveniently located just SE of the hut. Report back at the hut to receive the Tarot Card. You can also recruit a tiny stack of Wyverns (y) at the center of the shallow lake.
Just south of the Seer Hut is a Blue Keymaster (blue K). Pay a visit and pick up some more Warriors (w) just south of it. Next march east to grab the free Goblins (g). At (5) a cutscene plays and you discover that Kujin is really not, again, Biara. :) Go to the Seer Hut at (6) to finish up this quarter.
Suddenly the Orcs and Humans have reached a truce - yeah? (See mission 5 for more.)
Third Quarter (SW)
You start at (6'). Immediate to your north is the long-awaited Siege Workshop if you have Triple Flaming Ballista. If so your life has just become even easier! 0/5 on the scale!
Pick up the Centaurs (c) further north. The reinforcement just keeps coming even if you really don't need them, eh? At the NE corner of this quarter you can visit the Yellow Keymaster Tent (yellow K), pick up a stack of Earth Daughters (d) and unlock the Blue Gate (blue G). What you get is the ring artifact of the Urgash set (enemy morale -2). Not bad at all! Now you are ready to report to the Seer at (8) to take on the last quarter.
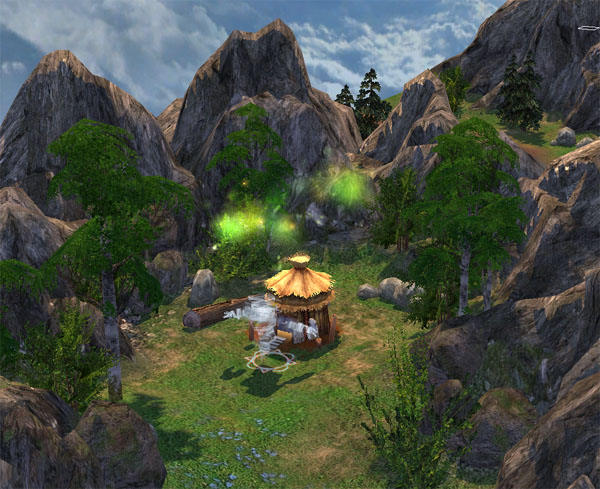
The green aura = Microsoft certified copy of the official Seer Tent!
Fourth Quarter (NW)
You start at (8'). According to the map file that I opened in the editor, there should be a small stack of Wyverns just west from here, but in my game I didn't see anything. Follow the grass path SW to see the paved roadd. If you are like me who actually picked up a ton of resources along the way as a potential quest requirement, go SE from here to sell them all to a Trading Post (T). This is your only chance to cash out.
Follow the paved road NW you can see an Artifact Merchant at (9). I was able to buy what Kujin missed back in mission 2 - the Dragon's Eye Ring. (I was able to buy it again in the next mission, by the way.) Just south of the merchant is yet another stack of Centaurs (c) joining you.
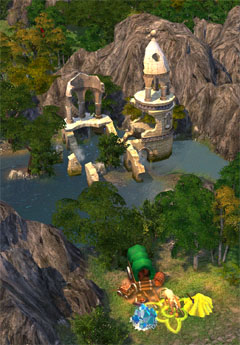
With so many shooters it is now a good time to tackle the optional quest - to find a Sunken Temple which I have marked with a red X. The path leading to the temple is just east of the Artifact Merchant. The Sunken Temple is essentially a Dragon Utopia guarded by something equally annoying. It is not difficult at all, and your loss will be reasonable for the rewards. I got a 1000G/turn Gold Bag here among other useless artifacts, but a lot of cash and EXP points.
Follow the paved road west, and you can see a Stable and yet another Seer Hut (10). You can spend a little cash here to recruit 40 Chieftains. That's right, the Chiefs are here! Now your Centaurs are firing till their arms drop! By the way, there might be yet another group of Goblins to pick up by the Staple according to the map file, but I don't remember seeing them myself. Or maybe there are just too many free stacks joining, so they fail to impress me anymore.
West of the hut you can find the Yellow Gate (yellow G) that hides the other Urgash artifact (helm). Follow the path north and you will see a Memory Mentor (11). If you have missed the Mentor in mission 2, here is another chance to straight Kujin up. East of the mentor you can pick up the last stack of reinforcement, Warriors (w), and finally upgrade units in a Hill Fort (12). Now if you have any cash left - hold on to it. (see last paragraph, about the last battle)
You are now ready for the boss fight. Just follow the path north, and climb up the hill to the west. Alastor will encounter you with an Infern... inferior army. No kidding for a mission 4 boss! In my game the fight was over right after Kujin casted her first war cry. What a joke!
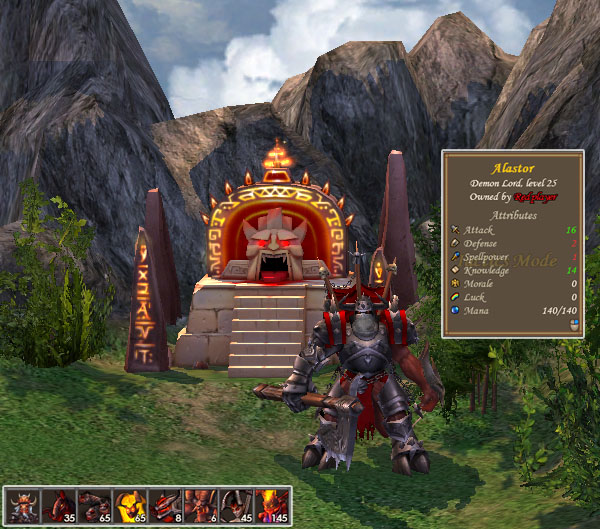
I think he belongs to mission 2. No wait, he is too weak for that.
Preparing for Kujin's Final Battle
It is actually a good thing to have a lot of cash left over!
Believe it or not, it will be Kujin, not Gotai, that appears in the final mission (in the Academy Campaign) of Tribes of the East. Currently, the game will give Kujin an army and directly march her towards the enemy. She does not even have a chance to adjust artifacts equipped by default (and the game makes very bad choices!). We will discuss more details in the C3M4 walkthrough section.
Therefore, this Memory Mentor in C2M4 is actually your last chance to tune Kujin for her last appearance. Let's throw away any skill that is not helping and go for the useful ones. First, forget about the Ballista - you won't even have one! Going for the ultimate is not a bad idea, although the armies are so big that your starting Rage Points won't last very long. Shatter Dark won't disappoint you as Kujin's opponent will cast them non-stop! Don't leave Kujin without Luck - Magic Resistance - you never know when you can dodge another annoying Frenzy. Barbarian's Luck is not necessary, because your enemy does not cast any damaging spell. Other than that it is standard Might Build. Here comes an example:
- Expert Blood Rage: get rid of Powerful Blow and keep the other two
- Expert Attack: Battle Frenzy, Retribution
- Expert Leadership: Recruitment, Aura of Swiftness, Battle Elation
- Expert Luck: Expert Luck: Magic Resistance
- Expert Shatter Dark: Detain Dark
You should still have about 4 skill points left. Either Expert Enlightenment or Expert Defense will do well. Have fun!