To Honor Our Fathers
M3: Father Sky's Fury
- Map Size: Large
- Level Cap: 22
- Difficulty Index: 2/5
- Last Updated: November 9, 2007, Patch v3.0
After Kujin's hard-fought success, our focus is shifted back to Gotai in this straight-forward mission -- Destory All Humans!
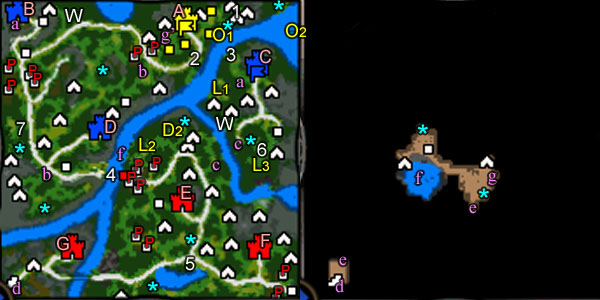
There are six Haven towns to be demolished, three Blue and three Red. The Haven AIs are not allies; apparantly they are at war and their attention is not on you. This is reflected in the total lack of huge scripted armies coming to run you over - a sharp contrast to the last mission. In fact, during most of the mission you will be bugged by little AI heroes carrying a small army (one-two weeks of creature growth). They love to flee - totally wasting their creature production advantage. The neutral stacks guarding goodies, on the other hand, are quite powerful. There are many good things to pick up on this map, so I suggest taking care of the AIs first, and just before you deliver the finishing blow, pause and spend two months collecting all the artifacts and stats (marked with blue *s).
Pick the 6000G bonus. There are lots of cash spending oppurtunity during the first week, and you can use the last penny of it to give you a good boost. There are better Weapon artifacts on the map, so don't choose the hammer. The one Cyclop bonus is a trap -- each Cyclop only costs 2900G, and they are available for hire on Day 1!
You are given a pretty nice Stronghold town (A) to start, plus a handful of Stronghold creature buildings including a high-level one - all flagged for you already. The nearby Sawmill and Ore pit are unguarded. A large stack of Goblin just SE of the town nearby joins you for free. You have a large Warrior stack carried over from mission one. You can't ask for better!
Your luck (in reality) might make this mission very easy. The first thing after the mission starts, check your town tavern, and see if you can hire a hero with 3 stacks of ~10 Centaurs. Centaurs are very important as usual. Another variable is what you get from the lv-2 War Cry guild. You want to learn Fear my Roar here, not the other (you already have it). On high difficulty, it is a good idea to restart the mission if you don't get Fear my Roar - it will make a difference early mission 5.
Immediately to the east of town (A) is a very nice area (1), consisting of a Gem Mine, a Gold Mine, a Sulfur Pit, a random artifact and cash. On heroic you have to beat a relatively-large neutral stack to gain access. Since you have some free cash at start, just pour the coins into creatures and capture this area ASAP. Hire this tavern hero for his Centaurs, and upgrade them into Nomads. Hire more Centaurs from creature buildings. You can skip the high-level creatures. Their number is too low to make a difference. Collect the free Goblins SE to the town and upgrade them to Trappers as well. Use your dominating Centaur stack to nail the Marksman, and your Trappers to delay the advance of the large stack of Squires. Your Warriors hit hard, and with enough Rage Points they are able to absorb the Squires' retaliation if you run out of 1-stack Goblins. You should win this with just a little loss.
The Academy stack guarding the Gold Mine is also powerful. Since they are large creatures, 1-stack goblins work great here. You will take losses but it is very worthwhile - You get a Gold Mine! Get a Mercury + 1 going in the town.
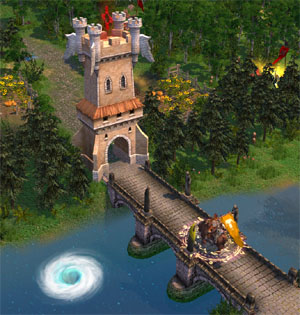
Now your income is healthy, but you are still lacking the red Crystals. There is a crystal mine SW of the town. Along the way you have to fight a very weak, but voiced Demon army (2). By visiting the Redwood Observatory nearby you can see a catapult structure across the river. In about two weeks it is going to fire at your high-level creature building and damage it.
The fastest way to access the catapault is to build a ship from the Shipyard guarded by some Phoenix. The Phoenix are still too powerful for you at this stage, though. Let's take an alternative route.
First, flag the Crystal Mine and the Mercury Lab along the paved road, and burn the neutral cottages along the way. Each cottage gives you some cash, and adds to your completion of an optional quest. If you burn all cottages on the map, Gotai gets a permenant Attack +2.
Come back to town (A) with Gotai to (hopefully) learn Fear my Roar and gather more armies. Don't worry about the Talisman as there are plenty of oppurtunities later. If you have sent a scout hero to gather resources out there, watch out for the Blue heroes coming after. You can easily defeat these weak hereoes with Gotai. In fact, 70% of this mission is about chasing down weak AI heroes, so you better not think it is tedious.
With the second week of creatures Gotai is powerful enough to take on the Blue towns. First, rush straight to town (B) of the NW corner. It should be very lightly defended. After winning the siege the town is burned to ground, and you receive various resources like hitting the jackpot on a slot machine! Get to the Slayer and Cyclop building quickly.
Next, pass through the two-way portal (I) just beside the ruin of town (B) to emerge right beside town (C). Burn it as well!
And look, just to the west of town (C) sits the Catapault that will damage your precious structure. Destroy!
Now Blue is reduced to just one town, and the Red heroes should not be a problem for about another week. In my game, the guarding hero of Town (E) is quite high-leveled and her stats are pretty decent. Let's return Gotai to the HQ to buy the level-3 Talisman (summon creatures) and pick up the third level War Cry. Either Battle Cry or Anger of the Horde is good. In my game, I totally skipped the Wyverns until much later to save cash. I also didn't hire any more tier 3 and 4 creatures.
There is an alternative route back home. Go straight south from the late town (B), burn more cottages and find the two-way portal at (II). The exit of this portal (which is SW of your town) is blocked by quite a large group of undead, so you probably need the third week of production shipped to you by a mule hero.

Don't ask an Orc to take care of your house when you are on vacation.
Around this time the Red heroes should have been pouring out to the town (C) area, and chase around your low-level hero(es). Let's deal with them right after taking down Blue in town (E). Let me introduce you a really, really powerful tactics if you haven't discovered it yourself:
Split your Chieftain stacks equally in two (or more if you have the free slot). Now during a hard battle, use their special ability "Order of the Chief" on your most powerful stack. In a castle assault it is probably your Centaur swarm. Against a powerful neutral army, it is probably the right time to whip your Cyclops (Untamed better than Bloodyeyed) non-stop into melee. What you get is a very powerful stack attacking for eternity!
p.s. Later on, when you have more Chieftain, put no more than 60 into each stack because the ATB counter push is limited at 60%. 50 is around the ideal size here as you can whip twice in a row to reach 100%, or waste nothing even the high-morale (ATB back to 50%) is triggered on the Cyclops.
You will lose some units by your own whips, but in a tough battle you will lose a lot more army if you don't kill their stacks first. You want to take down the enemy before they inflict heavy damage to you. The tradeoff is very worthwhile.
Let's start chasing the Red heroes. They might be coming after your town (A), so the portal (II) may be able to save you. Fortunately, the AIs tend to flee back to town if they think you are stronger, so you really don't need to chase them all over the world. Let's rush to take care of the Red, now!
There are two routes to take care of Red. You have probably noticed the first one right after taking town (D). You were shown some battle between the Red and Blue on the bridge at (3). If you take this route, you need to pass through a moderate garrison. The alternative way is to use the two-way portal (III), which the little Red heroes probably have been heavily using to invade you. It doesn't matter which route you pick because you are always going to end up with attack down (E) first. Another easy town!
After burning town (E) you can either go after town (F) or (G) next. Town (F) has lots of resources nearby, so I think it is a better choice (and leave the AI with the very basic town (G) for two months). There is a mana well at (4) that you can use to summon troops - shooters are what you are looking for in a siege.
p.s. You can finish the mission right here by taking town (G).
I'll list all the attractions below in case you decide to explore:
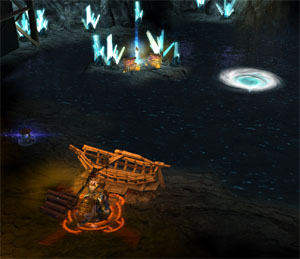
The stairways (IV) SW of town (G) leads you to the final set of two-way portal (V) underground, which takes you to a Dwarf treasure hall. In there you can find two stat boosts, two awesome Dwarven King artifacts (40% magic proof! wow), various resources and an interesting shipyard. The Whirlpool in the underground lake magically takes you to the river on the surface level (and you will lose units).
p.s. If the river is what you are after, it is better to use the one-way portal at (VI), though, as it brings you right back to Town (A) to purchase the best Talisman, and close to the Shipyard (south of (2)) guarded by Phoenix. By now you should have no difficulty beating it. Interestingly, Quick Combat always gives me better resut against the Phoenix.
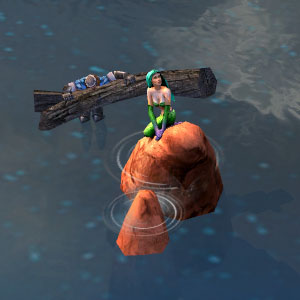
There is an Ogre artifact, (O1) just SE of town (A). The other Ogre articact (O2) is in the middle of a small island upstream, accessible by boat.
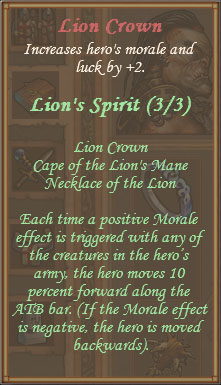
The Cape artifact of the Lion's Spirit set (L1) is also accessible by boat. You can actually find another Lion Neklace (L2) in the Red territory (so much for the trouble in Mission 1!). The best out of the three, the Lion Crown (L3), is hidden south of the late Blue Town (C).
Don't deploy the Centaurs or the entire stack will be gone!
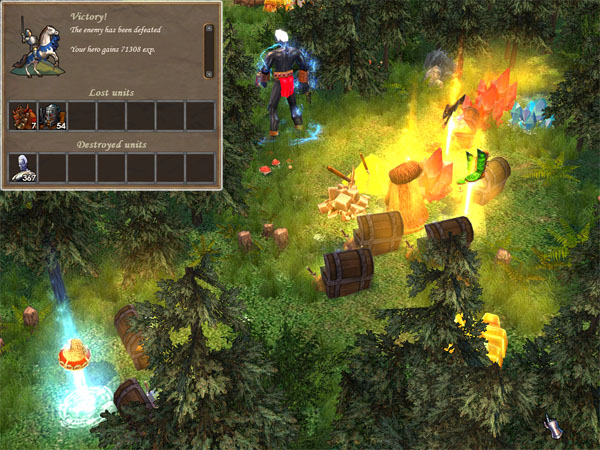
While this mission is very easy, the guarding neutral stack of the Lion Crown is quite a sight - in my game I saw a swarm of Titans, splitting into 4 stacks of 90+! But only in a true challenge our Might is properly shown. It is hard to believe how much 40+ Bloodeyed Cyclop and 2 cheering Chieftain stacks can do!
p.s. If for some reason you cannot defeat the Titans, there is an alternative way (thanks to Arveragus). When you sail down the river that is south of the Lion's Crown area, you will encounter a group of Fire Elementals fighting a group of Water Elementals. You can help either stack to defeat the other one, and the suviving stack will help you kill the Titans when you come back to the giants!
There are two Dragon artifacts, one just beside the Lion's Cape (L1) and the other at (D2).
I have marked all of the Cottages (peasants huts) with red (P)s. In fact you can also use a secondary hero to burn them down. As soon as you burn the last one all of your heroes, including Gotai, receive Attack +2.
There are various Catapults on the map. By spending 15 Ores you can fire a shot at various targets pre-determined by each particular Catapult's orientation. Some of the Catapualts actually aim at a Haven town - three shots (45 Ores) is what you need to bring down a town without a fight! You can get a lot more treasures by taking it down by an army, though. Too bad there is no Catapult aiming at those 360 Titans!
The area at (5) contains a Memory Mentor to adjust Gotai's skills. Some people would suggest you to take Shatter Dark for a future mission. I ended up doing it, but I think I should have gone with Logistics or kept Shouting... I highly recommend Triple Ballista (War Machine) and Flaming Arrow (Attack) here, plus Aura of Swiftness and Battle Elation under Leadership as well as Barbarian's Luck under Luck. There are two Witch Huts (W) on the map. You can always leave one skill slot blank, pick up a garbage skill to trade for something useful here.
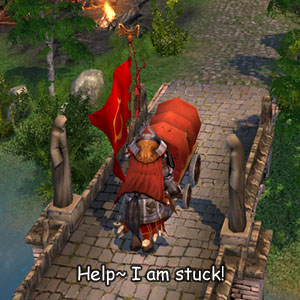
While you are collecting artifacts and stat points all over the map, again the Red heroes will make a run at your weaker heroes. To make things easier, you can fight them with a secondary hero carrying a large army of the less-useful units, or fresh town productions to be eventually shipped to Gotai. The Red is really annoying, but there is a good chance that the AI will stuck themselves with a caravan on the bridge! The AI is not allowed to go down the stairs at (IV), therefore invading your HQ.
Finally, take down the last Red town and claim victory. Let's push the "that was easy" button!