Welcome to the Necropolis campaign. If you follow the campaign order, the Necropolis would be your first stop, which is not a bad choice. Let's start with a few basics that were not clearly explained in the tutorials.
(1) Default or Custom hero? You can play the campaign with the default or a custom hero. Since patch 1.2, you should be able to use custom heroes in the final campaigns. The walkthrough will still feature the default characters, even though some of their specialties may be less useful.
 (2) Might or Magic? You can still customize each hero's Might/Magic affinity. There are four major differences:
- Only a Might hero has access to level 3 (bottom row) Might abilities (such as the highly acclaimed Counterstrike III and Cleave). Only a Magic hero can pick level 3 Magic abilities (such as the extremely useful stack disabler Time Stasis and mana recharger Meditation). A Might hero still has access to level 1-2 Magics and vice versa.
- Might heroes have more army-oriented abilities, and are therefore better suited to command a large army than a Magic hero. However, Magic heroes have more flexibility to succeed in seeminging impossible situations. For Necropolis, magic heroes, who have high Magic Power but low Might Power, are especially powerful since two powerful ranged stacks (tier 4 and tier 7) utilizes the heroes' Magic Power instead of Might Power. However, Hereos6 campaigns usually feature a good number of Arenas and Arcane Libraries so that a Might hero will have OK Magic Power and a Magic hero will have passable Might power at the end.
- Some artifacts have Might/Magic restrictions. Same as Heroes5, artifacts that belong to a set will carry over to the next mission.
- Heroes' special abilities differ between Might and Magic heroes. For example, only a Magic Necropolis hero can eventually use Curse of the Netherworld (mass damage + mass heal) if following the Blood path. This brings us to the next point:
 (3) Blood or Tear? Usually Blood is more about offense; Tear is more about defense. But in reality you should look for powerful special abilities that you can use frequently. Besides unique hero abilities of each path, advancing levels in Blood or Tear also enhances abilities that belong to the category. For example, (Mass) Life Drain, the bread and butter spell of a Necromancer, is under Blood. The spell becomes more powerful when the hero advances further on the Blood path. While there are numerous places in the campaign to get massive Blood/Tear points, it is also a good idea to use corresponding Blood/Tear abilities frequently in battles. Each usage gives 1 reputation. It is reasonable to aim to get to Blood/Tear II by mission 3, or even during mission 2.
This walkthrough will build Anastasya into a Magic-Blood Necromancer. It is based on Hard difficulty, and the player should be able to achieve the "Hero" ranking at the end of each mission. (Same with all other subsequent walkthroughs.)
(4) Dynasty Weapons. You will pick up more Dynasty Weapons along the campaigns and by spending Dynasty Seals in My Dynasty (Seals are earned through completing achievements). Dynasty Weapons are not associated with any particular campaign hero or campaign progress. Their experiences are accumulated throughout all games where the weapon is equipped. Since higher levels of each weapon require millions of EXP, it is better to stick with a good one and develop it to its full potential.
(5) Dynasty Traits. Dynasty traits are starting bonuses available at the beginning of each map. In the game's main menu, you can buy these traits with Dynasty Seals. More traits will be available for purchase when the player's account level (Iron rank, etc.) advances. The account's EXP, like Dynasty Weapons, are also accumulated through all games. At level 11 (not 10, it is also a known issue), you will be able to purchase Bronze-rank Dynasty Traits and pick a second starting bonus. At level 21 (Silver rank) You can buy the third trait slot. But there is no way to get the 4th or 5th yet.
HERO PLANNING
During campaigns, you can respecialize (in hero's special ability tab) your main hero's abilities when he/she reaches the the next level of Blood/Tear level. (So you have two shots) - note that this is different from the scenarios, where you can respecialize at level 10 and level 20. Here comes a list of core survival abilities for Anastasya. I used them almost exclusively in the toughest fights of the campaign.
 Unit conservation tools: Life Drain, Mass Life Drain (lv5), Regenerate, Mass Regenerate (lv5), Reinforcement I, II, Tactics I. Healing spells in Heroes6 are extremely powerful - they resurrect fallen units. Reinforcement is like a "pre-heal" so you can free up later actions to heal others in need. Abuse the these abilities and you will do very well in Heroes6.
Life saver for the army deprived: Summon Earth Elemental (lv15), Time Stasis (lv15), Puppet Master (lv15).
Mana buffet: Meditation (lv15). Refill a large amount of mana once per battle. Cast it just before the battle ends.
Boss fight mass buffs/debuffs: Mass Stone Skin (lv5), Mass Weakness (Lv5). In several very tough fights, we receive more damage than we can drain/regenerate back. So we better reduce that damage. While Mass Stone Skin seems more powerful than Mass Weakness, it only reduces Might damage.
The above list of core abilities only requires 15 ability points, so plenty of extra abilites points can be invested in passive abilities that doesn't take up Anastasya's precious action during a tough battle. It is a great idea to pour extra ability points into might-oriented passive abilities such as Archery, Counterstrike, Giant Slayer, etc. Another popular choice is Logistics and Pathfinding to speed up your expansion, especially useful in later missions.
It is generally a bad idea to give your main hero any ability that is not related to battles. That's what secondary heroes are for. They only need to focus on economic (Realm) abilities. There is no need to develop a combatant secondary hero throughout all Heroes6 campaigns.
Veterans of Heroes5 may intuitively pick Dark, Nature, and Prime Magic I, II, III, etc., thinking they unlock high-tier abilities such as Summon Earth Elemental and Puppet Master. However, in Heroes6 you can pick those high-end spells without Earth magic I or Dark magic I. All they do is mildly increases your hero's respective magic school power. Since there will be numerous +Magic Power stat boosts through the campaign (my Ana's end-game Magic Power was 70+), Dark Magic I, II, III does not really make any big difference - a poor choice that wastes away precious ability points.
Leadership (Morale) and Destiny (Luck) was another popular pick back in Heroes5, but they are also poor choices in Heroes6. There will be so many adventure map buildings and cheap artifacts that increases them so much (such as 8000 gold Golden Horseshoe for +8 luck) that your ability points seem to be completely wasted. Besides, Luck's effectiveness is severaly reduced in Heroes6 - it only increases your damage by 50%, and triggers much less frequently. Morale could be handy for Haven, but is completely useless for undeads.
Still, welcome to experiment on other abilities and let us know what you find. If you can fight every single battle with 0 loss, you must have done the right thing.
 "Did you get my closest kin's consent before reviving me? Oh. He is the one who killed me." Ana's great aunt is fittingly an Embalmer. Doesn't sound very ass-kicking, though.
CREATURES
In this campaign, the vast majority of tough battles are siege battles. Therefore, ranged power is extremely important. Necropolis is fortunate to be blessed with two very powerful Magic-based ranged creatures - Lich (tier 4) and Spider (tier 7). Lich in particular will provide the most damage output throughout the campaign. Naturally, the AI also wants to get rid of them first. I hope you don't grow tired of healing them!
 A third ranged unit is the spear-throwing Skeleton (tier 1). The upgraded version's (Might-based) attack also reduces the target's next movement range by 1. The skeletons are not particularly powerful since Ana's Might Power won't be too impressive as a Magic hero. However, if you find the Unicorn Horn Bow or the Emerald Yumi Bow (both negates range penalty, the latter also negates shelter), these little guys can really shine.
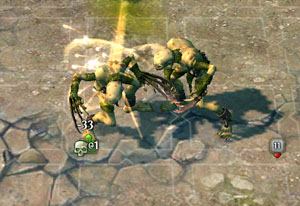
Anastasya's specialty is to have +2 movement on Ghouls (tier 2), which already has quite impressive movement (and initiative). You can let them catch the enemy's ranged units off guard as they can hit almost anyone on the battle field. However, since they also make Might-based attack, they will slowly lose their star status to others.
Ghosts (tier 3) are the healers of the army, responsible for roughly half of the healing in earlier missions. Their healing power will slowly turn unimpressive later on, but their damage (Magic-based) will eventually surpass your Ghouls'. They also receive reduced physical damage. A useful unit overall.
Tier 5 (Lamassu) and tier 6 (Vampire) are where the Necropolis looks lacking. Both use Might-based attack but have unimpressive movement range, so they often stop just short of the target. The Vampires do have the best initiative of your army, and can soak up the counterstrike quite well. Lamassu (and all other 2x2 creatures) can take away 2 hit points from a demon's gate; you will appreciate that in Mission 4. So they still have their minor uses.
WALKTHROUGH
Level cap: 10
Difficulty Index: 3/6
Last updated: December 30, 2011 (v1.2)
Dynasty Traits: The starting bonus does not matter a lot. If you have +3 Core Creature growth then go for it, since almost all you will be able to hire are Core (tier 1-3) creatures.
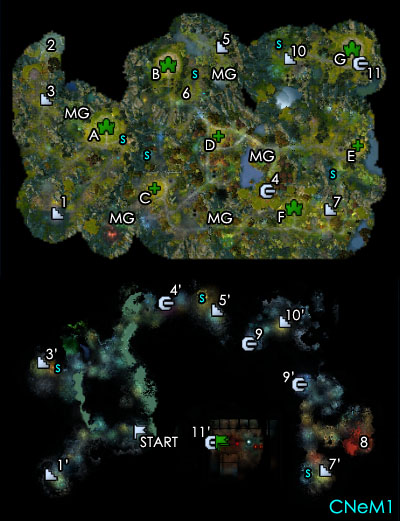
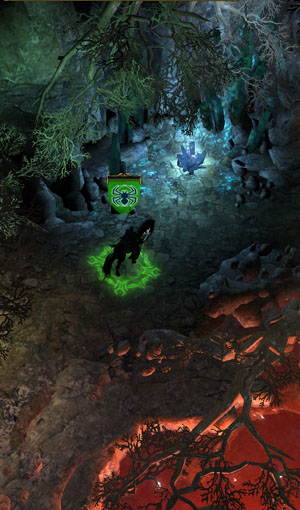
Anastasya starts her new afterlife underground, marked by (Start). Follow the road southwest, and pick up the Ghouls and later Skeletons. Ghouls and Ghosts are your best friends of the mission, so try to minimize their loss whenever possible. You will reach the level cap long before the conclusion of this mission, so feel free to cash out some chests. By the way, if you save the game before opening a chest, you can usually get another gold amount. This does not apply to which Week you get next - they have been pre-determined. The worst week for Ana is "The Week of Living". In my first run, I got that on Week 2 and was mercilessly crushed by the very first enemy hero. After restarting, the week never came again.
 The essence of Necropolis is to constantly raise back the fallen units and eventually outlast the enemies. It is a very good idea to pick up TWO healing spells as soon as possible in order to score perfect victories on almost all minor encounters. For Ana, they are Life Drain and Regenerate. The reason you need two healing magics is that there is a cooling period for most magics, so you can't cast the same thing over and over. Some spells are limited to one cast per battle (such as Mass Regenerate). As a result, you have to pick the best moment to cast them in a tough, long battle. For Mass Regenerate, the best moment is 5 turns before the battle ends to maximize your healing. Ana's third healing ability is her racial ability, Necromancy (the button that appears beside Ana's portrait in battles), which becomes very powerful later on.
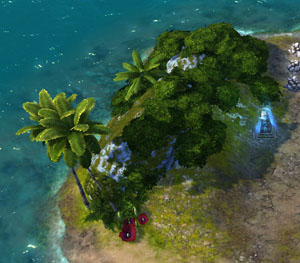
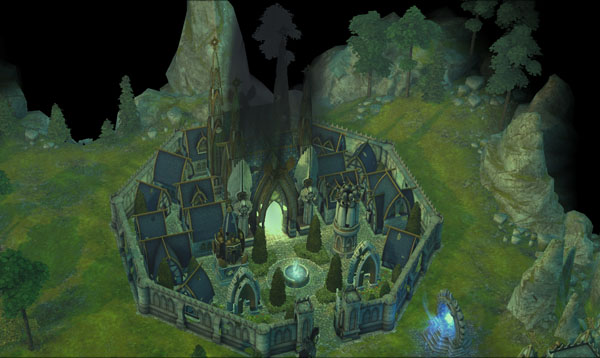
Climb up the dragon-mouth-shaped stairs (1') and emerge on the surface (1). Your goal is to capture Town A to the northeast. However, feel free to go northwest first so you do not have to return here later. Town A is defended by a weak hero with a weak army. You should be able to dispatch him easily (as long as it is not during the Week of Living).
Just east of Town A there is a status boost marked on the map by a blue s (same for others). Northwest of Town A, you can find a Mass Grave (MG). There are four more on the map, and you should visit each of them by Ana personally or the quest may bug out (v1.1.1).
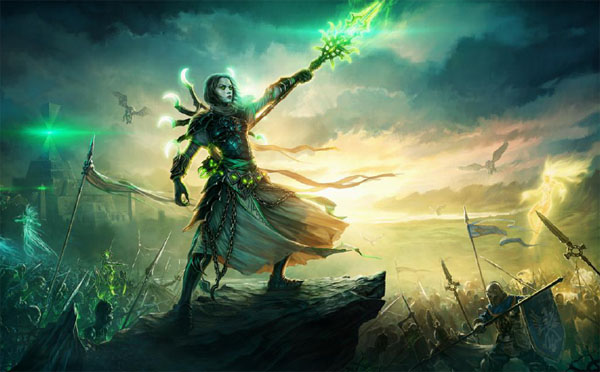
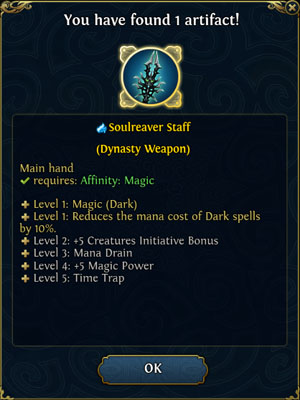
Follow the west path to the northwest and you will find another dragon-mouth stairs (3). Don't go down yet. Keep heading north to defeat a tough group of high-level creatures to claim your first hard-earned Dynasty Weapon, the Soulreaver Staff, perfect for a Magic Anastasya. The staff, which according to the loading-game screen (the first picture featured in this article), appears to be Anastasya's "official" weapon. It has a very useful ability at level 2 - a free (but mediocre) Mass Haste! Might Ana has to wait till much later for her first hard-earned Dynasty Weapon.
Use stairs (3-3') to return to the underworld. Visit the stats boost and follow the path northeast. There is a branch path to the southeast which contains resources but no enemies. Same as earlier games, it is always a good idea to have a mule hero following the main hero to pick up resources. They can also ship units, but it might be faster to Basic Town Portal the mule hero to the nearest Fort for that purpose (there won't be any "Summon Creature" spell, unfortunately). You can give the mule hero Logistics, Pathfinding, and other non-combat abilities to make him/her an effective courier, scavenger, and town manager.
 Use the portal at (4') to arrive at a little treasure plateau (4) on the surface. You can also take a sneak view of a future victim of yours. When you are done, portal back to the underworld and proceed east. Here is another stats boost and some Blood/Tear points.
Return to the surface with stairs (5'). Your goal is to capture Town B to your southwest. There is the second Mass Grave to visit on your way. There is also an Arena stats boost west of the Mass Grave. But you are too weak for the Arena now. Town B is defended by a mediocre hero, but since you have done a great job conserving units and have used a mule hero to ship new units to you, there shouldn't be any major problem. Sometimes the AI is dumb enough to send the defending hero around for errands, allowing you to steal the town easily.
It is a good idea to develop Town B into your headquarter, completed with an Advanced Town Portal and the unique structure for fallen unit revival (but reviving a unit costs more than hiring it, at about 150% of the cost). Just southeast Town B is a group of Spear Skeletons (6). They want you to locate a list, which is carried around by an enemy hero. Just keep fighting and you will get it eventually. When you get the list, return to (6) to recruit the Spear Skeletons and upgrade their structures in all towns. The upgrade structures also increase the creature growth per week. At this point, you should also get a quest to defeat the invading hero. However, in my game, the hero did not invade at all. I had to hunt him down in front of one of the towns later.
After taking Town B, you have two options. You can either travel down to attack Fort C, or go east to attack Fort D. I recommend taking C first since there is a rare Crystal mine in the territory. Depending on the strength of the resistance, you might be forced to work on the easier one first anyway. After grabbing both Forts, proceed further east from Fort D to capture Fort E. There are three more Mass Graves to visit in the area to complete the side quest.
Don't forget to convert all Creature buildings into Necropolis structures for more undead units per week for recruit. Since patch 1.2, converting Fort has become a decent investment that starts turning a profit after about two weeks.
So I loaded the autosave and avoided this battle - just passing by the town to fight some other neutral stacks on the other side. Strangely, the powerful defending hero left the town, trying to retake Fort E. This was my golden opportunity to capture Town F. With Life Drain, Regenerate, Stone Skin (cut down damage to 1/2 for 1 stack), a deep mana pool and the ever-recharging Necromancy, an almost-perfect victory against the hero-less defenders should be expected! There are also various temporary army boosts nearby, including a "water shield" structure to the east. (p.s. That powerful hero captured an undefended Fort E, but his army was only 1/5 of what I elminated in Town F. So he had no chance this time.)
A very good artifact for these low-level town siege are Summon Elemental scrolls. You might be able to find them on the adventure map, or purchase them very cheaply from an Advanced Market in a Haven town (before conversion). Summon a bunch of Elementals beside the defending Marksman to neutralize them. A trick of fighting siege battles: have superior ranged power and concentrate on killing the AI's range units until the AI sends its melee units out of the castle gate. Before that, don't fly your Spectres inside the castle to be brutely surrounded and slaughtered.
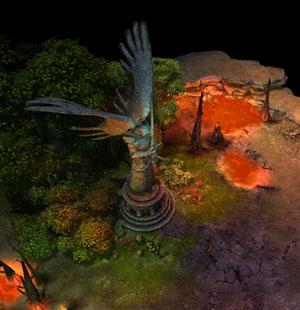
Whether Town F is in your possession or not, descend using stairs (7). Head to northeast for an Inferno-looking area to claim the Might-oriented Dynasty Weapon, Arachne at (8), and complete the corresponding secondary objective. Arachne's Life Drain passive ability at level 4 is infamously bugged (v1.2 and before) in a beneficial way. It is also one of the best Dynasty Weapons in Heroes6.
Head northwest to use Portal (9') to another underground section. There is nothing else to do but to climb up stairs (10') and return to the surface at (10). There is a final stats boost right beside you. Now go east and capture Town G! It will be another very tough fight. You might think this is the boss fight, so you can afford to lose a lot of units. Nope - this is the second last fight. So still try to raise as many fallen units back as possible. You can always resurrect them right in your converted Town G afterwards. At this point, you are too rich to care about 4- or 5-digit spending! Don't forget to convert another Barrack southeast of Town G. You can hire Lich now.

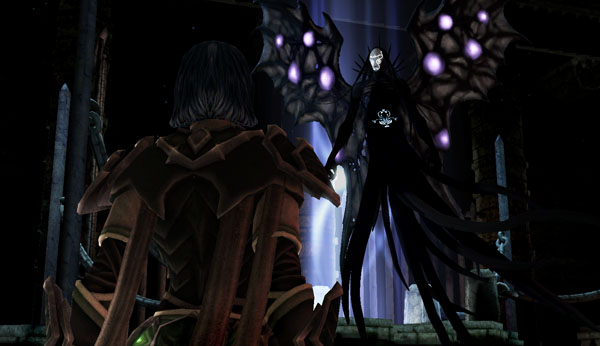
When you are ready, visit a few battle boosts and enter Portal (11) to face the boss fight of this mission. You need to win this battle in 12 turns or so. There will be lots of slapping, which promptly removes your positive buffs such as Life Drain. But before your stack attack, you can still cast Life Drain on it to get some strength back. Split out some 1-unit stacks so they absorb several initial hits and possibly counterattacks. Throw in whatever you have, keep raising the fallen with Necromancy and hope for the best. If you absolutely cannot win, come back a few weeks later with more units. In Heroes6, bosses' army grows very slowly, or in many cases do not grow AT ALL (unlike Heroes5). So you can always outgrow them providing that you have expanded well previously- this applies to every single tough battle of all campaigns. In my opinion, this feature really takes away the challenges... oh well.
Note: Do not worry if you could not complete the "reaching Blood I/Tear I" quest. It carries over to the next mission. Same as all equivalent quests in subsequent campaigns.