

Defeat all your enemies to win the scenario. However, if Gem is defeated in combat, the scenario is lost. Gem is limited to level 10 but will carry her experience, skills and spells on to the next scenario. Starting Bonus: 10 Wood and 10 Ore or 8 Crystal or Level 1 Mage Guild.
Maps

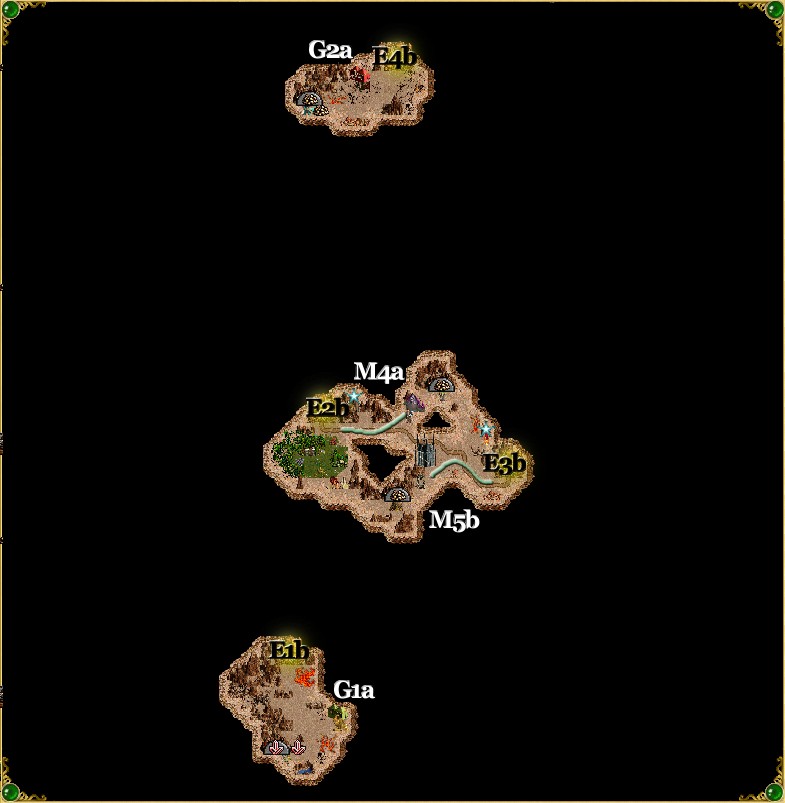
Click on a map to see a larger version.
Green - Friendly Town
Red - Enemy Town
Grey - Neutral Town
Yellow - Underground Passage
A# - Allied Towns
O# - Opponent Towns (a,b,c,d,e,f,g indicates which enemy)
N# - Neutral Towns
M# - Mirror Entrances (a) and exits (b). two-way unless stated
E# - Exit (a) entrance and (b) exit
S# - Seer (a) and the location of the item (b)
G# - Guard Tents (a) and the location of the Guard Tower (b)
J - Jail
X - Ambush
Starting Out
Take the Level 1 Mage Guild as your bonus since it will help you get a City Hall and eventually a Capitol faster as well as letting you use the Wood and Ore for building creature generators. There is a limitation in that you can't build Level 4 or Level 5 Mage Guilds in any of the towns so if you won't be able to get Town Portal to easily defend your towns.
First Leg
Hire some additional troops and give Gem most of them, flag the Centaur Stables and hire additional Centaurs, flag the resource mines, and try to take over both the second Rampart town and the Gold Mine. Place a priority on getting Grand Elves in both Rampart towns since they are the most effective against the slow moving early Necromancer troops. I recommend starting your push into enemy territory starting as early as the 3rd or 4th week by following the blue path. Take over N1 then swing north and take over N2. I'd use these two towns as money and possibly resource producing towns since if you act fast your first two towns will produce all of the creatures you need. Then head east on the green path and down E2a for a brief side-trip.
Second Leg
In this section of the underground there are two gold mines and a one-way mirror at M4a which will take up back to the surface at M4b which is in the southeast corner. The Arena is a nice place to visit for the bonus and if you're low on magic points there's a well handy. Continue along the green path down M5a back to the underground and then east to E3b. When you exit you will be west of a Necromancer town that you should easily conquer. Hunt down any enemy heroes that are in the area since you don't want them sneaking past you. View Air is a great tool for this job. Once you have overtaken N3, go north on the green path to do the same thing to N4. This should also be a relatively easy task since Grand Elves plus Slow or Blind or Forgetfulness works wonders. If you're low on troops you might want to stay in N4 and have two additional heroes ferry troops from A2 and A1 while striking down any enemy heroes that attack you or that wander by.
Finishing Up
Once you have enough troops to feel confident, head either west or east on the yellow path and take over O2a or O1a, head into either M3a or M3b, and take over the final town. Unlike other campaigns where heroes travel from map to map, there aren't many places of learning on this map and so it's not necessary to delay the victory longer than necessary. The only real danger you're likely to face is the Castle towers so to minimize your Grand Elf losses, you can always send a weaker hero to lure the strong enemy out and then use Gem to attack the enemy after surrendering with the weaker hero. Once you defeat every Necromancer town and hero, you will have won this map.
Read full article...