

Mission 4 - Negotiations
Map Size: Normal
Carry Over: Freyda
Level Cap: 27
Difficulty Index: 3/5
Primary Objectives:
- Talk with dwarven garrison
- Carry out Dwarves' demands
- Reach Tor Hrall
- Get away from the Dwarves' territory
- Freyda must survive
- Kill wolves
- Take care of Hydra
- Elminate rebels
- Find dwarven mithral helm and greaves
- Collect resources, enough for Keymaster's requirements
February 11, 2007, Patch v2.1
There will be plenty of nice artifacts in this mission, so the Champion bonus seems to be a good choice for a reasonable boost at start.
This mission is clearly divided into two parts. The first half is a brief, standard conquer and build. As soon as you meet the requirement, you should move on, since you will lose all the leftovers anyways. The second half is all about solo sight-seeing, but there are a few side quests to pursue in between.
Part I: Preparing for the Snowy Mountains
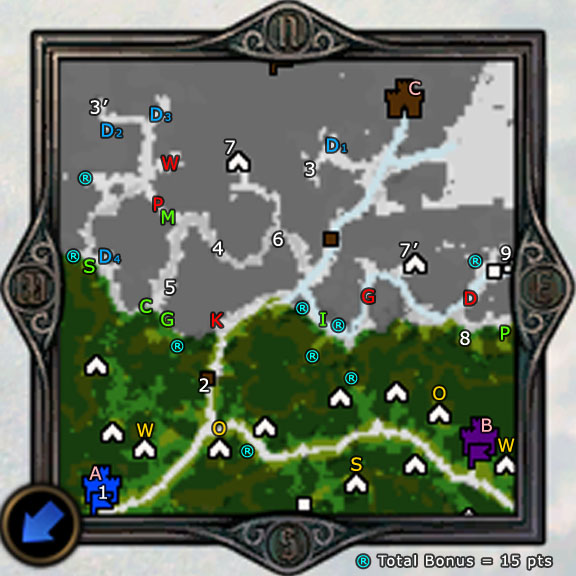
Freyda starts in the SW corner (1) with Town A already under her command. Haven towns (after so many patches) now require a lot of Wood and Ore, so you can start by flagging the nearby Ore Pit and Sawmill (yellow O and W). There will be no secondary hero in this mission, so Freyda has to do everything by herself. You will be able to reach the level cap quite easily in this mission, so you can skip a lot of optional neutral stacks, such as the group just SW of Town A.

Resurrection = Successful Campaign!
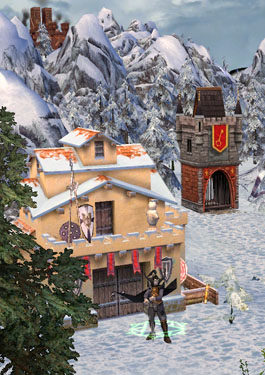
At this stage, all of the neutral Renegades will join Freyda. Pick up the better ones as soon as possible! If you venture into the NW region from the Saw Mill, you can flag two more mines and pick up a small stack of Fallen Angels, which are essentially super-sized Vampires. There is also a Witch Hut nearby.
 Before visiting the Dwarf garrison (2), keep going east to defeat the Rebels stationed inside Town B. Don't miss out on the Sulfur Pit (yellow S) on your way and flag the Sawmill and Ore Pit there as well.
 After flagging more mines and visiting the stat boosts (blue R), you can approach the dwarf garrison at (2). Freyda can only pass the garrison if she:
1. Owns more than:
- 15000 Gold
- 15 Crystals
- 15 Sulfur
- 10 Gems
- 100 Conscripts
- 80 Marksmen
- 50 Squires
- 30 Imperial Griffins
- 15 Inquisitors
- 5 Paladins
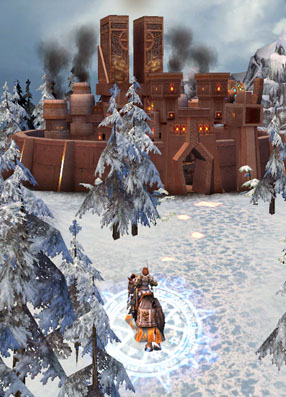
There is no return after passing through the garrison. After you have done everything meaningful, lead the specified army and go straight for the dwarf town Tor Hrall (Town C). You will see a Red Keymaster Tent (red K) on the left, but it is now guarded by legions of high-tier dwarfs. We will come back later for it.
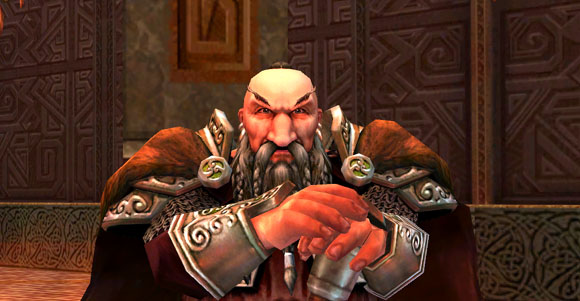
ROFL, oh wrong, ROLF, co-chiefs the Dwarf tribe with Wolfenstein, I mean Wulfstan.
Part II: Greetings from the Dwarves
As soon as you reach Town C, a cutscene plays and you have lost everything in your home base - and your bank account gets reset to 0 as well. Your new objective is to escape the dwarf territory. Your way in is now blocked by hostile and huge garrisons, so you have no other choice but to take the one-way portal at (3). Before entering the portal, you can pick up a nice Dwarven King artifact (blue D1). Similar to Findan's last mission, all four in the set will be available for collection!
 You emerge in the very NW corner of the map (3'). Immediately to your south and northeast are another two pieces of the Dwarven King artifacts (D2 and D3).
 Sometimes, you can get neutral, lower-level Dwarf units to join you. They are quite powerful units, and I would trade my fat and lazy Conscripts for them on any snowy day. By the way, from time to time you should pick up some Crystals, Gems, and Gold. They will be needed in an optional sidequest. Cash the chests as well. You will have lots of EXP from quests.
When you go south, you can see two stacks of Wolves in the forest (red W). The beasts seem to be missing a victim to be rescued by you, so it is better not to kill innocent wild animals, right? Actually, no. Video games never teach you to save wildlife, humanoids, or humans.
If you don't kill the wolves now, later on you will be blocked by three dwarf stackc at (4). They will ask you to defeat these wolves. As soon as the wolves are gone, these blocking stacks also disappear. There are three stacks of wolves in total.
SE from the wolves is large stack of Phoenixes. There is no need to waste your precious troops on them, because there is a very nice detour. Follow the path SW and not far ahead lies the last piece of Dwarven King artifacts (D4) and a stack of Squire reinforcements as well. Keep going south, and you can visit a Stable and pick up a very useful artifact - Boots of the Open Road, which eliminate the movement penalty on snow.
Note: The game hints that Rolf is going to chase you around, but I have never seen any trace of Rolf.
 Follow the road east, and you can pick up a stack of Conscripts and *Inhale* Imperial Griffins! Cast a Divine Strength on the diving Griffins (using your Inquistitors) and enjoy some landslide success.
 There is a Hut of Magi at (5). The Hut asks you to give up a Dwarven artifact and it will show you some interesting places. No, it does not show you Rolf ROFL or Wulfstan return to Wolfenstein. It only shows you the places I just described above. Don't waste your valuable artifact on it.
Now follow the road north and, look, you have bypassed that large Phoenix stack! There are some well-hidden Marksmen willing to join you just SE of the Phoenixes.
Next, turn east, and you will be blocked by the Dwarfs who ask you to kill wolves, if you haven't already done so. Keep going east, and you will bump into a little stack of Dwarfs hiding in the wood. Someone begs you to rescue his sister (who is also bearded, you will see), by defeating some Hydras. You can find a large stack of Hydras just NW from here (7). Note the path is not really obvious.
After defeating the Hydras, you can "enter" the mine. The mine works like a two-way teleport and you will come out at (7'). This is a shortcut to the end of the mission, but by taking it you will miss a few nice features in between.
If you are interested in what you might have missed, backtrack to (6) and follow the road SE then SW. You are back at the Red Keymaster Tent (red K), but this time the guarding stack is much weaker. You can trade for the Red Key with:
- 10 Crystals
- 5 Gems
- 5000 Gold
 That's why there are lots of Crystals and Gems around. The Red Key opens the Red Gate (red G) in the east. Go there, pick up the Inquisitors, visit the stat boosts, and you are now back to the Dwarf Mine exit (7'). Keep going east, and you can see a stack of Shadow Dragons guarding a high-quality artifact.
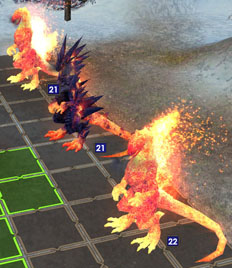
 You are now very close to the end of the mission. The mission boss is blocking your exit. It is -- a large stack of Godzillas !!... also known as Fire/Magma Dragons.
The Fire/Magma Dragons are essentially slow versions of Phoenixes. You receive fire damage from hurting them in melee and when you face such a large number, your losses will be significant. The Dragons are also immune to mind control spells (such as Frenzy and Puppet Master), so there is no trick to this battle. Just throw in whatever you have and Mass Haste your own side to shorten the pain.
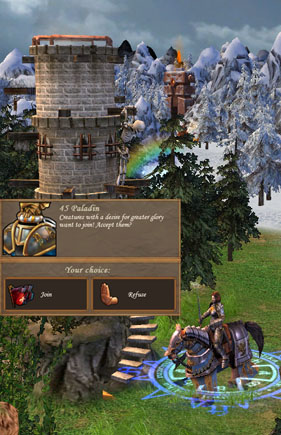
If you are not powerful enough to take on the Godzillas, you can go SE a bit to visit a Prison (8). The Prison holds no hero, but offers you an optional sidequest. By submitting two pieces of Dwarven artifacts, you get a large stack of Paladins to join. In my game I got 45 -- this was more powerful than my entire army combined! The exchange is well worth it. Besides, there are also a group of Paladins to be picked up further east.
Behind the Fire Dragons, there is a new and very nice stat boost (+2 spell power and +2 knowledge) guarded by a very small stack of Phoenixes. Finally, enter the stairs and approach the portal to trigger the end-mission cutscene. Well done!
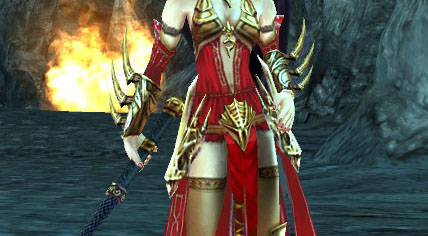
The most intelligent woman in the original HoMM5 has returned!
Freyda's Dilemma: Rebels | Suspicion | Duncan | Negotiations | Choices
Read full article...

