

M5: Heart of Darkness
Map Size: Large
Level Cap: None
Difficulty Index: 3/5
Last Updated: October 31, 2007, Patch v3.0
The final chapter of the new Necro campaign is as exciting as Markal's M5:Lord of Heresh. There will be huge neutral stacks, plenty of towns, a map full of AI heroes and a network of two way portals connecting the world. Your Necromancer's "raise as you go" ability is utilized to the extreme. The final boss can be as difficult as Godric... well maybe not that difficult, because the AI picked the skills for him - no Light Magic!
None of the bonuses are significant, and I took 25 Mercury. Even though resources are abundant in the mission, later on you are likely to use up mercury on the tier-7 dragons.
You start in the SE corner, in front of town (A) and right in the middle of your swampy rotten paradise. There is a Stable (S) right below that should be visited at the beginning of a week. There are not a lot of mines to be flagged in your area, but plenty of resource-holding structures (such as Elemental Stockpiles and Treant Thickets), so you can easily accumulate dozens of everything within the first 2 weeks. (In fact, you will be still short of Ore soon.) Loot as many treasures as possible early on will give you a very healthy town growth.
You are up against two AI players. The Blue AI owns 4 towns (B-E) at the moment, and as you can expect they will outgrow you if you don't start taking their towns fast. The Red AI owns the town to the far northeast (F), and there are scripted Red hero spawns to give you headaches.
You have almost no army, so you have to rely on your Avatar of Death and Phoenix. Spread out the 1-unit skeleton stacks to buy you time. The Mummy can help reviving them, too. Use your Dark Energy points to raise durable creatures (tier-6 or tier-3) for Arantir and Vampires for Ornella.
Just collect everything (including the resource buildings) as soon as possible with both Arantir and Ornella. I recommend sending Arantir to the east and Ornella to the west. Just east of the Sawmill Ornella can pick up a medium stack of Poltergeists (tier-3). Ignore the couple of two-way portals ((a), (f)). You can't use them yet and there is no enemy coming this way.
Around the first week in my game, a familiar Renegade (Blue) hero visits from the north east - Andreas. He is nothing to be afraid of. A couple of Curse of Netherworld will scare him back.
Just south of town (A) stands a stack of Champions. These Champions are not enemies, though. When you visit them, Arantir is automatically teleported to this spot (and he is not going to get teleported back), to receive a side quest about defeating an Inferno hero at (2). Looks like this hero just came out of the Volcano, or is about to jump.
Defeat the Demon hero with Arantir (who is more powerful than Ornella), and make Ornella visit the Champions. You receive quite a large stack of Death Knights. This is an awesome boost to Ornella's army. By the way, there will be a very tiny weekly reinforcement arriving from this spot (1 Lich + 1 Mummy for me).
After handling Andreas it is time to take the Blue towns. Each town is preceeded by an Outpost, which is essentially a low-level town wall harboring neutral creatures without a hero - very easy. The Blue towns are garrisoned by pretty-high-level Haven heroes, but they are nothing extraordinary, either. Just be aware of the new "Elemental Balance" skill possessed by some of the Haven heroes, though. When you summon a Phoenix, they get one at the same time! Fortunately the AIs don't really know how to use their free Phoenix.
I suggest you take down the Blue towns in a Blitz since there aren't a lot of resistance anyways. You don't need any good army to start with as each week you can gather a lot more from Dark Energy, and your power comes from the Avatar and Phoenix, or plus the Vampires for Ornella. Since Arantir is more efficient, you can give him more work. This is what I did in my game. You should be able to take all blue towns before the end of Month 2.
Arantir: Town (B)-(C)-(D)
Ornella: Town (E)
The river passage (3) from town (B) to (C) is not very obvious. Build a Stable in your new Haven town if it is not already there to boost movement at the beginning of a week. Hire a low level hero to pick resources up after your main heroes. You will be short of Ore (again!) so try to flag the Ore Pit NE of town (E) quickly.
Other than the decorative Outposts, each Blue town comes with two features. First, there are two 2-way portals outside each town. I have marked the connections with matching lower-case letters (a-a, b-b, etc.). The great thing about these portals is that you can quickly access any other towns for defense or troop transfer. However, you cannot pass through a portal unless the neutral stacks (Elementals) are cleared from the other exit, and the AI heros will not do that for you although this is clearly to their advantage. Therefore, after taking each town, clear the blocking Elemental stacks. The second feature is a large Inferno symbol. You can't do anything about it yet.
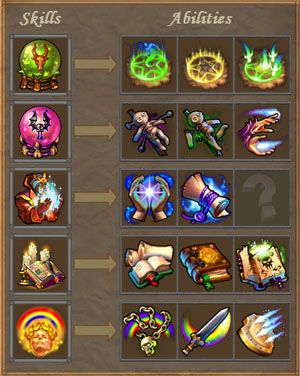
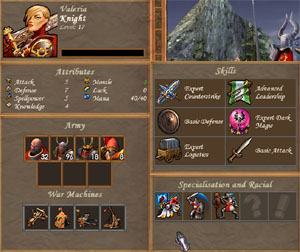
You can find a Purple Keymaster (purple (K)) just west of town (D). Visit it as it might be useful for you at the end of the mission. A Memory Mentor is hidden at (4) that you should eventually come with Arantir. I highly recommend giving up Master of Mind and aim for the ultimate Howl of Terror, because you are powerful enough not to cast Mass Slow, and the extra -6 morale will make a huge difference in the final battle. You can also trade away mana-friendly feats under Sorcery because your Knowledge point should be already very high (~20 or more) by now. I picked Luck as my 6th skill and was able to fully develop it by the end of the mission. You can use my Arantir's skill & feat selection (on the left) as a reference.
New spells in the expansion are finally available in this mission. It is likely that you can pick some up from the mage guilds. Let's take a look at the two new Dark magics:
Vampirism - This is my favorite spell back in HoMM4. With it my chaos campaign heroin alone could solo 50+ dragons, and so can you here. You can actually cast it on the Vampires or Avatar to double the draining effect! Combined with Arcane Armor the stack just becomes invincible. Use this spell to replace Raise Dead.
Sorrow - The melee attack of Ghost Dragons (tier 7 alternative upgrade) and a high-level Avatar has the same effect. Your hero has better things to do.
What you should worry is the Red heroes spawned from (5). The portal is operated by a stack of Succubus Mistress, which cannot be destroyed for now. The Red hereos are much more powerful than the Blue ones, and they might be able to cause major damage to your army if you cannot raise them back before the battle is over. These Demon Lords spawn roughly every week, and one after one they get stronger. Fortunately, in my game (3.0 heroic) they eventually stopped coming after the famous multi-player favorite Deleb. Oh you know what's coming with Deleb, right? (A nasty Ballista.)
The Red heroes will either go after an undefended town, or actively engage Arantir and Ornella because they usually have a much bigger army. You can't use Curse of Netherworld, so you have to fight the battle square. They are fast and their attack is powerful. They gate in a lot of units. You want to conserve army as much as possible - so what do you do?
My approach is to deploy as little but durable as possible. For Ornella, deploy only the Vampires (hopefully you have a good stack by now). Dock them in a corner and throw them an Arcane Armor. If you have learned Vampirism there is no better time to use it. This way, you don't have to take hits from multiple sides even if you are overpowered 10 to 1, and can still maintain head counts through retaliation. For Arantir dock with something very durable and deploy multiple ghosts to buy you more time, and kill everything with your Avatar.
If you need a larger army to handle the Red heroes, as soon as a new week arrives, use the convenient portal network to deliver Haven creatures to town (A) and convert them to Necro units. Your income is so high that you can usually afford to hire all available Haven creatures (skip tier 2, I will explain why). Invest your resources and money into Vampire Lords first. They are the only units needed before the final battle. With 100+ of them you should be able to suck Deleb dry!
When the Red heroes stop coming you are free to explore the map. Huge neutral stacks are everywhere, giving you juicy EXP points and great treasures. Do use a Phoenix (not the Avatar) against the Godzillas and their upgrades - or you can wave goodbye to the Avatar! (Their fire shields bites back.) There is a Dragon Utopia at (6). If you missed Vampirism, there is one more chance to pick it up here. While the artifact selection used to be awesome, now there are hardly anything useful.
Make Arantir visit as many stat boosts as you can, and progress the quest with either him or Orenall to the garrison at (7). This garrison is blocked unless you follow the ghost's instructions. First he asks you to kill a group of Assassins who claimed his live. The Assassins's hideout (8) can be reached through the two-way portal (g).
You should listen to this cutscene yourself! ...with Ornella alone visiting the Den.
The Assassins beg for mercy, and offer an alternative. If you spare their lives, they will help you destroy the demon's portal at (5) to stop red heroes from coming. I heard that you still have to kill the Succubus Mistress stack yourself, though. In my game, I got here around middle Month 2 and there hasn't been any sighting of Red heroes for 2 weeks already. So I don't see the point of the Assassins' offer - just click Cancel and kill them.
The only situation that you can use the Assassins' service is if you access this area (8) directly from your swampy HQ very early on, before touching any Blue town. You can rush to the Ghost (7) through portal (g), and come back here to use the Assassins to block Red hero spawns. No more Demon Lords, no more Deleb. You will make conquering the Blue territory somewhat easier if not all of the Red heroes have spawned already.
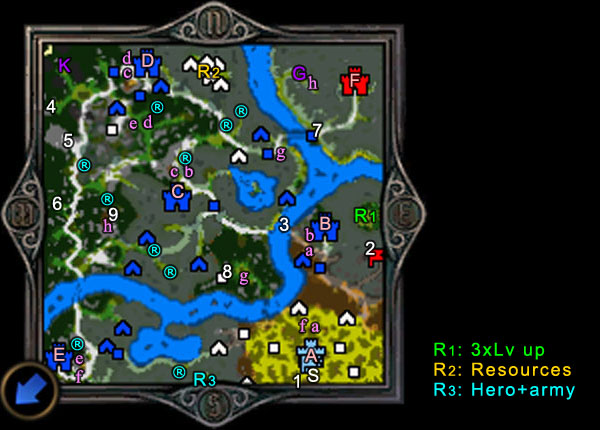
But I won't recommend that as the Ghost's reward is way better if you do kill the Assassins. Now you can choose one of the three rewards, marked with different colors of one-way portals here at (8). Each portal takes you to an isolated area. You can only pick ONE portal to enter (the other two will be sealed forever). Whichever portal you choose, though, you gain unlimited access to it.
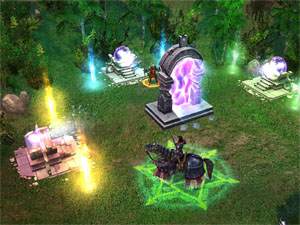
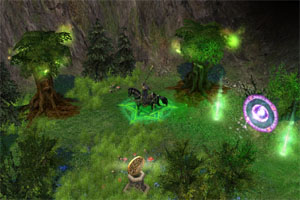
R1 (green): 3 Sylanna's Ancients, our beloved level up tree.
R2 (yellow): A lot of resources.
R3 (blue): Rescue a familiar Renegade Haven hero from a prison. You can convert her troops in town (A).[/*]
I suggest the Sylanna Ancients (green portal). Velaria is really weak compared to what she was back in Hammers of Fate C2M3, and her army is just about one extra week of growth from the 4 Haven towns - not good enough to make any difference (see the picture on the left). I don't see why you should give up three levels for her - since the majority of your army is actually the Avatar of Death! And needless to say all of the towns have been developed by now, so you have no use of the resources.
You are almost done! Go broke on army recruitment and upgrade, pass everything to Arantir (including everything that Ornella has, artifacts too), and march each of your scout hereos AND Ornella (not Arantir, Ornella plus three others) right on top of the demon symbols outside the four Blue towns (B-E). The story progresses and... Asha uses all! (We saw that coming from mission one, didn't we?!) Even better, the game developers make a timely sunset to create a heroic atmosphere. Arantir marches alone to meet his Destiny!
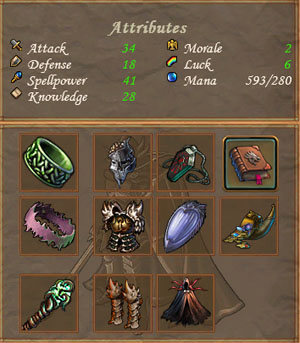
Let me briefly discuss my artifacts of choices for the final battle.
Death's Embrace Set: Too good to pass!
Urgash's Set: The ring (-2 morale) is very useful and the extra +5 Attack isn't bad at all.
Dragon Scale Armor & Dragon Bone Greaves: I picked up the armor in M3 and the greaves somewhere in this mission. They make Avatar and other melee units slightly faster. For equipping two you get one extra stats points in all 4 categories.
Shield of Crystal Ice: for fire protection. I picked it up just east of Town (E). This artifact was useful against Deleb, and the final boss also has a flaming Ballista.[/*]
I was trying to buy a Golden Horseshoe from the artifact merchant for the holding slot, but nothing good came up.
Just before you go, convert a few hundreds of skeletons into Skeleton Warriors to fill the 7th stack slot. They have the wonderful ability to shield nearby troops from ranged attacks - you will need them badly for the first round of the battle!
If you don't have a good Armor artifact (Dragon's Scale Armor is good enough), consider a little detour if it won't cost you an extra week. Go north after the bridge, and climb the mountain to unlock the Purple Gate (purple G). Pass through the last set of two-way portal (h) to reach another isolated area (9). A neutral stack offers to join (but it is unlikely you have the space for them), and here lies the best Armor artifact of the game - Armor of the Forgotten Hero (+2 for all attributes).
It is finally time for the final battle at Town (F)! Don't miss out FOUR morale/luck bonuses on the way. Your opponent is again Orlando, who is very different from M3. He is no longer a defensive chicken! His Attack stat is very high now. And don't be fooled by the numbers of his stacks - take a look at the crazy Morale and +9 Luck! They can deal a ton of damage! AND WATCH OUT FOR THAT BALLISTA!
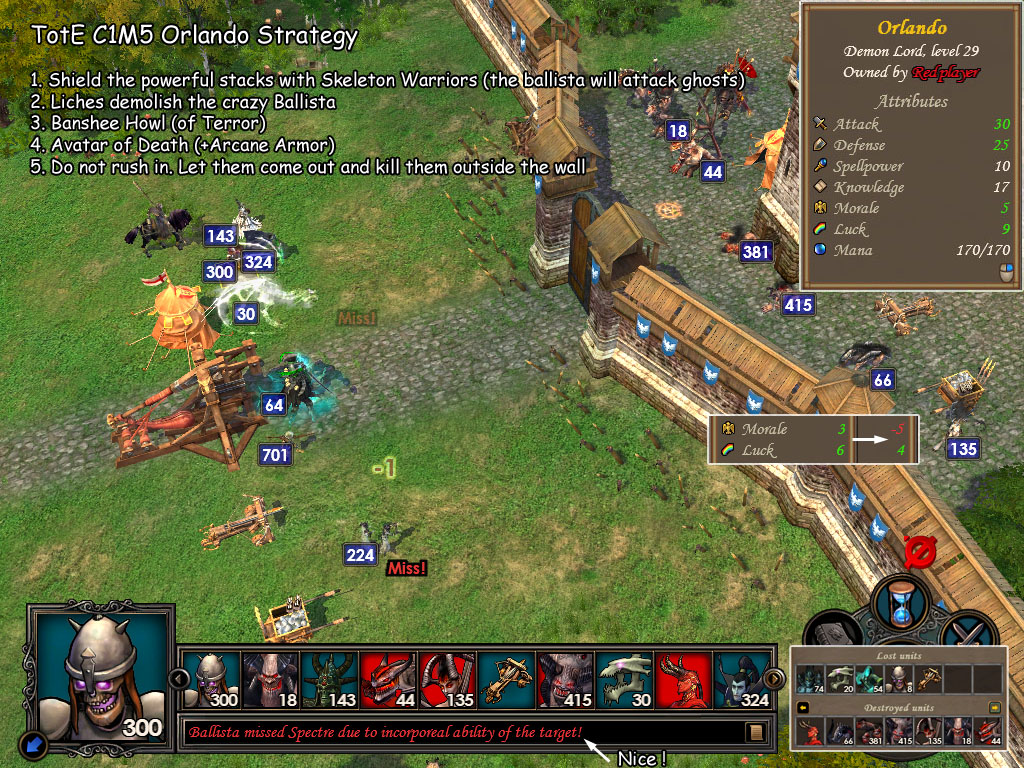
First, deploy the most important stacks (Liches, Ghost Dragons, Vampires) around your Skeleton Warriors to receive the shield bonus. Believe or not, that Ballista made 4 lucky shots and killed my 30 Ghost Dragons before they could act when I didn't use the Skeleton Warriors to protect them! And after I adopted this strategy the Ballista shot at my Ghosts instead and missed 3 out of 4 shots!! Use your Liches to get rid off that FREAK BALLISTA in round one no matter what. This is probably the most important step to victory.
Use Arantir's first action to scream Howl of Terror. With the help of other artifacts I was able to bring Orlando's creature morale down to -5. (The creatures come with +7 morale, then -2 from our Ring, -2 from our Cloak, and -8 from the Howl to make it -5.) According to the manual, the effect of morale and luck are still capped at +5 ~ -5, even if they can appear to be more than +5 or less than-5. So -5 morale is as good as -100 morale! The creatures' luck is also reduced from the cloak artifact and the Howl, down from +9 to +4, which is essentially 50% chance rainbow to 40%. If Orlando's creatures do move, you can expect a huge rainbow 40% of the time.
Don't rush in. Orlando's melee units and their clones will come out fast. Summon your Avatar of Death, but don't fly the Avatar inside the wall - it can get killed by a lucky hit - even the Avatar does not have that much HP. Or at least do it after casting Arcane Armor on the nasty creature. Use your Liches' area attack to unsummon the Phantoms (aim on the real stack and the splash is a sure hit), so Arantir can cast these useful spells on the most useful stack (Avatar). It is a very fast-paced battle and the first stack who strikes usually wipes the other out! In my game the battle was over before Arantir's fourth action!
The victory is finally yours! Have fun watching the explosion and you now realize why Orlando is soooo tough. He has the entire Lion's artifact set. This artifact set actually allows the hero to move up 10% of the ATB every time a high-morale eagle is triggered among his creatures. Now you know why every professional recommends Howl of Terror on TV!
Congratulations for winning the campaign!
Read full article...
