Kiril returns in a long Mission 2 to combat Necromancers and Necropolis creatures in the fearfully symmetrical Heresh. The mission starts quite linear, but suddenly expands to give you a lot of freedom of what to do next. You will also unlock the tier-4 and tier-6 Inferno creatures within the mission, although you probably have guessed that only the basic version will be available. Since Life Drain does not work on undead, you have to rely on Reinforcement and Regenerate to conserve units.
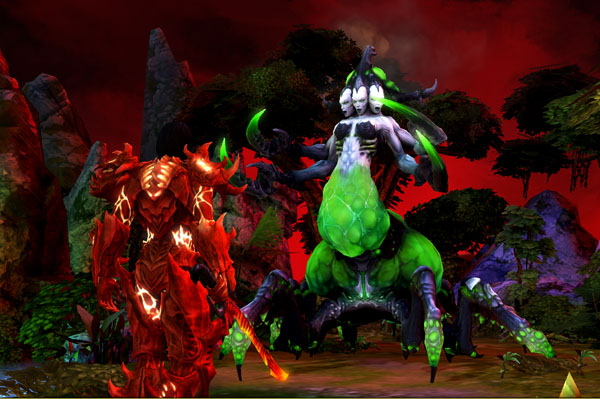
The ultimate goal of the mission is to defeat the Spider Queen (Mother Namtaru) frequently featured in the Necropolis campaign. Since this mission is quite long, by the time you finally reach the boss, it will be more than a reverse of the final fight of mission 1. You will have a bigger army and much higher stats than Xana, while the AI-controlled Spider Queen is not smart enough to run away from your loyal two-headed friends.
Dynasty Traits: You will be again swimming in resources and gold in this mission. So you can mostly ignore economic bonuses and go for +3 Core creature growth. Hero +3 movement bonus is also nice. Despite the relatively high level cap of 19, you will still fight enough battles to reach the level cap long before the mission is over.
 Inferno Campaign Mission 2
Level cap: 19
Difficulty Index: 3/6
Last updated: December 18, 2011
Kiril starts without a town at (start). The east is a dead end (looks like Kiril was air-dropped to this location). Follow the road west and cross the bridge. In my game, there was a Druid's Bracelet just down the road. It is by no means a powerful artifact, but it offers one free Regenerate per battle, which comes in very handy against Necro heroes.
 Soon you will be able to take over Town A owned the Red Haven player; it is even defended. The AI is so nice that it builds up the town for you, so don't feel too rushed as long as you take and convert it before the end of the first week. Take some time to collect resources nearby. You won't have a crystal mine until quite a bit later, so try to pick up all crystals and save them up for more important buildings.
When you have run out of things to flag and collect within Town A's borders, you should be powerful enough to take on the next Haven town, Town B. There should be an aggressive Haven hero who goes after Kiril, but it is a Haven army, so Mass Life Drain works. Take Town B, which the AI also builds up for you. If you have yet to build up Town A to level up, maybe the AI gives it to you here! You will almost always inherit a highly upgraded town from the AI in this mission.
After taking Town B, the gate at (1) is opened, but don't pass the bridge yet. To the northwest there is a Fort C, which governs a creature building and a Sawmill. This area is like your backyard, so you may as well make a round trip and grab things from the floor. There is an artifact merchant at (2) to burn some cash, as you will have way too much of it.
When you have done everything north of the bridge, go south and challenge Necropolis' Town D. From now on, almost everything you fight is undead, so you can switch your Dynasty Weapon to something other than Arache. The Angelic Alliance from the Haven campaign mission 4 is a good choice as at just level 3 (only requires 1M EXP), it provides a free Celestial Armor that absorbs a few hundreds of damage.
 Before taking Town D, you probably need to face a Necro hero. While his army isn't particularly big, remember now your Life Drain does not work, so you have to really be careful to avoid losing units. You can use gated units to distract the last remaining units of the AI - so the battle drags longer and you will have more time to slowly Regenerate back lost units.
After taking Town D, you will be attacked every now and then. There could be as many as three roaming Necropolis heroes coming at you at the same time. They will attack your closest undefended town/fort, but will not hesitate to escape from Kiril by Town Portal if they sense danger (and unfortunately, they will come back in just a few days through a one-way portal (2)-(2'). They can reach Town D three days after coming out from (2'). It will be still a while until we can swat these flies for good.
Your strength might not be enough to produce a perfect victory against the first counterattack, so you might consider defending in Town D. But the subsequent Necro heroes will be progressively harder to "catch". In the meantime, you can flag your first crystal mine northeast of Town D, and visit the first stat boost (s) of the mission northwest of the town.
 Around this time, you should be given the quest (capturing the next town) to unlock the tier-6 creature, Juggernaut. With poor movement range, their special attack is not very useful. But you can still practice their placement to avoid hitting your own units on the battlefield. In general, they should start a battle very far away from other friendly units.
With the crystal mine in production and some additional trading, you can build an Advanced Town Portal in Town D. Now you can freely explore and portal back when there is any threat. Then you can cast Basic town portal to some front-line town or fort to continue your expansion.
Not very far south of Town D, you can see two braches off the main road at (1). It is better to go west first to unlock the Breeders. Follow the winding path to take Fort E, and then south to take Town F. It is also a good idea to take Fort G early to give you an early warning of the Necro hero's presence, although the invaders then tend to go after Fort G, which gives you even less reaction time.
In my game, I parked Kiril in Fort G, and three Necro heroes stopped their turn just far away enough from Kiril so that Kiril cannot reach them on the next turn - at least they thought so. I then used a second hero to carry Kiril's troops, so Kiril can save up some movement points and have just enough movement points left to swat three heroes all in one turn! I did not see the next invasion for a long, long time.
 Upon your capture of Town F, the game spawns a relative weak (level 1) Necropolis hero at (3). After defeating the hero, you can recruit a friendly stack of Breeders, and unlock their buildings in all your towns.
In Town F area you can find an underground entrance at (4), but it only leads to a disappointingly small and dull area at (4'). There is also a one-way portal entrance at (5), exiting at (5') so you can return to Town F a little sooner. This swamp area really does not hold anything valuable.
Now you should be powerful enough to put an end on the Necropolis invasions. Take Fort G if you have not already done so. In this area, you can find a pair of two-way portals (6-6'), but they do not serve any important purpose. Cross the land bridge, pass the portal exit (2'), and continue northeast towards Town J. This town could be a little too tough for you if you arrived here too early, but now it should not be difficult at all.
 There is a Fort I just east of the land bridge. In my game, it was strangely undefended, so I captured it with an army-less secondary hero. Northeast of Fort I you can find a friendly and large stack of Cerberus at (7). Suddenly you become Xana in mission 1!
Now nothing should be able to stop you. Destroy everything on the way south and take Town K. The portal entrance (2) beside Town K is the source of all annoying invasions.
Keeping going south and grab Town L, the last stand of the Necropolis faction. There is another group of friendly creatures (Demented) at (8) in the middle of a narrow, dead-end path.
Now there is only one task remaining - gather all units you have and travel east from Town L. You will eventually see the stairs at (9-9'), leading to the Spider Guardian at (10) and the boss of this mission, Mother Namtaru. The boss has an odd HP of 87035, a quite-powerful attack that damages and disables multiple stacks in contact with her. But she does not retaliate attacks, and she does not avoid the dogs! Just look at how much the dog bite hurts her! Just like the Azkaal vs. Xana's dog battle, my dogs also hit more than all other stacks combined! Terrible creatures! (bug or feature?)

By the way, various spirits dotted the battlefield of the boss fight, but you cannot attack them. You will receive an achievement if you do not allow the boss to "consume more than 3 spirits". As long as you end the battle quickly enough, you should have no problem with this one.