 Having recently completed the Sylvan walkthrough, Maltz did some time-traveling and went back to the final mission of the Dungeon campaign. Maltz Raelag's Offer is a big map with intimidating neutral stacks and garrisons, one of which includes 3000 familiars, 600 hell hounds, 180 succubus and 35 arch devils (which you can avoid, fortunately). The article suggests three initial paths, and describes what you can expect to discover on each road. There are even some tips if you are a real masochist and want to defeat all enemies on the map.
Infiltrator and Maltz are both working on the remaining scenarios. If you need help with any of those scenarios, ask for some help in the forums.
Map 5 - Raelag's Offer
Size - Big
Level Cap - 40
Carry Over: Raelag & Shadya
While the programmers have probably convinced you that Raelag could take over the world all by himself in the previous maps, they will prove you wrong here by boosting the neutral numbers so much that your jaw will drop. There is only so much damage an Empowered Meteor Shower or Implosion can inflict, even with combined with Warlock's Luck (patch 1.3, giving you 4000+). You need a powerful army to secure victory, and you are given one!
Our glorious Warlock campaign finale is actually a grand escape. Your objective is to reach the opposite SW corner of the map, with BOTH Raelag and Shadya. Your enemy - the blue Inferno AI owns three towns, and steadily builds up its forces. These Inferno heroes will come to you when they have the upper hand; otherwise they hide in their towns when you get close. You have the option of destroying them all, or simply ignoring them.
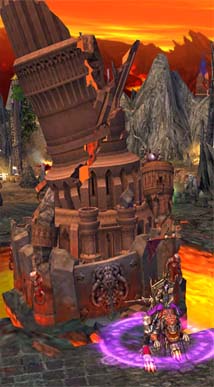
You might think a town or two will give you some fresh troop supply, but unfortunately that is not the case here. Whenever you conquer an Inferno town, the tower "crumbles" and it is gone permenantly. Therefore, try not to lose any creature during battles against neutrals, and feel free to skip the difficult ones. The good news is there are several high-level Dungeon and Inferno creature dwellings on the map. At certain places, neutral creatures will join you for free as well.
Your way out isn't at all straight forward. The paved road is guarded by a total of nine garrisons. Some of them are particularly formidable. Here is the composition of these garrisons on heroic, Week 1 Day 1:
AD = Arch Devil; PL = Pit Lord; SC = Succubus; SM = Succubus Mistress; CB = Cerberus; HH = Hell Hound; HD = Horned Demon; HO = Horned Overseer; FM = Familiar; IM = Imp; FE = Fire ElementalGarrison A: 500 FM, 98 CB, 3 AD
Garrison B: 340 HO, 300 CB, 55 SM, 25 PL, 15 AD
Garrison C: 400 CB, 8 AD
Garrison D: 1000 HH, 85 SB, 50 PL, 30 AD
Garrison E: 400 CB, 8 AD
Garrison F: 3000 FM(!), 600 HH, 180 SC, 35 AD
Garrison G: 800 CB, 350 SC, 50 PL, 30 AD, 400 FE(!)
Garrison H: 300 HD, 300 HH, 55 SC
Garrison I: 600 IM, 200 HH, 35 SC, 3 AD
Fortunately, You are not expected to tackle all of them. There are slightly longer routes to take to bypass the most difficult garrisons. There are two inter-connected underground passages, as well as a mud-road detour as well. There are other enemies you have to face underground, but they are mostly optional.
Note: People used to be able to skip the garrisons with the "Instant Travel" spell, which was conveniently offered in the Inferno towns as soon as you conquer one. However, since patch 1.1 this spell is no longer offered.
Starting Bonus: This mission has more might than magic, so the golden horseshoe (luck +2) is your friend. On patch 1.3 you also benefit from the increased chance of Warlock's Luck.
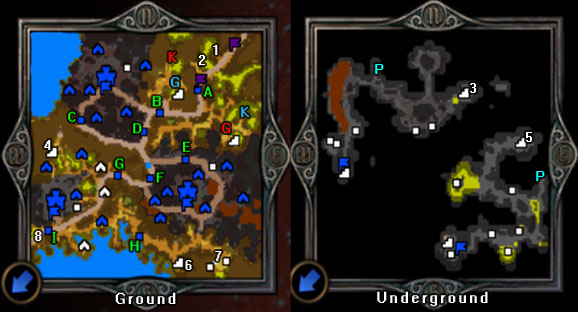
Your heroes start out in the NE corner. There is a Hut of Magi (1) on the roadside, telling you where to go -- but you don't need to. A little further down the road lies the Boots of Swift Journey (2), which is very useful in this mission. Since the movement points are determined at the beginning of the day, you can put on the boots before ending a turn, and swap it for the golden horseshoe before a battle.
Next, you have to break through Garrison A, the easiest garrison among all. After that your have a few choices of where to go:
(Option A) Stay on the the paved road, break through Garrison B, and challenge the NW Inferno town. You can eliminate one of the three towns right away, but you will lose some troops.
(Option B) Take the Blue Keymaster Tent (blue K) in the east, and pass through the Blue Gate (blue G) in the north. Enter the underground passage nearby (3).
(Option C) Take the Red Keymaster Tent (red K) in the north, and pass through the Red Gate (red G) in the east. Enter the underground passage nearby (4).
If you have the Resurrection spell, I would recommend option A, because you can to take down both garrison B and the NW town without losing any unit. (Hint for a perfect resurrecting castle assault: deploy assassins only, and resurrect them near the end!) Then, you can challenge garrison C, E, the SE town, garrison H, the SW town, and finally garrison I.
If you can't resurrect, then the underground passages might be more friendly to you. Option B and C are roughly the same. Let's discuss option B as an example.
Option B: After taking care of some 1000 Familiars/Imps, visit the mana well, and give Shadya a not-very-useful but durable unit (such as hydras). Now she is ready to visit the Blue Keymaster Tent (blue K). The creatures on the way are quite weak and she should be able to kill them all with her Destructive spells alone. In the meantime, send Raelag and all other units to the the Blue Gate (blue G), and unlock it once Shadya visits the tent. (Someone must have a strong arm to throw the key!) Just below the Blue Keymaster tent is a small group of minotaur guards waiting to join Shadya.
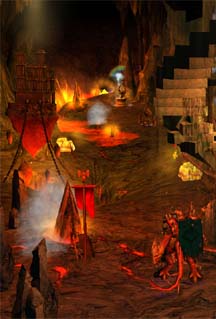
The underground passage here (3) carries an Inferno theme, and so do all the creature buildings you can see. You really don't need them as there are better things ahead. If you follow the road west and south, you will eventually face a stationary blue hero. Take care of him, and the stairway behind this hero takes you back to ground level at (4), with a Hill Fort (for upgrading units) just north of it, and quite a few blood furies willing to join you for free! From here, you can aim directly for the exit (8), after passing through the final garrison I.
The Inferno hero based on this SW town (Grawl/Deleb) might have a large army if you come here rather late. I have also seen reports about an unreasonably powerful Grawl even by Week 3. During my four runs on this mission (heroic, patch 1.1 - 1.3), Grawl and Deleb were always managable, though. (By the way, this Grawl here IS Grawl himself, unlike the previous mission.)
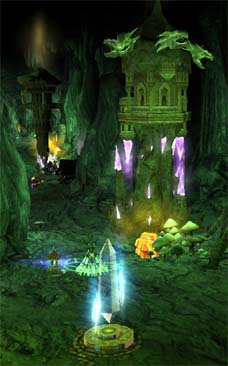
Alternatively, you can go through the only pair of underground portal (P). You will be transported to the other underground passage (5), which carries a Dungeon theme. The nice thing about this Dungeon passage is that you will be able to recruit some shadow/deep dragons along the way. Moreover, there are some nice dungeon creatures waiting to join you not very far ahead. There are two stat bonuses along the way, too.
There is another stationary blue hero waiting at the end of this Dungeon passage. The stairway behind this one takes you to (6), just south of the SE blue town. Again, there is a Hill Fort to the north for you to upgrade the dragons. Also, if you follow the mud road east, you will be greeted by lots of friendly bikini babies (shadow witches) and hydras at (7). These free witches give a huge boost to your ranged power, so don't let them wait for too long! (Er... actually they grow at ~10% per week, too.) You can also hire some other dungeon units here at (7).
If you have decided not to bother with the blue army, you don't have to go back to the paved road north from here. Follow the mud road west, and there is a small garrison H. Keep going west, and you will hit garrison I, and the exit (8) after it.
When both Raelag and Shadya pass the final garrison I, a scripted event takes place and you have to defeat an Inferno hero, Veyer, who is not hard at all if you have conserved your troops along the way. This is the final battle of this exciting warlock campaign. Congratulations!
Final Note:
The ultimate challenge of the warlock campaign is to defeat all garrisons here, even the craziest ones! One skill that helps a ton here is Light Magic and the Resurrection spell. You could have learned it from a Dragon Utopia or a Mage Vault back in mission 2 or 3. Note that you cannot resurrect magic-immune black dragons, so it is up to you whether to let them out and take the heat.
The problem for the starting 15 black dragon is that they are not powerful enough to wipe out a super stack (such as 3k familiars) in a blow, and they will suffer from the counter attack. However, since you can now eliminate the blue towns in a blitzkrieg, you can flag their gold mines (3 in total), and keep hiring more dragons. The garrison size will NOT grow in time, but you will. I'd like to make Shadya running a "dragon recruit express line" in the SE corner. Without logistics, she should be able to recruit 3 dragons per week, while Raelag is "cleaning the map" elsewhere.
The 400 fire elementals in garrison G will be a huge headache. Also, the 3000 familiars in garrison F stole all Raelag's mana, so nothing could be resurrected. By the way, I have heard that if you mind control the familiars (Puppet Master, etc.), they also steal mana for you!
Finally, Raelag is going to appear in the last (Academy) campaign, so it is not completely useless to give him a few more stat points and levels in this mission. :)