Objectives:
Level Cap: 22
Carries Over: Isabel
View a screenshot of the underground #1 (1 MB)
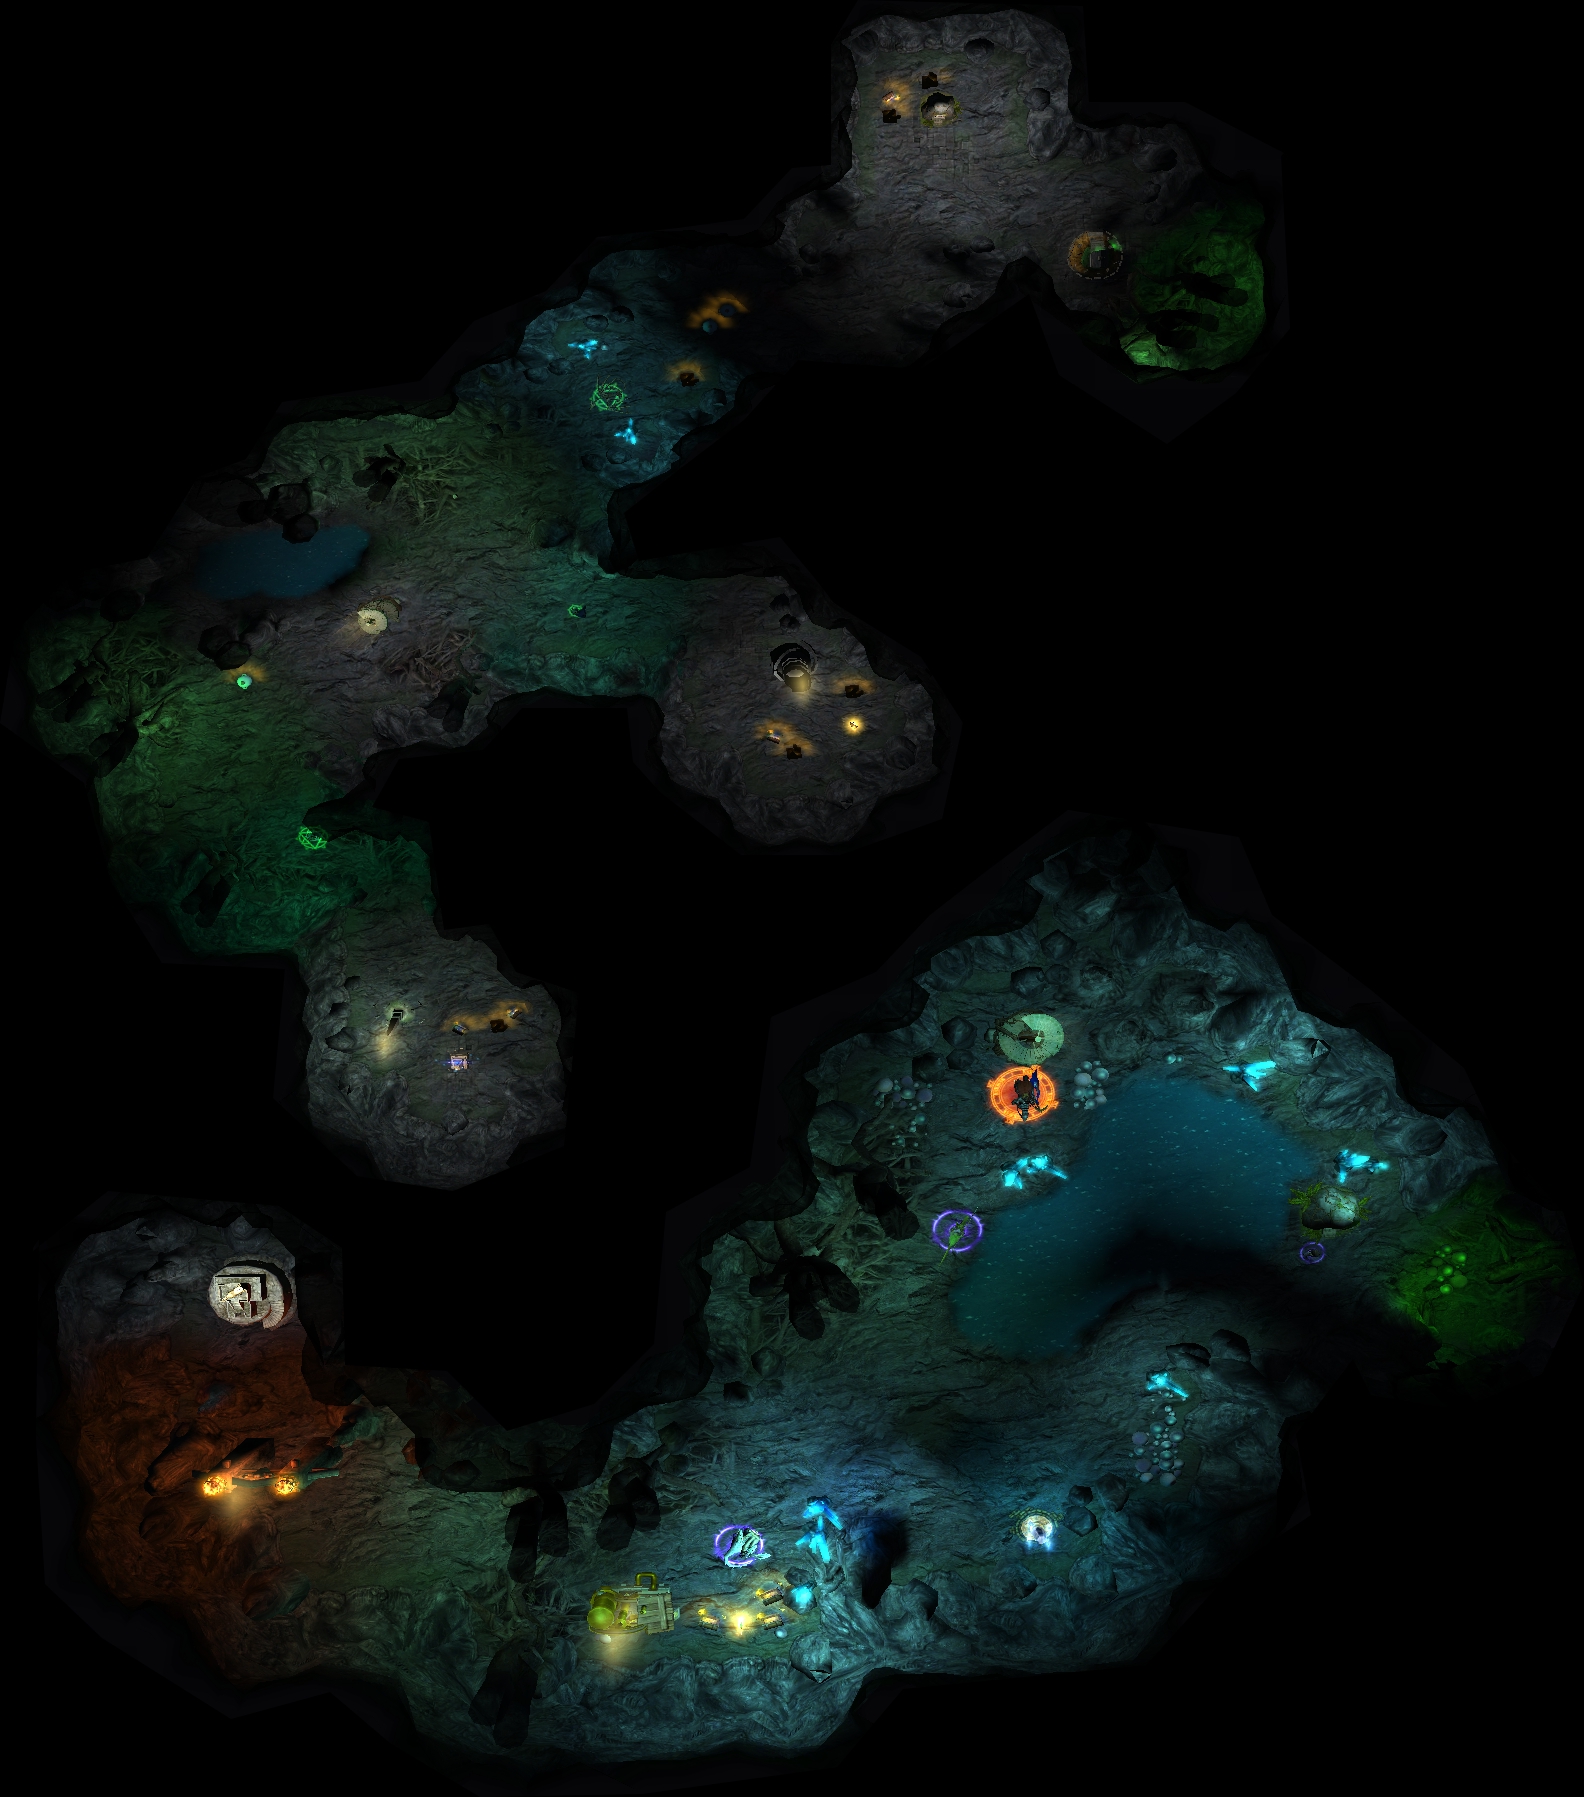
View a screenshot of the underground #2 (400 K)
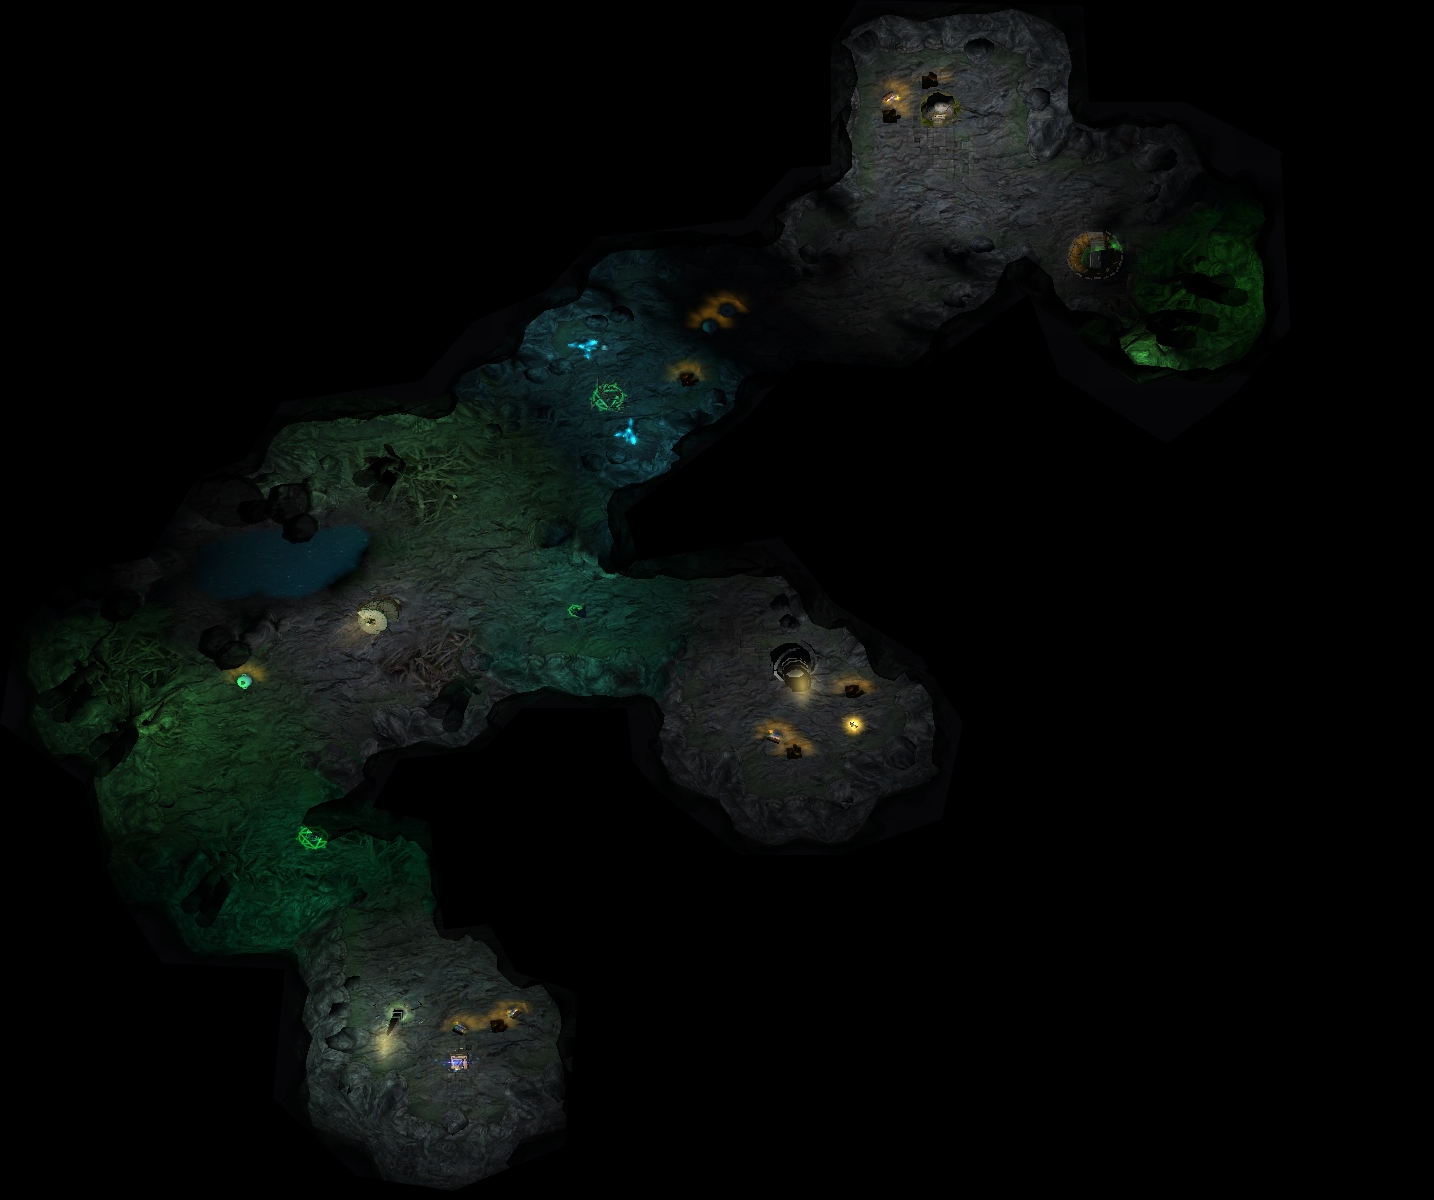
View a screenshot of the underground #3 (500 K)
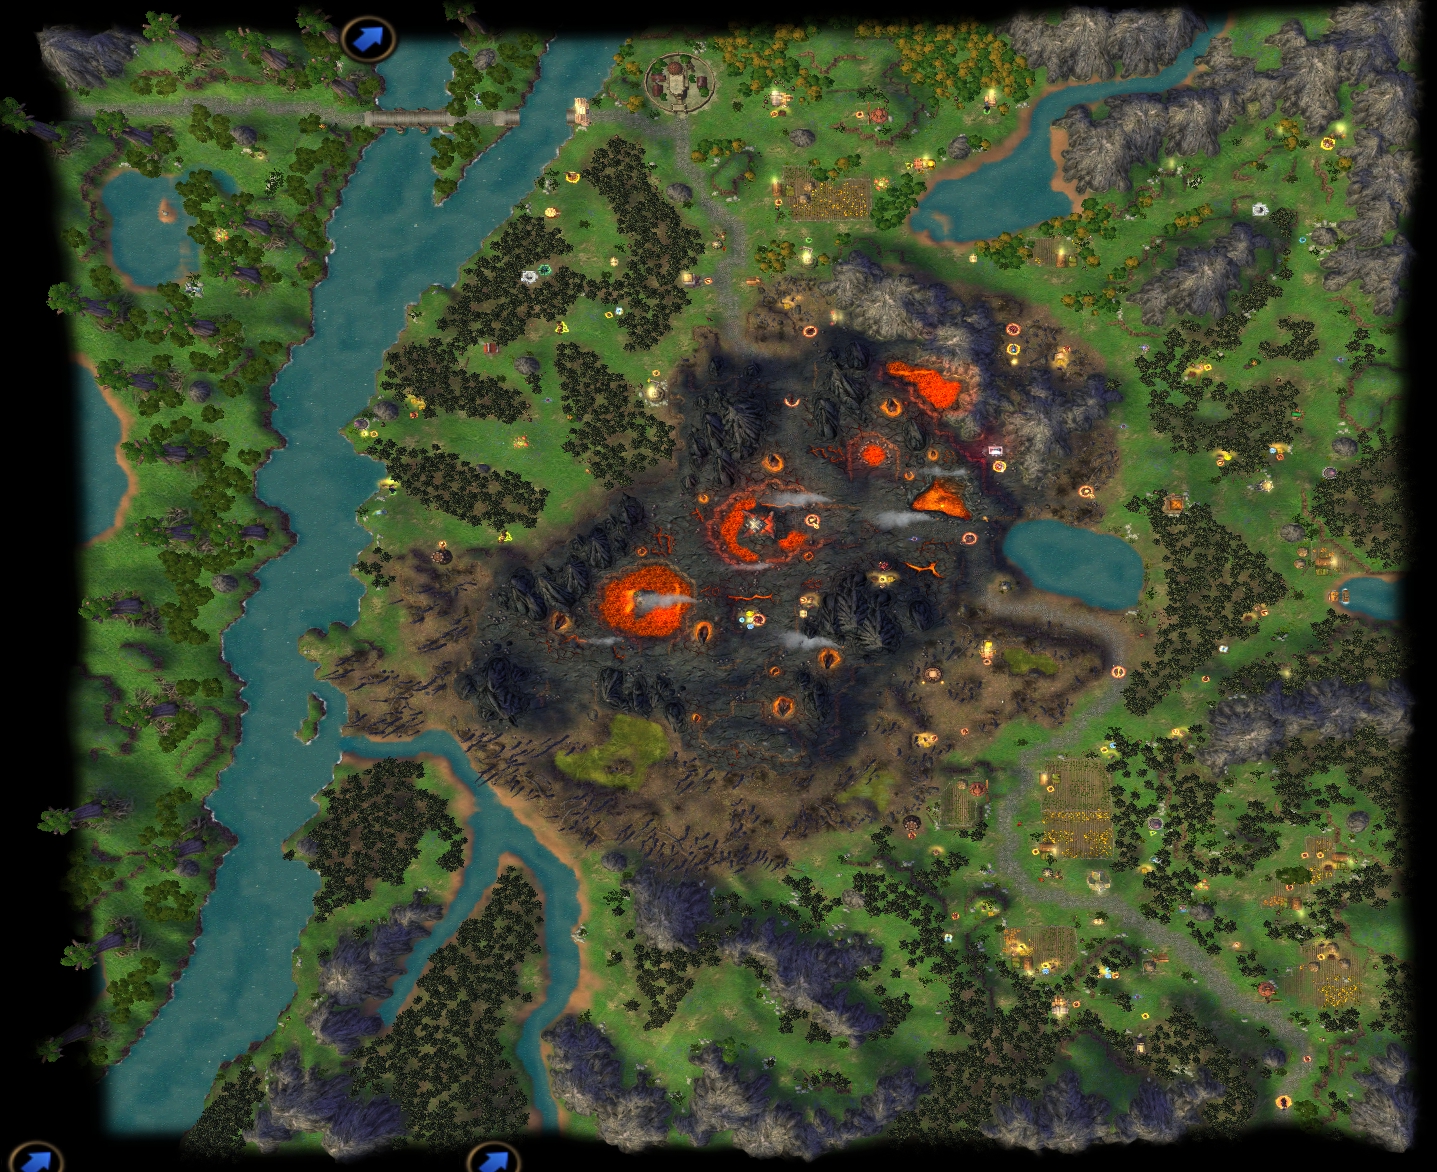
The Trap is a long trek along a path nearby some Inferno terrain, and this is your first mission with a very big map. There are plenty of places to explore, but unfortunately Isabel will probably hit her leveling cap long before the end of the scenario. You don't need to fight everyone unless you want to. Also, Isabel will start to learn magics (up to level 3) in this mission. You can learn spells by visiting spell shrines along the road, as well as from your mage guilds to be built later in the mission. In the latter case, the heroes have to visit the town themselves.
You start at the SE corner of the map with a sizeable army that includes imperial griffins and cavaliers. The cavalier bonus is probably the best, as you will use them a lot in the first half of this mission.
Follow the road NW, visit the windmill, and fight any stack that blocks your way. Just SW of a stable you can visit a Witch Hut (1), which sometimes teaches you a useful skill. (Otherwise, feel free to restart the mission as it is still early.) NW of the Witch Hut is a lumber mill that is worth flagging now.
Further down the paved road you will see a new kind of stat bonus, a Planetarium (spell power +1). Spell power affects the effectiveness (damage or duration) of your spells. There is another knowledge +1 bonus up a slope not very far ahead. Try to recruit the peasants from their huts as you proceed. If you feel confident, you can make another detour north to flag an alchemy lab (mercury +1/day).
It is important to keep your troops alive in the first half of the mission, or maybe I should say under all circumstances. In the picture below, Isabel challenges some marksmen and archers that block the Witch Hut at (1), with her imperial griffins and cavaliers only. I didn't deploy the other units as they will die from the arrows.
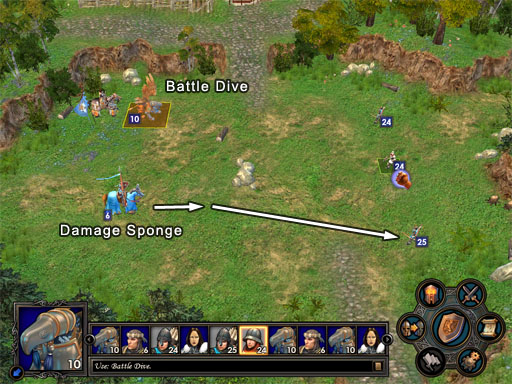
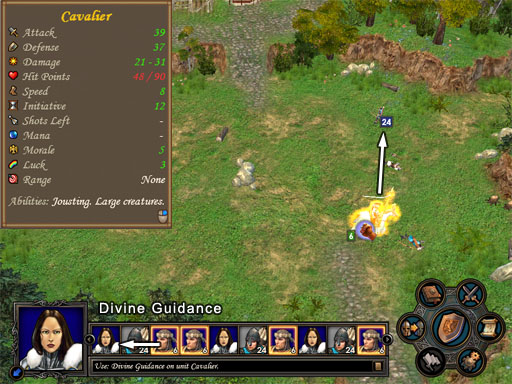

Fortunately, Isabel in this case has learned the skill Divine Guidance (under Leadership), so she can push up the initiative of cavaliers. Now the cavaliers act before the archers, killing them off without any more damage!
This is just one of the many ways to avoid casualty during neutral creature battles. High HP and defense units are excellent damage sponges (as long as you don't lose any of them). Try to keep an open mind and try out different strategies. It is always better to kill the enemies before they even touch you. A well-planned and coordinated offense is the best defense.
Back to the walkthrough: keep following the road, and you will need to fight some succubus mistresses (2), a shooter unit which could cause some damage to your troops. This is a good opportunity to test how much you have grasped the concept of troop conservation. Can you pull through without loss on heroic?
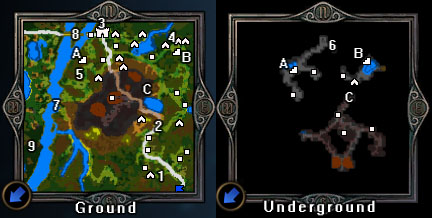
Keep traveling north until you arrive at Brightwood (3). The Castle is lightly defended, so you should have no problem capturing it. You should receive a new objective, which is to upgrade Brightwood's magic guild. You can now start to build up the town, while sending Isabel to flag mines in the vicinity. With the starting army, you should be able to flag most mines, starting from the ore pit NE of the stable all the way to the east end of the map (4). If you need a certain type of resource, there is a trading post conveniently located at (5).
In order to win this mission, you have to build up the mage guild up to lv 3. No matter whether you have picked magic skill(s) for Isabel, you can learn a utility spell called Summon Creature once you have mage guild level 3 and a lv 10+ Isabel. This spell enables Isabel to summon creatures inside the nearest town from anywhere on the map. You no longer have to come back to replenish the army, as long as you have enough mana to summon them!
After accumulating some troops, you can visit the garrison on the west of the town to trigger a cut scene and yet another objective. That objective will show up as secondary, but completing it is required to finish the scenario. Essentially, you need to visit a Seer's Tent just north of stairway A.
The entrance of the stairway A area is blocked by a rather large stack of griffins that won't join you unless you have a large army. You can also fight them to get through. After visiting the Seer's Tent, You will be asked to retrieve the Boots of Leviathan in the underground through stairway A.
The underground area is quite small, with three paths all leading to dead-ends. The only one you need to visit is the one guarded by bone dragons, in the NE direction. The artifact you are looking for is in a crypt at (6). The crypt is guarded by a rather large Necropolis army. Don't try to fight them unprepared.
Note: There is a new bug with patch 1.3. The icon of the Boots of Leviathan is missing, so it becomes a rather "invisible" artifact. It is still there and would functions normally when you equip it, though.
After taking the Boots of Leviathan, you are ready to win this mission. However, there are quite a few stat bonuses you probably haven't visited. First, you can pass the portal marked by the letter C, which connects to the C area of the underground. There are a few stat bonuses inside. After getting the Boots of Leviathan, you can walk down the river at (7). Isabel needs to wear the boots to cross water, and you usually need to have a day-full of movement points to start crossing. You can find several stat bonuses south of (7).
East of the portal C you can see two new types of buildings, a Hill Fort and an Artifact Merchant. The Hill Fort allows you to upgrade units (for example, archers to marksmen) for a slightly discounted price, and you do not need the corresponding upgrade building in the town to upgrade in a Hill Fort. The artifact merchant sells six random artifacts, and their stock changes from time to time. Generally speaking, your money is better invested in units than in artifacts, unless you see very useful ones (for example, Golden Horseshoe, Ring of the Broken Will, Lion's Crown, etc.).
When you feel ready, put on the boots and cross the water at (8). Go west a bit and you win the mission!
Note: By the way, the most famous Easter Egg of HoMMV is hidden on this map at (9)!

A little surprise awaits Isabel, Beatrice and friends.