


 Infiltrator's Dungeon guide, published back in the days of the open beta test, was extremely popular and got very positive feedback from the community. Months before its release, Heroes of Might and Magic already had a decent strategy article. For the second version of the guide, Infiltrator started from scratch and rewrote everything based on the retail version of the game. The longer version includes the following information:
- hero and creature analysis;
- skill and ability recommendations;
- early, middle and end game strategies;
- explanation of elemental chains.
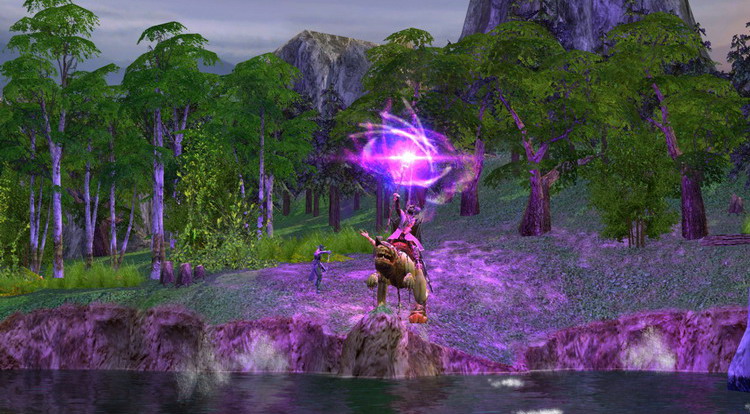
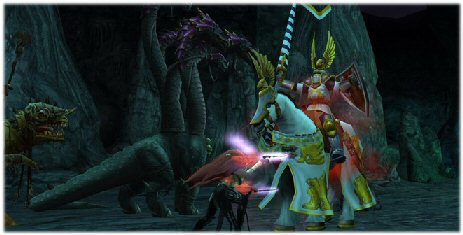
A series of cool screenshots can be found inside. Have a look.
| CREATURES STATISTICS | CREATURES ARTWORK | |
| SKILLS | ABILITIES | |
| TOWN BUILDINGS | STRATEGY |

Prologue
Everyone who has had contact with the HoM&M universe will think of an evil Wizard the moment someone mentions the name Warlock. While this simple explanation may be somewhat accurate, there's a plethora of complex strategies under the hood of the Dungeon town. Make no mistake - the Dungeon is one of the, if not THE most hard towns to play with, especially early on, despite the low production and high stats of the units. You'll need to plan carefully as losses take heavy tolls, even if minimal. But, before the actual strategy, a small intro to the Dungeon.
The Warlock concept has had evolved through each and every of the Heroes sequels. However, the core gameplay features that distinct him from the other alignments has remained - the Dungeon is still a heavily magic-oriented town, particularly leaning toward the Destructive school of magic, and it is still bearing its greatest asset in the highest-level creature - The Black Dragon. The new additions are numerous, though, the most noticeable - the Dark Elves are now part of the family. An integral part, more precisely, as the Warlocks themselves are all Dark Elves and 4 of the 7 units are Dark Elves as well. Don't fret though, as the Minotaur make a return, and so do the Hydras. Since every hero type is specialized in a skill, Warlocks now get to be better at what they do best - causing damage. One of their special abilities is Irresistible Magic, which enables them to pierce the magic resistances of any creatures that might have them, and thus even be able to use Destructive spells against creatures that are otherwise resistant, or immune to them. The other special ability are the Elemental Chains, which will enable you to identify the elements associated with each of the creatures present in the battlefield, and thus use this to your advantage. More of this will be explained later. For now, let's stick with..
The Basics
The Warlock Hero starts out with 1 Attack, 0 Defense, 3 Spellpower and 1 Knowledge. It's therefore clear that the hero will mainly be focused on Spellpower and Attack. Knowledge is a big issue for warlocks, but some workarounds exist, I will get onto them soon.
Like each of the 5 other factions, the Warlock has a Primary skill, 3 basic abilities that branch from it and one ultimate which requires your hero to take a specific route when leveling. A warlock starts out with Basic Irresistible Magic which enables him to negate 20% of the magic resistance or immunity an enemy unit has toward Destructive Magic (so this skill cannot override Immunities like the Titan's Mind Immunity). The percentage of the resistance negated increases per level - Advanced negates 40%, Expert negates 50% and Ultimate Negates 75% of the resistance enemy units have to your Destructive Spells. So, at the Master level of Irresistible Magic, a Black Dragon (who is immune to all spells otherwise) will absorb just 25% of the damage of any Destructive spells you cast on it. Also, Irresistible Magic increases the damage bonus of your elemental chains, 5% per level. This brings me to my next point.
One of the abilities that are available to a Warlock via Irresistible magic is Elemental Vision. It grants the Warlock to use his second specialty, Elemental Chains. The ones who were beta testers will certainly remember Elemental Chains being a bit more complicated and tactical ability of the Warlock, but they have been simplified since then, and now they are easier to deploy and require less calculation as they have some random factors attached to them. So what are they all about? Well, every creature is associated with one of the 4 elements - Fire, Ice, Air and Earth. At first, you can't see any of them. Once you acquire the Elemental Vision skill, you can see the elements of the enemy creatures in combat, and you are already able to deal additional elemental damage - the basic idea is that you identify what is the enemy creature element (located in the lower-right corner of his icon in the ATB bar) and based on it, cast a spell that is aligned oppositely toward it. Fire is opposite to Ice, and Air is opposite to Earth, so, if I cast Meteor Shower (earth spell) on a creature that is aligned with air, I will deal bonus damage, dependent on the strength of your base spell damage, level of Irresistible Magic, and buildings in your town(s).
Each of the Destructive spells is aligned with one element:
Eldritch Arrow - Fire
Earth Spikes - Earth
Lightning Bolt - Air
Ice Bolt - Water
Fireball - Fire
Circle of Winter - Water
Chain Lightning - Air
Meteor Shower - Earth
Implosion - Earth
Armageddon - Fire
 After you have successfully dealt bonus damage via
the Chains, the element of the enemy creature will change, randomly. As soon as
you build the Temple of Elements in your town (requires the Mage guild) you
will be able to see the elements of your own creatures, and they too can now
partake in doing additional damage. At the start of the battle every creature
is assigned a random element, and if your creature, for example aligned with
Fire attacks an enemy creature aligned with Ice, it will deal additional
damage, and both your creature and the attacked one will randomly change
elements. If you build the Altar of Primal Elements in your town, which is an
upgrade to the Temple of Elements structure, all your chains will deal 10%
bonus damage, and if you build the same structure in other Dungeon towns, they
will stack. In summary, the base formula for obtaining the bonus is - 5*(level
of Irresistible Magic) +10*(number of Altars you posses). The figure you get is
a bonus % of the base damage your creature or spell makes when you connect a
chain. So, for example, if you have Advanced Irresistible Magic and the Altar
of Primal Elements built in your town, and your Blood Fury (air) hits Zombie
(earth) for 200 damage, the elemental chains will kick in and they will do a
bonus of 200*(10+10)% = 40 bonus damage, equaling 240 in total. Which is a nice
boost that gets stronger as the base damage of your creatures/spells increases
and you gain new levels of Irresistible Magic.
After you have successfully dealt bonus damage via
the Chains, the element of the enemy creature will change, randomly. As soon as
you build the Temple of Elements in your town (requires the Mage guild) you
will be able to see the elements of your own creatures, and they too can now
partake in doing additional damage. At the start of the battle every creature
is assigned a random element, and if your creature, for example aligned with
Fire attacks an enemy creature aligned with Ice, it will deal additional
damage, and both your creature and the attacked one will randomly change
elements. If you build the Altar of Primal Elements in your town, which is an
upgrade to the Temple of Elements structure, all your chains will deal 10%
bonus damage, and if you build the same structure in other Dungeon towns, they
will stack. In summary, the base formula for obtaining the bonus is - 5*(level
of Irresistible Magic) +10*(number of Altars you posses). The figure you get is
a bonus % of the base damage your creature or spell makes when you connect a
chain. So, for example, if you have Advanced Irresistible Magic and the Altar
of Primal Elements built in your town, and your Blood Fury (air) hits Zombie
(earth) for 200 damage, the elemental chains will kick in and they will do a
bonus of 200*(10+10)% = 40 bonus damage, equaling 240 in total. Which is a nice
boost that gets stronger as the base damage of your creatures/spells increases
and you gain new levels of Irresistible Magic.
The second ability unique to the Warlock is called Empowered Spells. With it, every Destructive spell (and Magic Fist) can be cast with 50% more damage, but at double the mana cost. The normal versions of the spells are kept in your spellbook though, so in case when you need to conserve, or just don't have enough mana, you can cast them. Since Warlocks don't have a lot of mana, especially early in the game, this ability will prove to be a lot more useful mid-late game.
The Dark Ritual is the third unique Warlock basic ability. It's rather straightforward - basically, it enables you to fully regenerate your spell points, but requires a full day worth of movement points. You can already see that you won't be using this on a regular basis, as there are usually other methods of regenerating mana without blowing a whole day with your hero. The only reason you should take this ability as early as possible is because it's a prerequisite to Secrets of Destruction - an ability from Destructive Magic which grants you +2 Knowledge and a random destructive spell from level 1 to level 3 that you don't already posses in your spellbook. With this ability your early game-play will benefit from a significant boost as more mana and a possibility to get a higher level destructive spell without the mage guild will enable you to confront tougher enemies without fret.
The Rage of the Elements is the Warlock's ultimate ability, and while powerful, its considerable drawback is having to pick war machines to get it. While War Machines have their uses, this skill is probably one of the least desired to fill one of the 5 slots. Apart from War Machines, you require Luck, Enlightment and Logistics. All three of those are good choices for a warlock otherwise, however with luck being the only one a "must" choice even if you don't plan to take the Rage of the Elements route. Which brings me to my next point, skill and Ability allocations.
The Tools of the Trade
The Dungeon is a rather offensive-oriented faction, which is probably why besides the Dragons, they lack any other tough units to soak retaliations (Hydras are tough, but their no-retaliation ability sometimes is not as desired). So you have to base your skills to match the Dungeon's identity.
Critical skills, if you're a warlock these skills will never be a mistake regardless of situation. A strong synergy lies between the warlock, his units and the skills and abilities that follow:
Offense is of crucial importance to a Warlock, even if at first glance it doesn't look so attractive. Frenzy isn't particularly useful as it relies on having a lot of low-damage units, which Dungeon certainly lacks. Archery isn't a great choice either, as Assassins are there to poison, not deal damage, and Shadow Matrons and Matriarchs can take the roles of casters more often then not. So what's so great about Offense? Tactics. This ability will enable your Blood Furies to reach the other side of the field right off the start of combat and will also allow you to pick a wider range of targets with your Grim Raiders (tactics lets you re-arrange your troops in an additional row before combat starts). Once you get tactics, Power of Speed is available to you, an ability which enables you to cast Haste at no expense; it will be useful in those situations where you don't have mana or when you don't need to spend it anyway. And Power of Speed, coupled with Empowered Spells will unlock Retribution, an ability that will enable your troops to deal additional damage based on their morale state. So it's clear that any Dungeon player should ditch Frenzy and Archery and get these abilities, in most situations. Of course, increasing the Offense Skill will give a direct boost to your Elemental Chain bonuses made by your creatures in melee combat.
Destructive Magic is self explanatory. The Warlock is THE Destructive magic master, half of his skills augment and affect this school in one way or another, so it's only natural to get this skill with no questions asked. Destructive Magic will enable you to cast more powerful and different spells, enabling you to adapt and use the Elemental Chains to your advantage to the fullest. The abilities themselves are the aforementioned Secrets of Destruction, three other abilities that enhance three of the four elements - Fire, Ice and Lightning spells, as well as Mana Burst. I suggest you wait and build at least the mage guild level 3 before deciding what element-specific abilities to use, because picking Master of Ice and not getting any Ice spells in your guild afterwards wouldn't be pretty. Master of Fire will enable you to cut down all affected creatures' defense by half for one round, a huge bonus, especially against creatures with a high defense. This affects the Fireball and Armageddon spells. Master of Ice affects Ice bolt and Circle of Winter spells, and it will grant them freezing effect. The effect bumps the units back for a few spaces in the ATB bar, and applies the Freezing effect to them for half a round. If they are to reach the ATB bar under this effect, they will go one space back as long as the freeze effect lasts. Master of Storms affects the Lightning Bolt and Chain Lightning spells, and it acts similarly to the Master of Ice ability. Creatures stricken by Lightning or Chain Lightning will be bumped in the ATB bar back based on how close they are to acting. Creatures that are about to act will be bumped back more then creatures whose turn isn't close to come. Also, the Chain Lightning will only apply this effect to the first creature you strike; the consecutive ones will only receive damage. Mana Burst will enable you to deal damage to casters, once they cast spells. I suggest you leave this skill out as having 2 elemental masteries will be far more useful.
Favorable skills, these aren't necessary, but having some of the listed will help a great deal.
Luck can be very handy. Having it, you gain an even bigger edge on offensive and will minimize your losses from retaliating creatures. You should get of course the Expert level as soon as possible, but there are abilities that are defiantly worth of having. Resistance is one of them, increasing your chance to resist all spells by 15%, obviously useful if faced against caster creatures or Heroes aligned with Dark or Destructive spells. Resourcefulness increases the chance of getting more resources from fireplaces and resource piles or gold/experience from chests, but there are better things to spend your level-ups in. Soldiers Luck increases the chance of applying useful creature abilities that don't trigger all the time. The only case in the Dungeon is the Shadow Matriarch's chance to apply a negative spell when engaged in melee combat. While this Ability alone is not very useful, the one that it unlocks most definitely is. It's called Warlock's Luck and it enables your hero to have luck rolls when casting Destructive spells. With a high Luck this Ability will make your enemies tremble when your hero reaches its turn, as double the damage on any spell is, well, just plain crazy :) . The fifth ability from Luck comes from the Warlock's Luck, it's called Tear of Asha Vision and it basically enables you to dig up the Tear of Asha if you are not directly on top of it, but rather nearby. I wouldn't be picking this unless I'm going for Rage of the Elements, as most of the time the digging will be done by other heroes, as the main one has plenty of other things to do.
Leadership, another useful skill, synergizes perfectly with Retribution from Offense. Combined, with each increase of Leadership you will also increase the damage output of your creatures. As for the abilities, Estates at 250g a day is definitely not good for a main hero to be spending level-ups in. Diplomacy will reduce the cost of surrendering and, more importantly, increase the chance of neutral armies joining you, you can then proceed to sacrifice them at your Sacrificial Pit and perhaps you will be granted a better population bonus of Blood Furies you so desperately need. Recruitment is an excellent ability for dungeon, however, not for a main hero. Having to be in the town every weekend is pretty hindering. However if you've taken Leadership you should also take this skill, for the sake of Swiftness Aura, a very useful ability that grants all your units +1 speed and is unlocked by getting Recruitment.
Logistics is almost always welcome, especially on maps that are large and/or covered with rough terrain types. It also has its merits, weather you catch up that fleeing hero, or make a close escape thanks to it. At the expert level, 30% bonus to movement will be noticeable indeed. One of its abilities, Pathfinding, will reduce the movement penalty over rough terrain by 50%. Scouting is now much more useful then it used to be, as it will, in addition to increasing your view range, enable you to see the exact information on how many creatures are in the neutral stack or enemy heroes. As an added bonus, scouting unlocks one of the best abilities a Warlock can get - Teleport assault. This ability will grant you the teleport spell that will boost forward in the ATB bar the creature that's being teleported. It doesn't take much to figure out that the Hydra is the perfect target for this spell. Suddenly, the slow unit that almost never gets to act will become an offensive fortress with this spells, a hydra is usually ignored until the end, but this ability will make sure they see the action much earlier then your opponent would expect. Teleport Assault also unlocks Death March, an ability that will add +4 to all your units speed when sieging enemy castles, this will be most useful for your Dragons as they will be able to get to any spot of the field in one turn. The final base ability of Pathfinding is Navigation, obviously worth having only on maps that are water-centric.
While Sorcery doesn't give any benefit to your creatures, it makes your hero much more terrifying and solves some problems the warlock suffers from having a small mana pool. Sorcery reduces the interval between hero actions by 10/20/30% per level, enabling you to cast spells more frequently, something definitely worth having. Magic Insight will enable you to learn 3rd level spells, this is most useful if you get Phantom Forces in your guild (as the Dungeon is Destruction/Summoning aligned) as casting this on your Blood Furies will not only boost their survivability, but it will also bolster your offensive power significantly. Arcane Training is a good, straightforward skill that decreases the cost of all spells by 20%, a welcome addition indeed. Mana regeneration will double your base regeneration (base regeneration is Knowledge value of spell points per day, with this ability 5 knowledge would mean 10 MP regenerated per day instead of 5) and is more useful early on then later in the game, where the base knowledge would be sufficient enough to keep your mana pool high most of the time. Mana Regeneration unlocks however, a very interesting ability - Erratic Mana. It will randomly lower the cost of your spell by 0-50%, after being cast. You still need to have the amount of mana it takes to cast a spell normally, but this ability, coupled with Arcane training will significantly reduce the cost of your spells. Counterspell is unlocked by Erratic mana, and isn't quite useful, frankly. Couple the fact that you have to take Mana Burst and Defense to get it as well, it's probable that you won't be offered this ability often. For the record - it negates effects cast by the enemy of his next spell, but it drains twice the mana cost from you. Something you definitely do not want in most cases.
Summoning Magic is a viable choice for a Warlock, as this is one of the two schools the Dungeon is aligned with (the other being destructive). Also, summoning magic benefits greatly from spellpower, something a Warlock certainly has. The abilities gained from summoning magic are pretty un-inventive, but useful non-the-less. Master of Life makes your Fist of Wrath and Raise Dead spells stronger by +4 spellpower. Master of Earthblood applies the same effect for the Earthquake and Firetrap spells, and similarly, Master of Conjuration adds +4 spellpower when casting either Summon Elementals or Summon Phoenix. Master of Conjuration also unlocks Exorcism, an ability that makes your destructive spells deal double damage to summoned or gated units, most useful against Inferno forces, as they rely heavily on gating. In addition, summoning magic will allow you to conserve more units, as Phantom Forces and the Summon Elementals and Phoenix Spell will provide you with cannon fodder, and Arcane Armor will ensure the longentivity of your units against phisical attacks.
Enlightment has had quite an increase in power in Heroes V, and it's a useful all-around skill for just any hero. Providing you with +30% experience and +1 additional primary stat per 2 levelups at Expert Level, this will ensure you have level and stat superiority when facing other heroes. Intelligence is an incredibly useful ability for the Warlock, enhancing his small mana pool by 50%. Scholar is flat out as useless as it always was, and considering it doesn't tie up to any more powerful abilities, I don't think anyone would choose this unless in some very specific and rare situations. Arcane Intuition is the new name for the Eagle eye, it is useful when fighting Pit Lords and you don't have Meteor Shower, for example, as you can learn any spell that's being cast, even by creatures. It also unlocks Dark Revelation, an ability that gives you a free levelup, but it still takes away an ability slot, so this is best saved later on when level-ups don't come by so easily. Dark Revelation also opens up the opportunity to learn the Wizard's Award, a mediocre ability that will permanently boost your spellpower by 2 and earn you 1000 gold (as a one-time bonus of course). You'll also need this ability if you plan on getting Rage of the Elements.
That's about it for the Useful skills. The ones you should try to avoid are:
Defense - 30% defense from melee and 20% from ranged attacks sounds nice, but the dungeons main focus is offense, and killing off anything before they can do any damage, couple the fact that the abilities of defense aren't tailored for a Warlock either, it's clear that this skill is not one that should be picked often.
Warmachines aren't bad, but simply put, there are many other skills that are just plain better then this skill. Avoid unless you are going for Rage of the Elements.
Dark and Light magic don't show up in your mage guild after level 4, and up to then only one of the two will show up for the first 3 levels. So while you definitely could gain benefits from these schools, you won't have anywhere to learn the spells from until you've captured another town that is aligned with them.
The Hero
So now you know the basics of the skills. Based on your play style, map and what you're up against, you're going to have to choose wisely, but as important as skill/ability selection, you're going to have to pick a main hero as well. There are eight dungeon heroes total on your disposal. I'll go through each one here:
 Yrvanna
- Blood Mistress, a viable choice, especially for long games, as she starts out
with Basic Enlightment and Learning. On top of that she adds +1 att/def for
every 2 levels to the Dungeons key unit - the Blood Fury. She's also an
excellent secondary hero, as she starts with around 9 Blood Sisters, boosting
your main hero significantly early on.
Yrvanna
- Blood Mistress, a viable choice, especially for long games, as she starts out
with Basic Enlightment and Learning. On top of that she adds +1 att/def for
every 2 levels to the Dungeons key unit - the Blood Fury. She's also an
excellent secondary hero, as she starts with around 9 Blood Sisters, boosting
your main hero significantly early on.
Vayshan - Black Hand, specializes in Scouts and Assassins, granting them +1 att/def every 2 levels. He starts out with Basic Luck and Soldier's Luck, so getting Lucky spells was never easier. Opposite to Yrvanna, he starts out with around 21 Scouts, but no Blood Sisters.
Kythra - Slave Driver, pretty bad choice for a main hero, as she specializes in Minotaurs, who don't see much action. Furthermore, she starts out with Leadership, which is good, but Estates, which is bad, as you can't get both Diplomacy and Aura of Swiftness, key abilities for Leadership. Her starting army is downright horrid (a couple of minotaurs and nothing else).
Sinitar - Catalyst, a very good hero for small maps. He starts out with Basic Destructive Magic, Empowered spells and Eldritch Arrow. His specialization allows him to reduce the mana cost of Empowered spells as he levels, but at level 15 the mana cost of every empowered spell reaches the mana cost of the normal spell version, effectively making this hero stop dead in his development. On larger maps I advise you to take another hero, as mana won't be a problem on higher levels.
Sorgal - Lizard Breeder, an average hero, he starts out with Basic Offense but Frenzy, which immediately throws Retribution out of the picture. If you don't plan on getting Leadership, this hero will serve you well though, as his specialty is increasing the damage done by your Grim Raiders' Lizard Bite.
 Eruina
- Coven Mistress, a very good hero for medium-large maps. Her starting skills
are perfect (Basic Dest. Magic and Basic Attack) and she also starts with an
Ammo Cart. Her specialty gives your Matrons and Matriarchs a chance to get a
free shot at targets of your destructive spells. AoE spells count too, and the
target is the unit that is in the center of the AoE. The Matrons and Matriarchs
will also shoot even if they don't have any shots left.
Eruina
- Coven Mistress, a very good hero for medium-large maps. Her starting skills
are perfect (Basic Dest. Magic and Basic Attack) and she also starts with an
Ammo Cart. Her specialty gives your Matrons and Matriarchs a chance to get a
free shot at targets of your destructive spells. AoE spells count too, and the
target is the unit that is in the center of the AoE. The Matrons and Matriarchs
will also shoot even if they don't have any shots left.
Lethos - Poison Master, this hero would be the best choice against anything but a Necromancer, as his specialty gives him a chance to cast Plague on a number enemy units based on his level. But, alas, this hero is ruined by starting out with Basic Dark Magic, a wasted skill slot that will make him a bad choice as this school is not aligned with the Dungeon and it's also not Spell Power dependent as the two schools that are - Destructive and Summoning Magic.
Yrbeth - Dark Mystic, I saved the "best" for last. This hero specializes in Dark Ritual, making it more effective by overlapping your max mana pool when used, based on her level. Since you don't use Dark Ritual often in the first place (you need to waste a whole day with your hero) there's not much point into picking a hero that specializes into something that you won't use a lot (or at all, in most games). To make her even less appealing she even starts out with Dark Magic.
The Followers
So now you know the basics of the skills, abilities and heroes. But, the core of the Heroes series have always been the creatures you can command. Dungeon has a unique arsenal, and to win with it, you need to know each creature inside-out to see how well they synergize with each other and make surgical attacks, as just attacking at random will be a sure path to failure with Dungeon.
I'll try to summarize each creature here, revealing strong and weak points, however, to put them to good use you'll not only need to know each creature as an individual unit, but how do they synergize as a group, which I will cover later :)
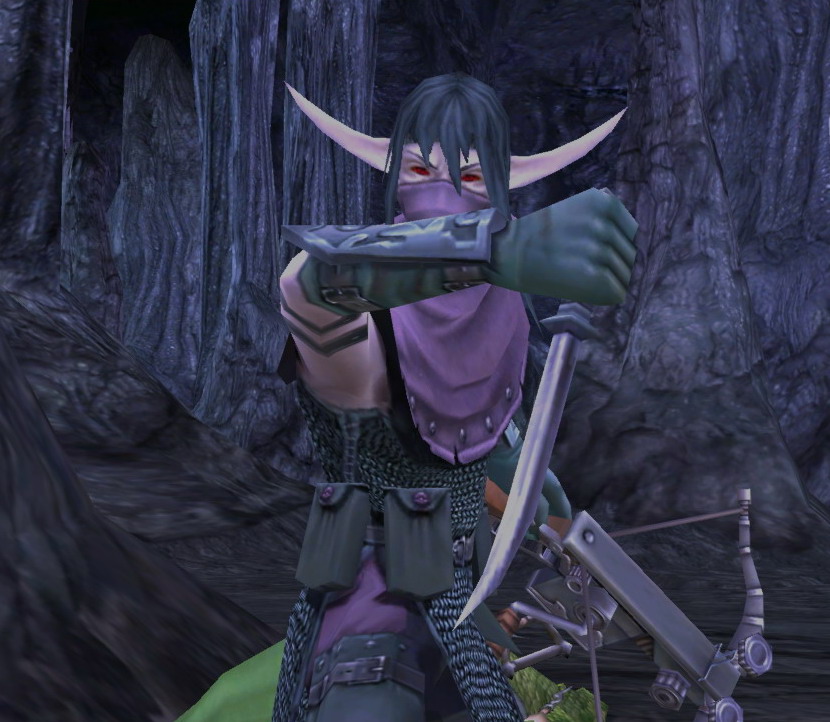
The Scout and Assassin
 The Scout is the first unit of the dungeon, and
just by looking as his stats, you can tell that individually he's one tough
level 1 unit. However this quality does not come without cost, or lack of
quantity. As a result, their production is low, and their cost is high. Not
that he's not useful, especially in early game. They are ranged units, but with
a ranged penalty. What this means is that they will do 1/4 damage to targets at
long range, and 1/2 damage when shooting nearby enemies. This is offset by the
fact that they have no melee penalty, and I strongly advise you to use them as
a melee unit (forcing melee is done by ctrl+click) when you can finish an enemy
or don't fear the enemy retaliation will take a heavy toll. So keep him in the
front row, even though he's ranged, soften up the enemy, and when he's in walk
ranged and weakened by your other units, deal the finishing blow with a melee
attack. Gradually, you will have to restrain from using them as a melee unit
though, as when you start fighting higher level neutrals, retaliations will be
too strong to absorbed by them.
The Scout is the first unit of the dungeon, and
just by looking as his stats, you can tell that individually he's one tough
level 1 unit. However this quality does not come without cost, or lack of
quantity. As a result, their production is low, and their cost is high. Not
that he's not useful, especially in early game. They are ranged units, but with
a ranged penalty. What this means is that they will do 1/4 damage to targets at
long range, and 1/2 damage when shooting nearby enemies. This is offset by the
fact that they have no melee penalty, and I strongly advise you to use them as
a melee unit (forcing melee is done by ctrl+click) when you can finish an enemy
or don't fear the enemy retaliation will take a heavy toll. So keep him in the
front row, even though he's ranged, soften up the enemy, and when he's in walk
ranged and weakened by your other units, deal the finishing blow with a melee
attack. Gradually, you will have to restrain from using them as a melee unit
though, as when you start fighting higher level neutrals, retaliations will be
too strong to absorbed by them.
That's where the Assassin comes into play. He's not that much of an improvement over the Scout, stats wise, but he comes with an ability to poison his enemies with both his melee and ranged attacks. Poison occurs 100% of the time (although some creatures like undead and mechanicals are immune) and will deal damage equal to the number of Assassins in the stack to the attacked creature for 3 consecutive rounds, each time before it acts. You can't 'refresh' the poison charges on the enemies, so once you've poisoned one, you might as well switch to another target. The good part is, of course, that he can poison from a safe distance, making the Assassin an excellent unit to reduce the numbers of the high level creatures, as the poison damage is not altered by their level or high defensive value.
Overall, the Scout will serve you early game for weakening units at long range and finishing them off in melee, while the Assassin will prove to be useful after, mostly as a range-only poisoner.
The Blood Maiden and Blood Fury
The level 2 Dungeon units correspond to the ones we had back in Heroes 3 - the Harpy and Harpy Hag, being different only visually (a lot ;) ) and because they can't fly. These are also the key dungeon units, much of your offensive power will come through them, but, as with the scouts and assassins, they aren't cheap and you don't get many per week. The Blood Maiden is a waste of a unit, she can only fight peasants and militiamen, and you'll be lucky if you get out without causalities. She attacks, takes the retaliation and runs back to the spot where she stood. Obviously the problem is that she lets the attacked creature retaliate, which is disastrous, coupled with her low growth and hit points.
Fortunately, the Blood Fury fixes this problem, as she gains the No Retaliation ability. With it, you will dominate melee units as her high initiative, speed, no retaliation and big offensive power will allow you to quickly obliderate walkers. Of course, fighting ranged units with her is a big risk, as they will unquestionably target her, and while she does gain the no retaliation ability over the Blood Maiden, she still shares her weak defensive capabilities.
It's no big secret that you should be very careful with what you attack with the Maidens and Furies, as one false step, and you just lost 2-3 weeks of their population. I'll cover the more detailed steps of preserving and utilizing them to their fullest later on.
The Minotaur Slave and Minotaur Guard
While Minotaurs aren't as powerful as they once were (mostly because they dropped to a mere level 3 unit), they can still take some punishment and pack a punch. The Minotaur Slaves are slow and fairly balanced in the offense/defense ratio. Because of their Bravery ability, no matter what the combat circumstances are their morale will never fall below +1. While they won't act as much, this ability will ensure that once they do get to it there won't be a possibility for them to skip a turn due to low morale. You can use them in the early stages to soak some retaliations from enemy creatures, and then engage in melee safely with your Scouts or Assassins.
Minotaur Guards gain a significant bonus to their offensive skill, as with the upgrade they get to attack twice. This is best used against ranged creatures and creatures that have a big defense but low attack penalty, as they will retaliate after the first strike has been applied, and the second swing will consider how many causalities you've suffered after the first one.
Minotaurs are adaptable to most situations, but don't excel at any in particular. They can deal good amounts of damage, but don't let their huge hit points deceive you - their low defensive value will make them vulnerable to physical damage. They can soak the damage early on, but later in the game their offense will overcome their tanking abilities, so you will have to pick your targets more carefully.
The Dark Raider and Grim Raider
A new addition to the Dungeon, the Dark Raider is a charger unit, with excellent offensive and mediocre defensive capabilities. Unlike the Paladins, who gain damage per square traveled, the Dark Raider reduces the targets defense by 20% for each square traveled, all the way to zero. This renders them very useful when confronting high level units with big defensive values, as if charged from 5+ squares, their defense will practically be nullified. The Dark Raiders aren't exactly the charging type because their speed is average, so until you upgrade them, they are better off at intercepting enemies, then charging across the field.
With the upgrade, the Grim Raider performs considerably better then his lesser cousin. Most importantly, speed an initiative get bumped up, enabling them to cross the field easily. Furthermore, they gain the Lizard Bite ability. It enables them to deal half their normal damage to adjacent enemies, whenever they get hit by one of your units' melee attacks. This obviously fits perfectly with the Blood Fury, who gets no retaliation anyway, and the Minotaur Guards, who trigger two attacks of the Raiders with their Double Strike ability.
Overall, raiders are an excellent charger that ignores the enemy defense when charging long enough, making them an excellent slayer of high level units. When fighting other players, I don't recommend charging against low-defensive and low-level creatures unless there's no other option, as dropping their already low defense to zero doesn't provide much of an advantage. While they are excellent at their blow from afar, they aren't that great when forced into a melee, so be sure to take advantage of their maneuverability and retreat them if necessary.
The Hydra and Deep Hydra
Most Dungeon creatures are heavy hitters who can't take a lot of beating. To balance things out, the imposing Hydra once again joins the cause of the Dungeon. Towering above every other unit in the battlefield, the Hydra is a slow and lumbering unit that can take obscene amounts of punishment. She has three heads which enable her to attack three targets that are in front of her. Furthermore, as it has always been, Hydra attacks cannot be retaliated against, but, luckily for your enemies, the Hydra has a very poor initiative, so a defensive role is what you will use her most of the time.
The Deep Hydra brings even more goodies to the table. The already high amount of hit points goes even higher, and so does the damage dealt. This hydra has six heads, enabling her to attack every enemy creature around her regardless of their positions, and a new ability, Regeneration, is gained. It will enable the Deep Hydra to heal 33-50 hit points each time it gets to act, it will even bring back lost Deep Hydras back to life if the amount healed overlaps the maximum hit points.
Obviously, the Hydra and Deep Hydra are mostly defensive creatures due to their low initiative, huge hit points and big defensive values. But, when surrounded by enemies it will show considerable offensive potential. That is why most neutrals (and players) leave her alone or attack her with no more then one creature. The no retaliation ability is good for preserving her numbers as is the Regeneration ability, so use this to your advantage - with the Teleport Assault ability (from Logistics), the Hydra can be turned into an offensive fortress, just teleport her into the enemy ranks, it will improve her position in the ATB bar, allowing you to strike down several enemies immediately. It will also deny your opponent the option to ignore her.
The Shadow Witch and Shadow Matriarch
These Mistresses bring what dungeon direly needs - a high level shooter and spellcaster. While having only four shots, their spellcasting somewhat compensates this. Unlike the spellcasters from other town, Shadow Witches don't have any direct damage spells, and are able to cast Slow, Righteous Might and Disrupting ray. All of these spells are cast at Advanced level so they are powerful buffs and debuffs, depending on what you need. On the downside, the witch has pretty poor stats (most notably health) and is quite expensive.
The Shadow Matriarch receives an additional spell in her book - Confusion. It lowers the retaliation and ranged damage of creatures, so it will be quite useful where you have to attack a strong target (halving his retaliation damage), or partially disable an enemy shooter. The spell is cast without any proficiency, so it does not make it an absolute favorite over her former spells. An additional ability she gains is whip strike, enabling her to sometimes cast Slow, Weakness or Frenzy at enemies engaged in melee combat. While berserk is the highest spell, considering its effect, it won't prove too useful as you need to be in melee range to apply it. Like the Witch, the Matriarch inherits only 4 shots and overall low stats, but bumps up the price.
The role of the Shadow Witch and Matriarch is of a supportive character to Dungeon, they can shoot and cast spells and even though they are a lousy shot, Dungeon direly needs them as a melee-centric faction. They prove to be more useful in the spell department, weakening your enemies or strengthening your own units. The Whip Strike may seem tempting, but trust me when I tell you to avoid melee confrontations with them, as due to the low hit points and stats they will drop like files in close quarter combat.
The Shadow Dragon and Black Dragon
Once again, the pinnacle of the Dungeon army are the powerful Dragons. Shadow Dragons are strong flying units that can traverse the battlefield in one turn, and incinerate two foes with their Fire Breath ability. When facing large creatures, be sure to attack them from the right position as you can fire breathe through them as well. The only downside Shadow Dragons posses is a somewhat low attack and defense rating, and low initiative in comparison to other level 7 creatures.
The mighty Black Dragon is the Dungeons trademark, and with more then enough reasons. Once you get a hold of this unit it will provide a tremendous advantage in fights against neutrals and players alike. Baring his curse and gift - magic immunity, the Black Dragon is impervious to all spell effects, excluding your own area effect spells (Irresistible magic affects your own creatures at the moment) and the Destructive Spells from other Warlocks. Improving every aspect of their lesser cousins except initiative, they will be able to cause severe damage and take loads of punishment from just about anything.
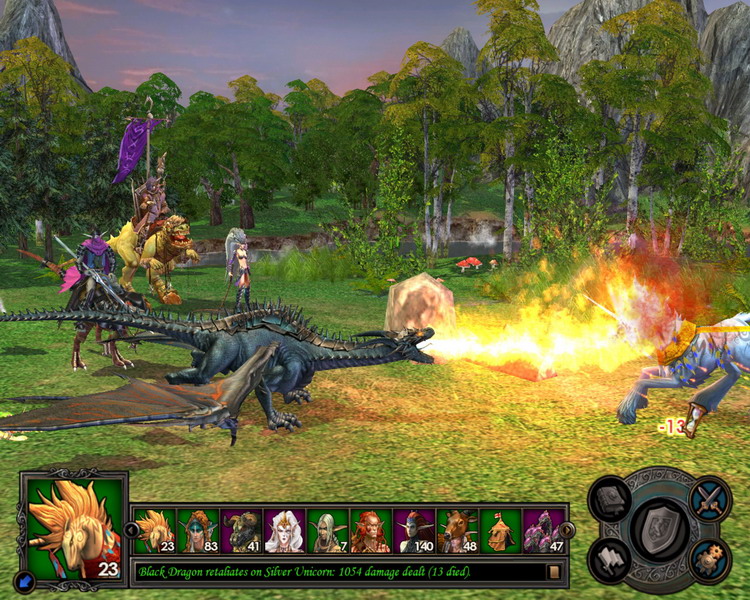
Once you get Dragons, your army will gain a considerable boost in both offense and defense. Use their Fire Breath to your advantage, but be careful about placing your own units around Dragons, as the enemy can take advantage of it and use your Dragons' retaliations to harm your units behind them. Black Dragons are extremely useful when fighting Druids and Pit Fiends, just remove everyone but the dragons from the group and they won't be able to do much, as their spells are useless. Just be careful when facing Pit Lords - who will always kill at least one Dragon, and Magi - who can cast magic fist, which is considered a physical attack.
The Scheme
Now that you have some basic insights of the Dungeon's army, I'm going to describe the general strategy when playing with this town. Note that this is not a winner strategy, as dependent on the map and other circumstances, you will have to adapt, if you want to win.
Early game
If your town hasn't got a tavern, get it immediately, and get a Dungeon hero to fill your main hero’s ranks and pick up loose resources and mines. With several Blood Maidens and scouts, all you could clear without causalities at this stage is peasants and conscripts, on lower difficulty settings. Once you get the tavern, regardless of weather you have or not the Scout building, get the Blood Sister production building and the upgrade for it the next day. The reason is simple - Blood Maidens make up for lousy fighters against anything but the weakest foes, but Blood Furies are excellent against melee units in general, and absolutely dominate the slower melee units. Once you have them, make the Scout building (if it was not there at the start) and continue linearly making units, ensuring that you have built the Town/City Hall when prerequisites permit it, Dungeon is an expensive town and you need to build and recruit. Until your hero has Tactics (which you should get ASAP) do not engage Archers or Hunters on mines (nor their upgrades).
Disposing of zombies is easy, but once you get to fight Golems, Footmen or Minotaurs, who can take a beating, be sure to run back with your Blood Furies and Scouts out of their reach when they are about to take their turn. That will ensure that the Blood Furies will get at least two attacks in before they get to act again. So the procedure with the Furies is:
1) Wait (W button) for them to move in range of your attack.
2) Attack them, most of the time you will be able to act twice before their next turn.
3) a) If they will not reach you when their next turn comes, attack them again. (you can see how much they will move by hovering the mouse on them)
b) If they will reach you when they next turn comes, retreat out of their move range.
4) They will move, but since you are out of range they won't be able to attack you.
5) Attack them.
6) Retreat where they can't reach you.
7) Repeat steps 5-6 until they are weak enough, then you can just finish them off with a melee attack from the Scouts (ctrl-Click) or with the Blood Furies.
Note that the retreating part also goes for Scouts, but they won't be able to attack as much like the Furies so just save them to finish off weakened enemies. Don't waste mana on the melee neutrals unless you really need to, as ghosts and shooters will pose a much bigger threat and you will need the spells for them.
You can engage Gremlins and Skeletal Archers even without tactics IF there aren't isn't more then a horde of them. This will probably cost you 1 or 2 Blood Furies depending on Morale, but a Horde of them will take away a much heavier toll so stay away until you get tactics. Scouts are easy to deal with as they have a Ranged penalty, but Assassins will probably take their toll of a few Furies, so pick your fights carefully.
If by any chance you find Sprites on your wood or ore mines, do NOT fight them. They have Wasp Swarm, a spell that, when cast by around 15 sprites will kill two Blood Furies, and they can cast it twice (just until you reach them). Couple that with one of the best initiatives in the games, these pests are the last thing you want to attack early on. If you are on Easy or Normal difficulty, you might want to consider hiring a third hero from another alignment just to kill them with troops you don't need anyway. Pixies, the un-upgraded version do not have the Wasp Swarm ability, so you should be able to deal with them easily.
By the end of the Week, your town should have a Tavern, Scout building, Blood Fury building, Blacksmith => Minotaur building, Town hall and First level of the Mage guild. Depending on the Difficulty and the amount of built structure s at the start, you could squeeze in either the Raider or Hydra structure, do so based on the Neutrals: a lot of ranged neutrals - get Raiders, a lot of melee neutrals - get Hydras.
Your hero should have Destructive Magic with Secrets of Destruction if you were lucky (you need Dark Ritual to unlock the Secrets of Destruction) and/or Tactics, from Offense, by the end of the week.
Middle game
By now you should have cleared all or most mines that were guarded by melee neutrals. I expect you have Tactics by now as it will be essential for dealing with stronger ranged units. By ranged, I mean Archers, Hunters, Succubi and Priests. Again, depending on the difficulty setting, you may be able to take them earlier or later. The key with killing them is placing your Blood Furies on the appropriate squares. For example, if you place them on Square 4 from the left, you will be able to attack the other neutrals if they are either all in one stack, or split in two, as the AI will always place them in the same position. If there is an obstacle on the way, consider the strength of your army against the attacking creatures. If you were sure they were going to flee, having superior forces, they will probably be all placed in a single stack. If, however, you did not expect them to flee, they are probably split into 2 or 3 stacks, so place your furies accordingly, and if you have an option to attack two targets, always go for the one that will get to act first (by highlighting the unit in the ATB bar you can see in what order they will come) and finish the second off with a spell, if possible. If you have Teleport Assault from Logistics, use it on hydras, teleport them between 2 stacks of shooters (if possible), and enjoy the fun.
Mages and Druids are the toughest opponent at this stage of game, if they're on a mine you need, things aren't looking good for you as it's almost certain you will suffer heavy causalities. Fighting them does not differ from fighting normal ranged units except that in the case of Druid Elders and Arch Magi you should remove some units from the combat (like the Hydra and Minotaur) because they have Area Effect spells and thus you should place your units farther from each other to keep the damage suffered only on one target.
Attacking Higher level walkers will be easy, if you did a good job conserving your Blood Furies. Just employ the same strategy I described in the above section on slower enemies. Note however, that the faster ones like Nightmares, Unicorns and Paladins, can reach you in their first turn, so put your furies in the back row for such encounters. Wait with the Furies if they get to act first, and then launch a full-fledged attack onto them.
Your hero should have at least Advanced Destructive Magic and either Master of Storms or Master of Ice (depending on what you got in your mage guild), both of these will help a lot as they delay the turn of your enemies. Other skills depend on your personal preference and just about any of the one I recommended in the "Tools of the Trade" section can go.
In this stage of the game, if you are at the end of the week and have to choose between Citadel and City hall, get the Citadel, as it will ensure more Blood Furies. You should have built the first 5 unit structures and the 2nd mage guild level by now as well. If you're on Easy or Normal you should definitely have the first 6 creatures and both the Citadel and City Hall built. The Hall of Intrigue, a prerequisite for the Shadow Witches, will help you as well, increasing the knowledge of all warlocks by 1.
Late Game
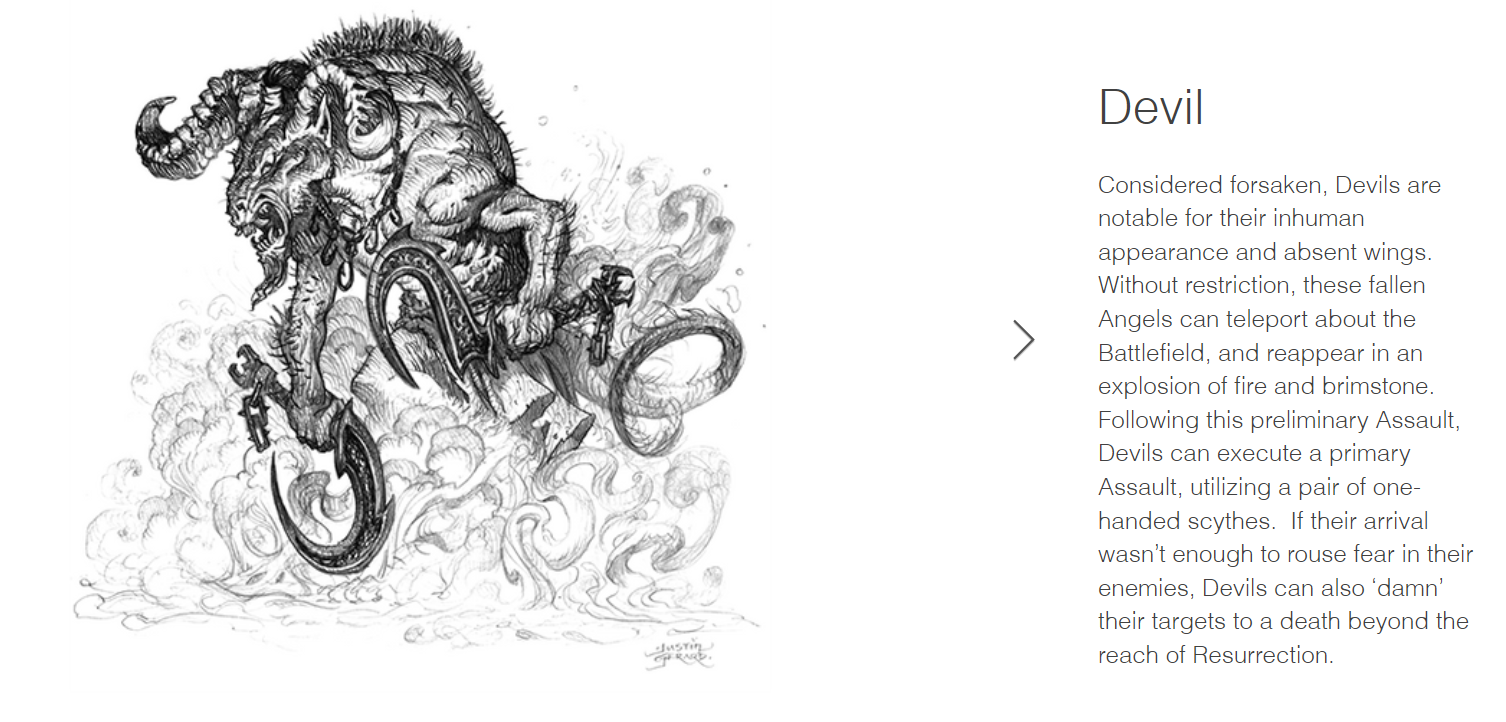
A few Shadow Dragons should be among your ranks in this stage. You can now easily clear the once hard Druids, Mages and Pit Fiends, but you should easily deal with some of the toughest melee opponents like Angels, Bone Dragons, Colossi and Devils. Place your units in the back rows, if you have extra spaces, split the Shadow Witches/Matriarchs into two stacks and slow them. Harass them with the Blood Furies and spells, and then finish them off with Dragons and Raiders.
The tactic versus Druids is easy - just throw everything you got on them. The Dragon should go for one druid, the Blood fury for the other, so put the fury on square 4 from the right and the dragons on, say, square 7 and 8, with the Raider in-between. Couple it with your spells, they should be dead before any of them reach their turn.
When facing bigger numbers of Druids or Pit Lords/Fiends and you have several or more Black Dragons, you can just remove everyone else from combat and kill them all with just spells and Dragons. The high hit points and stats will ensure that the druids don't kill a single one of them, while Pit Lords/Fiends, who don't have a ranged attack, will waste their turns on casting spells in vain, ensuring you that you'll get to cast your share of the spells at least twice on them. Couple that with a very slow speed, the Dragons won't even have to act (which is good vs. Pit Lords, as they have the Vorpal Sword ability).
Mages on the other hand have to be dealt with your whole army, as sending only Black Dragons would be a mistake - they have the Magic Fist, and they will take a few of them for sure if you decide just to bring them. So just throw everything you've got on them as quickly as possible, baring in mind to split your units apart in order to prevent multiple victims to their Fireball.
The Fast Fliers, like Shadow, Black, Emerald and Gold dragons are still a threat, as they can cross the field in one turn. If there are few of them, you can just go with your own dragons, and place them in one of the corners. Since there are little of them they will be able to take the damage without causalities, and you can finish the rest off with spells and smart use of Fire Breath. A lot of them is definitely something you should avoid. If you must face them, you can start by placing your Dragons and Hydras in front, and the rest of the small units behind. Raiders should be placed in a far spot of the field ensuring to get attacked by one creature at most. When placing them, be mindful of the Fire Breath and don't leave holes where they can land and kill your Blood Furies, Assassins and Matriarchs.
 Titans are fairly easy (in reasonable numbers),
attack them with a full-fledged assault, and their ranks should dwindle completely
or mostly before they get to act.
Titans are fairly easy (in reasonable numbers),
attack them with a full-fledged assault, and their ranks should dwindle completely
or mostly before they get to act.
In this stage, you should dominate with your destructive spells. Spells like Meteor Shower should spell annihilation to your enemies. Speaking of which, if you do not have all your mage guilds built yet by this stage, or do not have the spells you wanted, you can loot a Dragon Utopia, which from Heroes 5 gives you the high level spells you can learn but are missing from your spellbook. This occurs regardless of the strength of the Utopia guardians and will be a great resource saver.
Epilogue
Don't think for one second that you now know all, or even most secrets of the Dungeon. This guide was meant only as an introduction to the Warlock and his minions. While it was written to give you the basic insights and tactics, your personal preference and style of play will ultimately dictate how your hero and town will develop, and the final outcome of the match. Pick your fights wisely and fight them properly, and you will go a long way. Needless to say what will happen if you don't do that. Dungeon is a hard town to play, and leaves little place to errors, but if you don't make mistakes, rest assured that your efforts will be rewarded properly.
As the saying goes - "Hide, listen, watch, learn… And when the time is right, strike from the shadow."